Table of Contents
Staring at a blank page can feel overwhelming, but there's nothing quite like the satisfaction of filling it with a vibrant layout that keeps your business organized. Imagine turning that chaos of client deadlines and project timelines into a cohesive system with just a few simple bullet journal spreads. You’ll discover twelve layouts that can help you regain clarity and efficiency. After experimenting with various methods for months, I found these specific designs truly made a difference. Start messy—each spread counts towards your journey of organization!
Key Takeaways
- Create an expense tracker using a dedicated spread to monitor monthly spending — this keeps your finances transparent and helps identify areas for savings.
- Set up a financial tracking page to review income and expenses weekly — regular analysis boosts profitability and ensures you stay on top of cash flow.
- Use mini monthly calendars to highlight key deadlines and milestones — this visual reminder keeps your business priorities front and center throughout the month.
- Implement a color-coding system for different clients or tasks — this enhances clarity and allows for quick scanning of your workload, making management smoother.
- Conduct weekly reviews of your goal-setting pages for 15 minutes — this habit reinforces accountability and keeps your business objectives in focus.
Introduction

Ever had that moment when you're knee-deep in invoices, juggling client projects, or stressing over inventory? It's all too easy to feel overwhelmed by scattered info across a million apps and spreadsheets, right? I totally get it! That's where a bullet journal can step in and save the day.
It’s all about crafting a customizable system that pulls everything together. By setting up some strategic spreads, you can track your finances, measure performance, and keep your operations running smoothly—all in one spot. Your business needs creativity and efficiency, and a bullet journal can offer both.
From monitoring expenses to setting goals, and planning projects to tracking habits, these spreads can truly change the game for your entrepreneurial path. What I love about this approach is how it feels personal and functional at the same time. Utilizing a step-by-step system can further enhance your organizational skills.
This guide is packed with essential bullet journal spreads tailored just for small business owners like you, helping you make smarter decisions and grow sustainably.
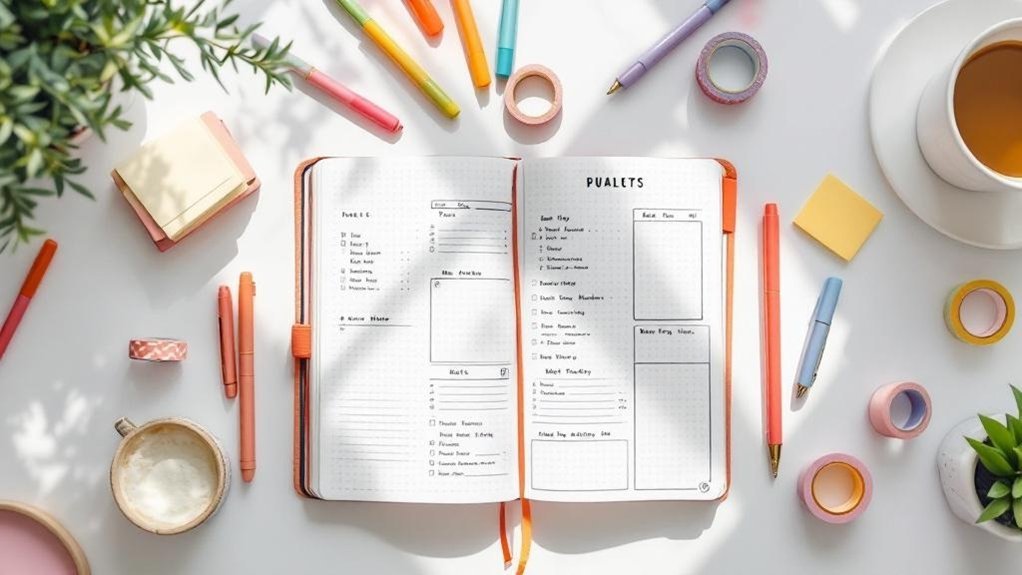
Supply List for a Basic Business Spread
- Journal: Leuchtturm1917 A5 Dotted (around $20) or a budget-friendly alternative like the Scribbles That Matter A5 Dotted Notebook (about $15).
- Pens: Tombow Dual Brush Pens for color (approximately $10 for a set) or Crayola Supertips for a budget pick (around $6 for a pack).
- Ruler: A simple 30 cm clear acrylic ruler (costs about $3).
- Micron 05 Pens: Perfect for fine lines (around $2 each) or use a fine-tip Sharpie for a budget option (under $2).
Skill Level: Beginner
Let’s dive into setting up your first spread!
Creating a Simple Expense Tracker
- Layout Basics: Start by drawing a box that’s 10cm high and 15cm wide on the first page, 2cm from the top and centered. Use your Micron 05 for clean lines.
- Sections: Inside that box, create five horizontal sections. Each section should be 1.5cm high.
- Headers: Label them: Date, Description, Amount, Category, and Notes. Feel that? It’s your first organized step!
- Color Coding: Use a Tombow Dual Brush Pen to add a pop of color to each header. Think about a color that makes you happy—maybe a vibrant blue or a sunny yellow?
- Details: Leave space beneath each header for your entries—this is where you’ll jot down your expenses as they come up.
I’ve used this layout for three months, and it’s a game-changer! You’ll be amazed at how much easier it's to see where your money’s going.
Engagement Break
Common Mistake: A lot of beginners try to make their trackers too complex right out of the gate. Remember, done is better than perfect! Start simple. You can always add more later.
Monthly Review Spread
Now, let’s set up a monthly review spread to reflect on your progress.
- Box Layout: Draw a rectangle that's 8cm high and 20cm wide, 2cm from the left margin. This is your main review area.
- Sections: Divide it into four equal parts. Each section will be about 5cm wide.
- Headers: Label them: Wins, Challenges, Learnings, and Next Month’s Goals.
- Visual Elements: Use different colors for each header to help them pop. Think about how colors can affect your mood—warm colors can energize, while cool colors can calm.
- Notes Space: Leave enough room under each header for you to write down your thoughts—this is where the reflecting magic happens!
Try This Today!
Grab your journal, set up that expense tracker, and write down your first few entries. Remember, it’s okay if it’s not perfect. The goal is to get started!
And if you feel adventurous, try creating that monthly review spread too. You’ll find that reflecting on your wins and challenges can provide invaluable insights for your business.
Keep it fun, and remember, your bullet journal is all about helping you feel organized and inspired—not stressed! Happy journaling!
Understanding the Problem
You're juggling multiple business responsibilities without a unified system, which means you're likely losing track of critical deadlines, financial data, and customer interactions.
Most small business owners mistakenly rely on scattered apps, notebooks, and memory rather than creating a centralized organizational method that adapts to their unique needs.
When you don't address this fragmentation, you're fundamentally operating blind—unable to see the full picture of your business's health and performance.
So, what happens when you take the first step toward integrating your operations?
Embracing a cohesive system not only streamlines your processes but also illuminates pathways for growth and efficiency. This is akin to the concept of bullet journal migration, which emphasizes the importance of regularly organizing and reassessing your entries to maintain clarity and focus.
Why This Matters
Why This Matters
Ever feel like you’re spinning plates while running your small business? Juggling client emails, tracking finances, and meeting project deadlines can feel like a never-ending chaos. I’ve been there! Without a solid organization system, it’s easy to get lost in the whirlwind of tasks and lose sight of your goals.
Here's where a structured bullet journal can save the day. Picture it: a customizable space where you can centralize your tasks, finances, and goals. This isn’t just about keeping things tidy; it’s about cutting through the mental clutter that weighs you down.
Trust me, once you get your spreads in order, it feels like a breath of fresh air—like you can finally think straight again!
Supply List for Your Bullet Journal Journey
- Bullet Journal: Leuchtturm1917 A5 Dotted ($20) or a budget-friendly alternative like a simple composition notebook ($5)
- Pens: Tombow Dual Brush Pens ($10 for a set) or budget-friendly Crayola Super Tips ($8 for a pack)
- Ruler: Any standard ruler ($2) or a clear acrylic ruler for precision ($5)
- Stickers/Decor: Washi tape ($5) or DIY stickers made from printer paper ($2)
Skill Level: Beginner to Intermediate (comfortable with basic supplies)
What I love about bullet journaling is that it can be both artistic and functional. You can create minimalist layouts for clarity or go wild with artistic spreads. There’s no pressure for perfection here—done is definitely better than perfect!
Getting Started
First, let’s centralize your tasks. Start with a monthly spread. Draw a box that’s 15cm wide and 20cm tall, 2cm from the top of the page. Divide it into sections for each week. Make sure each section is about 4.5cm tall.
Use a black pen to outline these boxes, and add a splash of color with your Tombow pens—maybe a soft pastel for a calming effect.
Tip: Keep your spreads simple at first. Feel that? It’s the space for your thoughts to breathe.
Then, create a to-do list for each week. I recommend leaving a 1cm margin on the left side of each box for notes or reminders. This way, you can jot down quick thoughts that pop up during the week.
Accountability Checkpoints
Regular check-ins are vital. Dedicate a page at the end of each month for reflections. You can create a simple graph or chart to visualize your progress.
It doesn’t have to be fancy—just draw a 10cm x 5cm box and divide it into sections for areas like “Client Satisfaction” or “Financial Growth.” Use different colors to represent your performance. This visual element helps improve scanability and makes it easy to spot trends.
Engagement Break: Have you ever felt overwhelmed by too many tasks? What I'd do differently is to focus on just a few high-impact activities each week instead of trying to tackle everything. It’s a game-changer!
The Mistake Most Beginners Make
A common pitfall is overcomplicating your layouts. I’ve tried intricate designs that took forever to set up, only to abandon them after a week.
Keep it simple! Remember, you can always add a decorative element later if you feel inspired.
Try This Today: Grab your supplies and sketch out a simple monthly spread. Focus on clarity and functionality. You’ll be amazed at how much easier it's to prioritize when everything’s in one place. You've got this!
What Most People Get Wrong
What Most Creative Journalers Get Wrong
Hey there, friend! Have you ever found yourself diving into bullet journaling, only to get lost in the pretty layouts? I get it—it's so tempting to spend hours making everything look gorgeous while your actual goals and tasks get scattered across a bunch of apps. Trust me, I've been there. It's like putting on a beautiful outfit but forgetting to check if it's comfortable.
Here's the thing: while aesthetics are fun, focusing solely on how your journal looks can undermine its real purpose. You might be overlooking essential elements like clear goal-setting and time management spreads. Without these, your beautifully decorated pages can end up as pretty artifacts rather than useful tools. Got a moment? Think about your last review session. Did you even have one? Regular reviews help you adapt when things change around you.
The common mistake? Treating your bullet journal as just a creative outlet instead of a powerful business tool. Consistent tracking can reveal growth opportunities you might miss otherwise. What I love about this approach is that it transforms your journal into a decision-making ally, not just a desk accessory.
Supply List for a Functional Spread
- Notebook: Leuchtturm1917 A5 Dotted ($20) or a budget-friendly option like the Moleskine Classic Notebook ($10)
- Pens: Tombow Dual Brush Pens ($20 for a set) or Crayola Supertips ($10 for a set)
- Ruler: A standard 12-inch ruler ($5) or a budget plastic ruler ($1)
- Sticky Notes: Post-it Notes ($5) or generic sticky notes ($2)
Skill Level: Intermediate (you’re comfortable with rulers and hand lettering).
Let’s Create a Goal-Setting Spread!
1. Draw the Layout: Start with a rectangular box measuring 15cm x 20cm, about 2cm from the top of the page. Use a 0.5mm black pen for a clean outline.
2. Header: At the top of the box, write “Goals for [Month]” in bold, using a Tombow Dual Brush Pen in a vibrant color (like coral). Keep the font fun but readable—this is a space you’ll want to look at often!
3. Divide the Box: Using your ruler, create three sections within the box. Each section should be about 5cm high. This gives you space for short-term, mid-term, and long-term goals.
4. Bullet Points: In each section, list your goals with Bullet Points. I love using little doodles or icons to represent each goal—it's quick and adds a personal touch.
5. Color-Coding: Use a different color for each section. This makes it easy to see what’s what at a glance. It’s also a fun way to add some flair without losing functionality.
Engagement Break: Have you ever found that one spread just didn’t stick? Maybe it was too complicated? What I’d do differently is simplify the layout. Sometimes less truly is more.
6. Review Section: At the bottom of the spread, draw a small box (5cm x 10cm) for a “Monthly Review.” This is where you jot down reflections on what worked and what didn’t. I found that these little moments of honesty can really keep you accountable.
Remember: Done is Better Than Perfect
Starting messy counts! You don’t have to have everything figured out from day one. What I’ve learned is that your journal should evolve with you. Sometimes, I abandon a layout after a month because it just doesn’t fit my lifestyle. And that’s okay!
The mistake most beginners make is thinking they need to create a perfect spread every time. Embrace the messiness! It’s all part of the process.
Try This Today!
Take a moment to sketch out your own goal-setting spread. Use the ideas here or adapt them to fit your style. You’ll feel more organized and inspired to tackle the month ahead. Remember, your bullet journal is a tool—let it work for you!
The Solution: Step by Step
Building on the foundation you've just laid, you'll now embark on a structured journey to create your bullet journal system.
You'll begin by designing core spreads tailored to your business needs, followed by a systematic implementation into your daily routine.
Ultimately, you'll assess your progress to ensure your system is effectively guiding you toward your goals, allowing for adjustments as necessary. Incorporating expense tracking systems will help you maintain a clear overview of your finances and support informed decision-making.
Phase 1: Foundation
With your foundational elements established, you're ready to explore the practical application of your bullet journal system.
But what comes next? It's time to set up your index pages and key sections, allowing for smooth navigation between your goal-setting spreads, financial tracking, and project management layouts.
As you do this, consider how a well-defined color-coding system and symbol key will enhance your efficiency, helping you quickly identify priorities, deadlines, and action items throughout your journal.
Key Setup Details
Supply List
- Bullet Journal: Leuchtturm1917 A5 Dotted ($20) or a budget-friendly alternative like a Scribbles That Matter A5 Dotted ($15)
- Pens: Micron 05 Black Pen ($2.50) or a budget-friendly alternative like a Sharpie Pen ($1.50)
- Highlighters: Tombow Dual Brush Pens ($10 for a set) or Crayola Super Tips ($7 for a set)
- Ruler: Westcott 12″ Metal Ruler ($5) or a budget-friendly alternative like an Office Depot Plastic Ruler ($1)
Skill Level: Intermediate
—
Ever had that moment when your to-do list feels like it’s spiraling out of control? Yeah, I've been there too.
What I love about bullet journaling is how it can turn chaos into clarity. You don’t need to be a design pro or spend hours on Pinterest to get started.
Let’s break down five essential components that’ll not just keep your business organized but also make it feel uniquely yours.
1. Income-Expense Tracking
First up, let’s tackle finances. Create a simple income-expense tracker. Draw a 10cm x 15cm rectangle on the right page. Divide it into three columns: Date, Description, and Amount.
I use a light grey Tombow brush pen for the headers, so it’s soft but readable.
Tip: Use different colors for income and expenses! It makes it easier to scan. I love using green for income and red for expenses. It really pops!
2. Weekly Task Lists
Next, your weekly task lists. I do this layout every Sunday. Draw a vertical line 2cm from the left margin and a horizontal line 3cm from the top.
Now, create seven boxes, each 4cm x 6cm. This gives a nice space for each day. You can decorate each box with doodles or washi tape, but keep it functional.
Question for you: How do you prioritize your tasks? Feel that? It’s satisfying to cross things off!
3. Monthly Overview Spreads
For monthly overviews, I usually set aside a double spread (that’s two pages). In the left corner, draw a 5cm x 5cm box for the month.
Use a bold pen for the title! Around it, create mini boxes for each day — I do 3cm x 3cm. This gives you room to jot down important dates and deadlines.
4. Client Trackers
Now, if you’re working with clients, a client tracker is a game changer. On the next spread, make a table with three columns: Client Name, Service, and Due Date.
I usually draw this 2cm from the top of the page and each column about 6cm wide. This way, you can see everything at a glance.
5. Habit Trackers
Lastly, let’s talk habit trackers. I’m not saying you need to track every little thing, but a simple habit tracker can help you stay accountable.
Create a grid — 7 rows for the days of the week and however many habits you want to track. Use a light color for the grid lines so it doesn’t overwhelm.
Engagement Break
Ever tried setting up your habit tracker and felt overwhelmed? The mistake most beginners make is trying to track everything at once.
Start with just one or two habits. That counts! You can always add more later.
Final Thoughts
You’ve got this! Every component serves a purpose: streamlining workflows, monitoring profitability, or just keeping your brain organized.
You don’t need to have everything perfect right away. Start messy. Remember, it’s about what works for you.
Try this today: Set up your income-expense tracker. You’ll be surprised at how motivating it's to see your finances laid out clearly. Happy journaling!
Phase 2: Implementation
With a solid foundation established, the next phase focuses on implementation, where the real transformation begins.
To ensure your business remains accountable and on track, you'll need to create critical checkpoints—these serve as your system's safeguards, helping you identify and address potential issues before they escalate.
Regularly reviewing your metrics, whether weekly or monthly, will allow you to evaluate what's effective and where adjustments are necessary.
Critical Checkpoints
Let's Get Your Business Vision on Track!
You’ve mapped out your business vision—awesome! Now, it’s time to create those tracking systems that'll keep you accountable. Think of it as your creative organization toolkit. Ready to dive in?
Supply List:
- Journals: Leuchtturm1917 A5 Dotted or a budget-friendly alternative like the Moleskine Classic Notebook.
- Pens: Micron 05 for fine lines or a budget option like the Sakura Pigma Micron.
- Markers: Tombow Dual Brush Pens for color or Crayola Supertips for something cheaper.
Skill Level: Intermediate
1. Financial Spreads****
Start with a simple financial spread. Create a box that’s 10cm x 15cm on the left page for tracking cash flow. Use a 0.5mm black pen to outline it. Leave space at the top for a title like “Cash Flow Tracker.”
Under that, draw three columns labeled “Date,” “Income,” and “Expenses.” This visual setup helps you quickly scan your numbers. What I love about this? It's straightforward and keeps your finances in check without overwhelming you.
2. Weekly To-Do Lists****
Next up, let’s prioritize those urgent tasks. Draw a 15cm x 20cm rectangle on the right page. Inside, create a list format with checkboxes. I usually leave a bit of space between each task for notes or adjustments.
You can color-code tasks based on urgency: red for urgent, yellow for important, and green for ongoing. I’ve tried both colorful and minimalist lists, and honestly, it’s all about what speaks to you. Feel empowered to start messy!
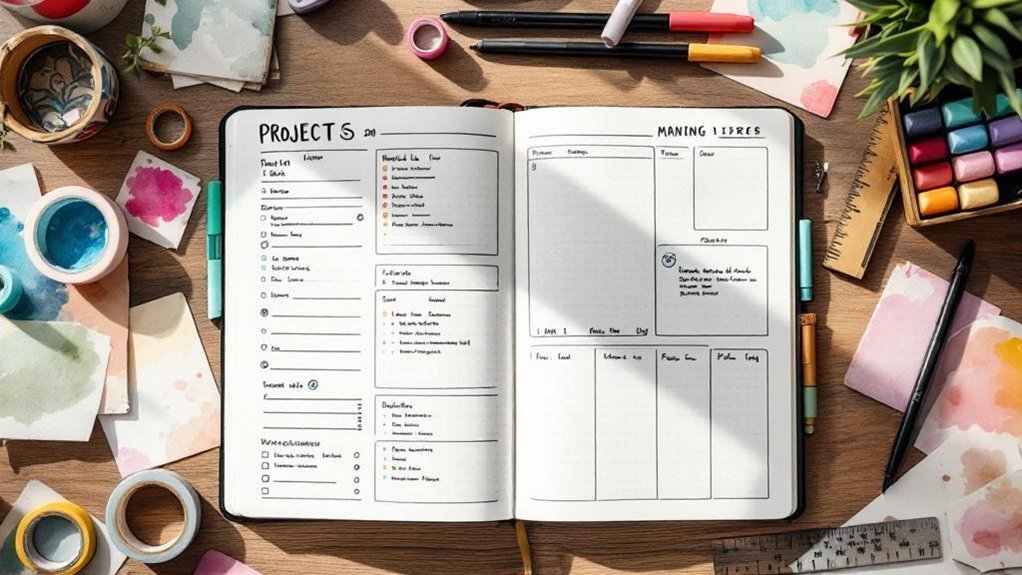
3. Project Trackers****
Create a project tracker to break initiatives into actionable steps. This can be a simple grid layout. For each project, draw a 5cm x 5cm box. Label it with the project name, and inside, list out tasks in a bullet format.
I’ve used this method for three months, and it transformed how I approach big projects. It’s all about seeing those steps laid out visually, making it easier to tackle them one at a time.
4. KPI Habit Trackers****
For tracking sales and engagement metrics, why not try a habit tracker? Draw a grid of 7 rows (one for each day) and as many columns as you have KPIs. Each box should be around 2cm x 2cm, so you can fill in your data easily.
Using color to represent different levels (like green for goals met) makes it visually appealing and functional. Remember, done is better than perfect!
Engagement Break
Ever felt overwhelmed by the pressure to make everything perfect? The mistake most beginners make is spending too much time on aesthetics instead of functionality. Trust me, I've been there!
Focus on what helps you track better.
Try This Today
Pick one of these layouts and give it a go this week! Whether it’s a financial spread or a project tracker, just start. Remember, every little step counts in turning your vision into reality. You got this!
Phase 3: Verification
You'll know your bullet journal system's working when you can spot clear patterns in your financial data, see projects completing on schedule, and notice tangible improvements driven by customer feedback you've tracked.
Your metrics should show increased marketing ROI from your planned campaigns and measurable progress toward the goals you've set. If you're spending less time hunting for business information and more time making informed decisions, your spreads are delivering real value.
So, how do you leverage these insights to take your strategy even further?
Let's explore the next steps in maximizing the effectiveness of your bullet journal system.
How to Know It Worked
How to Know Your Bullet Journal Spreads Are Working for You
Ever spent hours creating a beautiful spread only to wonder if it’s actually helping your business? Been there! It’s easy to get lost in the aesthetics, but let’s talk about how we can make sure our creative efforts are driving real results.
Start by tracking your KPIs. Think about sales growth and customer engagement. For instance, keep a simple table to note your sales numbers before and after implementing a new layout. This is something I’ve done, and it really opened my eyes to what works.
Weekly reviews are key. Set aside a few minutes to look over completed tasks and see how they match up with your initial objectives. I like to use a colored pen to mark what I achieved versus what I didn’t. Feel that sense of accomplishment? That’s the good stuff!
Analyze productivity. I’ve tried different methods, and what I love is seeing how my productivity shifts after trying new spreads. Was it the layout? The colors? It’s all about experimentation, my friend.
Gather client feedback. Ask your clients what they think! It's super helpful to validate your strategies. You might find that your latest artistic endeavor is the talk of the town, or maybe it’s time to pivot. Either way, you’re learning.
Monthly performance patterns are gold. Take a moment each month to compare what’s working and what’s not. You’ll spot trends, and that’s when the real innovation happens. Ready to dive in?
Quick Tips:
- Keep it simple: A table might be all you need to track your KPIs.
- Don’t stress the design: The most important thing is that you’re getting stuff done. Remember, done is better than perfect!
Common Mistake:
The mistake most beginners make is thinking that every spread needs to be a masterpiece. It doesn’t! If it helps you stay organized and productive, that's what counts.
Try This Today:
Grab your favorite pen and notebook, and set up a simple layout to track your KPIs. Maybe a box for each week with a few bullet points for key metrics. Trust me, it’ll be a game changer!
Pro Tips From Experience
Pro Tips From Experience
Ever find yourself staring at a jumble of notes, wondering how to make sense of it all? I’ve been there! After seven years of bullet journaling, I’ve learned that keeping organized tracking systems is the key to managing a business effectively. Here’s what I’ve found works wonders: color-coding your financial tracker. It creates instant visual clarity, allowing you to spot spending patterns right away. And trust me, reviewing your goal-setting page weekly is a game-changer. It builds momentum like nothing else!
Here are some strategies that can really elevate your journaling game:
- Cross-reference your spreads: Try linking project deadlines to financial milestones. It adds a layer of accountability that can transform your workflow. You’ll feel that connection!
- Digitize selectively: I love taking photos of my completed spreads at the end of the month. It helps me build a searchable archive while still enjoying the tactile benefits of pen and paper. You won’t miss those pages!
- Batch your tracking: Make Sunday evenings your dedicated journaling time. Update all your spreads at once to reduce decision fatigue during the busy week. Start messy—perfection isn’t the goal!
Supply List:
- Journals: Leuchtturm1917 A5 Dotted (or a budget-friendly alternative like the Scribbles That Matter Dotted Journal)
- Pens: Tombow Dual Brush Pens (or Crayola Supertips for a budget-friendly option)
- Fineliners: Micron 05 (or Papermate Flair for a more affordable choice)
Skill Level: Intermediate
You should be comfortable with rulers and hand lettering to really make these spreads shine!
Visual Details
- Create a financial tracker: Draw a 10cm x 15cm box on the right page, 2cm from the top. Use a 0.5mm black pen for the outline. Inside, make columns for dates, expenses, and categories, each 2cm wide. Color-code your expenses using your brush pens—green for income, red for spending.
- Goal-setting page: On the left page, draw a vertical line 1.5cm from the left margin. This will create two columns. In the left column, jot down your goals for the month using hand lettering. In the right column, list actionable steps.
- Linking spreads: Use colored arrows with a 0.3mm pen to connect deadlines to financial milestones. It's visually engaging and keeps everything interconnected.
Personal Note
What I love about these methods is that they keep me accountable. I used a similar layout for three months, and it really helped me stay on track!
But remember, not every spread will stick. I tried a complicated layout once that took me 45 minutes to set up—totally not practical for weekly use.
Engagement Break
Feel like you’re getting lost in the details? That’s okay! The mistake most beginners make is overcomplicating spreads. Start simple. You can always add more flair later!
Action Step
Ready to give this a go? Set aside some time this weekend to create your financial tracker and goal-setting page.
Before and After: What to Expect
Before and After: What to Expect with Your Bullet Journal
I remember the chaotic days when I juggled a million tasks but still felt like I was missing out. You know what I mean? Many small business owners struggle with scattered priorities and missed deadlines before they find their groove with a bullet journal system. But trust me, once you dive into these techniques, you’ll see shifts that will blow your mind.
| Before | After |
|---|---|
| Fragmented task management | Centralized tracking system that flows |
| Reactive decision-making | Data-driven insights that guide you |
| Time wasted on organization | Streamlined workflows that save you hours |
| Limited performance visibility | Clear metric analysis to track your wins |
| Creative potential untapped | Enhanced innovation capacity that sparks joy |
Feel that? You’ll experience sharper focus and a productivity boost that'll make you wonder how you ever managed without it. Visual elements like charts and graphs? They’ll completely change the way you analyze your business metrics, letting you make faster, smarter decisions.
Supplies You’ll Need:
- Journal: Leuchtturm1917 A5 Dotted ($20) or a budget-friendly alternative like the Scribbles That Matter Dotted Notebook ($15).
- Pens: Tombow Dual Brush Pens ($40 for a set) or Crayola Supertips ($10 for a set).
- Ruler: Westcott 12” Ruler ($5) or a simple plastic ruler from any dollar store ($1).
- Stickers or Washi Tape: Any fun designs that inspire you ($10) or DIY options (use colored paper).
Skill Level: Intermediate
You should be comfortable with hand lettering and using a ruler to create layouts.
What I love about this process is how it’s not just about getting organized—it’s about finding a system that feels right for you. My go-to approach is to start messy. I’ve tried both intricate designs and simple layouts, and guess what? They both work! Perfect is the enemy of done, so don’t stress about making it flawless.
Visual Elements to Embrace
When you create those charts, aim for clarity. For example, if you’re tracking sales, use a simple bar graph. Draw a rectangle measuring 10cm wide and 5cm tall, leaving 1.5cm from the top margin. Use a bold color for the bars—let's say a deep blue (Tombow 493)—and a lighter shade for the background. This will make it easier to scan and understand at a glance.
Here’s a tip: pair your graphs with a color-coded legend. This will help you quickly identify different categories, whether it’s sales, projects, or personal goals. I’ve used this layout for months, and it really sticks!
Engagement Break
What I’d do differently: Sometimes I get too caught up in making things pretty and forget functionality. The mistake most beginners make is thinking every page needs to be a masterpiece. It doesn’t! Start with what works for you and build from there.
Try This Today
Ready to try? Set aside just 10 minutes to jot down your tasks for the week. Use a simple to-do list format and highlight each task with your favorite color. This will give you a sense of accomplishment and help clear that mental clutter.
Your Next Steps
Your Next Steps in Bullet Journaling
Hey there, fellow journaler! So, you've got the basics down—awesome! Now, let's make those pages work for you and your business. Ready to dive in?
Supplies You'll Need:
- Notebook: Leuchtturm1917 A5 Dotted ($20) or a budget-friendly alternative like the Scribbles That Matter Dotted Notebook ($15)
- Pens: Tombow Dual Brush Pens ($10 for a set) or Crayola Supertips ($7 for a set)
- Fineliner: Micron 05 ($2) or a budget option like Sharpie S-Gel ($1.50)
Skill Level: Intermediate (you’re comfy with rulers and hand lettering)
—
Recommended for You
🛒 Fine Tip Pens For Journaling
As an Amazon Associate we earn from qualifying purchases.
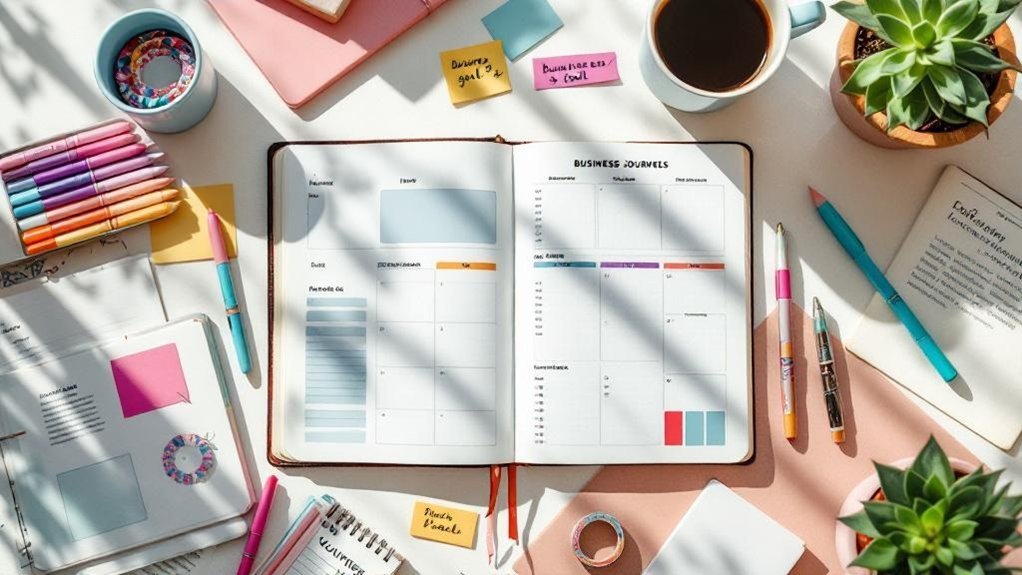
Financial Spread
Let’s kick things off with a financial spread. This is your go-to for tracking income, expenses, and profit margins. Here’s how to set it up:
- Draw a 16cm x 20cm box on the right side of your page, about 2cm from the top.
- Divide it into three sections: Income, Expenses, and Profit. Each section should be about 5cm tall.
- Label each section with a bold header using a black fineliner.
- For tracking, create small lines or boxes underneath each label—about 1cm high—where you can jot down numbers.
What I love about this spread is how it gives you clarity on what’s working and what needs tweaking. I used this layout for three months, and it really opened my eyes to where my money was going!
—
Goal-Setting Page
Next, let’s create a goal-setting page. This is where you’ll outline your short-term and long-term objectives.
- Start with a 12cm x 18cm box, centered on the page, about 2cm from the top.
- Split it into two columns—one for short-term goals and one for long-term goals.
- Draw a line down the middle, then label each column.
- Use small bullet points (or little doodles) to list out your goals under each header.
Feel that? That’s the thrill of clarity! I’ve tried both structured lists and free-form brainstorming, but this layout keeps me focused.
—
Client Tracker
Now, let’s streamline communication with a client tracker.
- Draw a 15cm x 20cm box on the left side of the page, 2cm from the top.
- Create rows for each client—each row should be about 2cm high.
- Label columns for interactions, project statuses, and deadlines. A simple grid works wonders here.
- You can use different colors for each status—green for “on track,” yellow for “needs attention,” and red for “delayed.”
This layout makes it easy to scan through your interactions. Trust me, it saves you from last-minute scrambles!
—
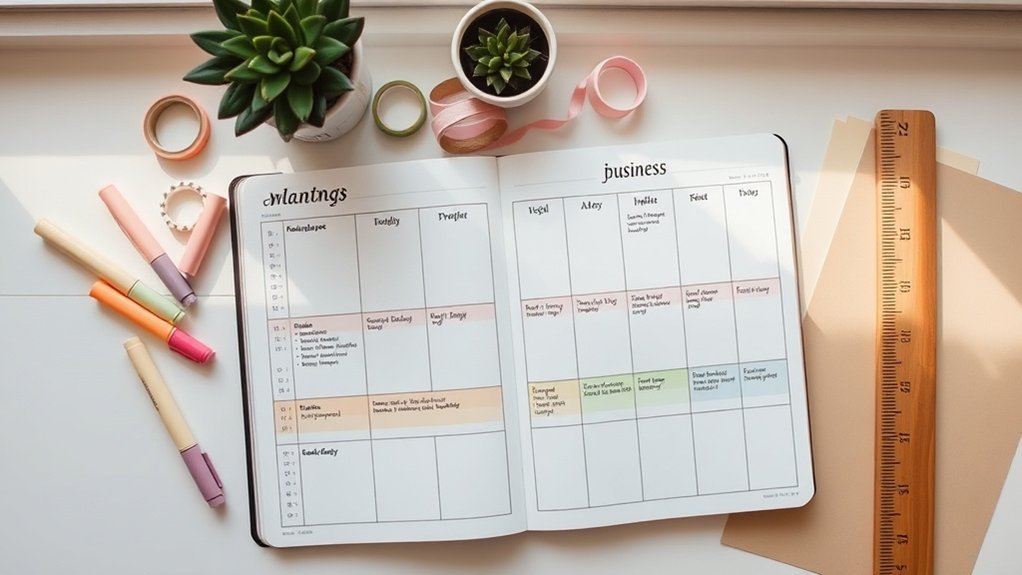
Marketing Calendar
Next up, let’s implement a marketing calendar. Keeping track of campaigns and content schedules is key for a consistent brand presence.
- Draw a 20cm x 15cm box, centered on the page about 3cm from the top.
- Divide it into weeks with horizontal lines—four lines for four weeks.
- Label each week across the top, then create columns for social posts, campaigns, and deadlines.
- Use colored pens to mark important dates—maybe red for launches and blue for content deadlines.
This method keeps your marketing organized and visible. I love it because it feels like a roadmap!
—
Habit Tracker
Finally, let’s add a habit tracker to monitor daily activities and productivity metrics.
- Draw a 12cm x 12cm square, in the bottom right corner of your page.
- Split it into a grid—let’s say a 6×6 grid for 36 habits.
- Label your habits along the left side and top—this allows for easy scanning.
- Use a light pencil to fill in squares as you complete each habit.
Start messy! It’s all about finding what works for you. I abandoned a more complex habit tracker after a month, but this minimalist approach has stuck with me!
—
Wrap-Up
These interconnected spreads create a business management system that transforms your journal into a powerful growth tool.
Remember, the mistake most beginners make is overcomplicating their layouts. Keep it simple, and don’t stress about perfection.
Try this today: Pick one spread to start with, and let it evolve as you go. After all, done is better than perfect! Let’s get journaling!
Frequently Asked Questions
What Type of Bullet Journal Notebook Works Best for Small Business Owners?
Q: What type of bullet journal notebook should I use as a small business owner?
Any notebook works — but a dotted A5 gives you the most flexibility. It allows you to create custom layouts that can grow with your business.
Try a Leuchtturm1917 Dotted Notebook ($20) for a durable option, or go for a budget-friendly option like the Scribbles That Matter ($15).
Q: How long does it take to set up my bullet journal?
About 20 minutes once you have the layout figured out. The first time might take about 45 minutes, but don’t stress—imperfections are totally fine!
Start with a simple monthly spread, and use a Muji gel pen ($2) for clean lines.
Q: How can I track my finances effectively in my bullet journal?
You can set up a finance tracker in just 15 minutes! Use a simple table format to log income and expenses.
A great tool for this is the Tombow Dual Brush Pens ($25 for 10) to add some color, or Crayola Supertips ($6 for 20) for a budget-friendly alternative.
Q: What about tracking projects and goals?
This spread takes about 30 minutes to set up and just 30 seconds daily to fill in. Use a simple checklist format to keep your goals in sight.
You can use the Erin Condren LifePlanner ($55) for a structured layout or a plain notebook for a more flexible approach.
Q: Should I include an index in my bullet journal?
Absolutely—it’s essential for staying organized! Setting up an index takes about 10 minutes.
Just number your pages and jot down the topics. Use a simple system like the Leuchtturm1917, which comes with pre-numbered pages, making it super easy!
How Much Time Should I Dedicate Daily to Maintaining My Bullet Journal?
How much time should I spend daily on my bullet journal?
You’ll want to dedicate just 10–15 minutes each day to keep things manageable. Start your morning by reviewing yesterday’s wins and setting today’s focus, then wrap up with a quick reflection at night.
This routine keeps it dynamic and actionable. If you’re using a dotted A5 notebook, like the Leuchtturm1917 ($20), you’ll have the flexibility to adapt as you go.
What supplies should I use for my bullet journal?
Any notebook works — but a dotted A5 gives you the most flexibility. For pens, try Tombow Dual Brush Pens ($25 for 10) or Crayola Supertips ($6 for 20) for vibrant colors.
If you’re adding stickers or washi tape, consider the Pipsticks Monthly Subscription ($15) for a fun variety. Remember, it’s all about what inspires you, so pick what makes you excited!
How long does it take to set up a new spread?
Setting up a new spread takes about 15 minutes, and you’ll spend just 30 seconds daily to fill it in. Start with a simple layout like a habit tracker or a daily log.
Once you get the hang of it, you’ll find it doesn’t take much time at all! Keep it simple and enjoy the process — there’s no need for perfection!
Can I Use Digital Tools Alongside Traditional Bullet Journal Spreads?
Q: Can I use digital tools with my bullet journal?
Absolutely! Blending digital tools with your bullet journal can really boost your productivity.
Try using apps like Todoist for task reminders or Google Calendar for events. Capture quick notes digitally and then transfer key insights to your journal weekly.
It'll take about 15 minutes to set up your system, and then just a few minutes daily to maintain it.
Q: Which type of notebook should I use for my bullet journal?
Any notebook works — but a dotted A5 gives you the most flexibility.
It’s perfect for layouts and doodles. I recommend the Leuchtturm1917 ($20) for quality or a budget-friendly option like the Scribbles That Matter ($15).
You’ll be set up in about 10 minutes, and it’s totally okay if your spreads aren’t perfect!
Q: How long does it take to set up my first spread?
Expect about 45 minutes for your first spread, but once you’ve got the layout down, it’ll only take around 20 minutes for future spreads.
Start simple with a monthly overview and weekly logs. Use the Mildliner Highlighters ($10 for 15) for a pop of color, and remember, it doesn’t have to look polished!
Q: How much time will it take to fill in my journal daily?
This takes about 30 seconds daily once you’re in the groove.
Just jot down your tasks and thoughts as they come. You can use the Muji Gel Pens ($10 for a pack of 5) for smooth writing.
Don't stress about making it perfect; just enjoy the process!
What Supplies Do I Need to Create Effective Bullet Journal Spreads?
What supplies do I need for my bullet journal?
Any notebook works — but a dotted A5 notebook gives you the most flexibility.
Try the Leuchtturm1917 (around $20) for quality, or go for a budget-friendly option like the Scribbles That Matter (about $15).
You can use fine-tip pens like Tombow Dual Brush Pens ($25 for 10) or Crayola Supertips ($6 for 20) for vibrant colors.
Don't forget a ruler for clean lines and sticky notes for quick changes!
How long does it take to set up a spread?
This spread takes about 15 minutes to set up once you’ve got the layout figured out.
After that, you’ll spend around 30 seconds daily filling it in.
Start with simple layouts for your first few spreads, and remember that it doesn’t have to be perfect!
What if I make a mistake in my journal?
Mistakes happen, and that's totally okay!
You can use an eraser to fix pencil sketches or simply cover up ink with washi tape or stickers.
It adds a fun touch! For a quick fix, try the Tombow Mono Eraser (around $3).
Just remember, it’s all about enjoying the process.
How Do I Customize Bullet Journal Spreads for My Specific Business Needs?
Q: How do I customize my bullet journal for my business metrics?
Any notebook works — but a dotted A5 gives you the most flexibility. Start by listing your key metrics like revenue or client projects, then sketch simple layouts to track them.
This setup takes about 20 minutes once you have the layout figured out. For pens, try Tombow Dual Brush Pens ($25 for 10) or Crayola Supertips ($6 for 20) for easy color-coding.
Q: How can I track my inventory in my bullet journal?
You can create an inventory spread in just 15 minutes! Use a simple table layout to list items, quantities, and reorder levels.
Don’t worry about perfection; it’ll evolve as you use it. For filling it in daily, set aside about 30 seconds. A good pen option is the Muji Gel Ink Pen ($10 for 5) for smooth writing.
Q: How often should I update my spreads?
Aim to update your spreads weekly; it’ll take around 10-15 minutes each time. This keeps your metrics relevant and helps you adjust your strategies.
You can even use stickers or washi tape to mark important updates or successes. Try the Happy Planner Stickers ($20 for a pack) to add a fun touch without extra time.
Q: Can I make changes to my spreads as my business grows?
Absolutely! Your journal should grow with you. If you find something isn’t working, don’t hesitate to tweak it.
This process takes about 5 minutes, and it’s totally okay if it’s not perfect. Invest in some erasable pens like the Pilot FriXion ($15 for 6) so you can adjust layouts easily.
Conclusion
Dive right in! It’s totally okay if things aren’t perfect—start messy, that counts. Grab your journal and a single black pen. On the next blank page, draw a 2×3 grid—this will be your first weekly tracker. Fill in today’s column with your top tasks. Done beats perfect every time!
Once you’ve got that down, why not try creating a finance tracker next? You’ll be amazed at how just these few layouts can help you take control of your business. Trust me, you’re on the right path!
Related Posts
Related Posts
Related Posts
Related Posts
Related Posts
Related Posts
Related Posts

Related Posts
✨ Our Recommendation
Editor's Pick: Dot grid journal with durable binding and Leuchtturm1917-style numbered pages, plus basic journal supplies.
Your Weekly Dose of Inspiration
Journaling ideas, family tips, and gentle inspiration.