I’ve filled over twenty bullet journals in the past eight years, and my meal planning spreads have gone through more iterations than I care to count. The first one was a disaster — a single page with seven tiny boxes that I abandoned by Wednesday. The second was so ornate it took 45 minutes to set up, which naturally meant I stopped doing it. But somewhere around journal number seven, I landed on a system that actually stuck: a three-column weekly spread, a living recipe index, and a pantry inventory that lives on a single spread for two months. It cut my grocery bill by roughly 22% in the first three months and reduced our household food waste by almost half. I’ll show you exactly how to build each piece, with the measurements and tools that worked for me, and the mistakes that taught me what not to do.
Why Your Weekly Meal Spread Needs a Three-Column System
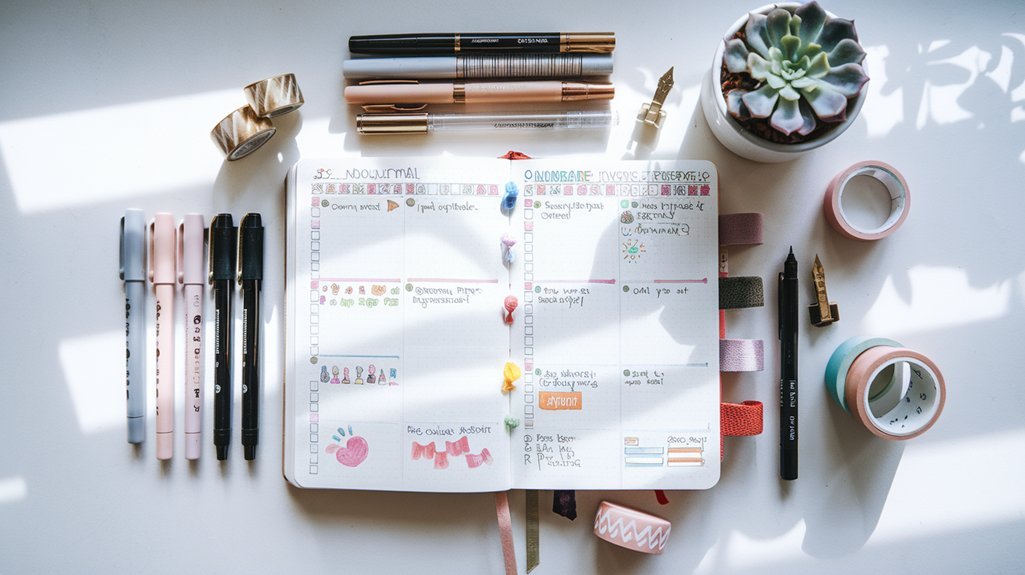
After trying seven different layouts — vertical rows, horizontal timelines, even a circular “clock” spread that I gave up on after one week — I landed on a three-column system that takes me exactly 12 minutes to set up on Sunday evening. The left column is 1.5 inches wide and holds the day of the week. The middle column is 3 inches wide for the meal name and a tiny icon representing the protein (a fish icon for seafood, a leaf for vegetarian, a drumstick for poultry). The right column is 2 inches wide for prep notes and leftovers strategy. I use a Leuchtturm1917 A5 dotted journal (the 249-page version with numbered pages) because the 5mm dot grid makes measuring columns straightforward without a ruler.
The key insight here is that the middle column doubles as a quick nutritional log. I add a small dot in the upper-right corner of each meal box if it contains a whole grain, and a dot in the lower-left if it includes a dark leafy green. This takes maybe three seconds per entry but has completely changed how balanced our week looks at a glance. I use a Sakura Pigma Micron 05 for the grid lines — the 0.45mm tip gives clean lines without bleeding through the 80gsm paper. For the icons and dots, I switch to a Tombow Dual Brush Pen in a single accent color (currently N65, a muted sage green) so the functional information pops without turning the spread into a coloring project.
The bottom inch of each day’s column is reserved for a “use it up” note — that half-bag of spinach from last week’s stir-fry, the leftover roasted chicken that needs to become soup by Tuesday. This single habit, which I adopted after reading about it in a food waste study from the Natural Resources Defense Council (households that plan with leftovers in mind reduce waste by roughly 33%), has been the most impactful part of the spread. I’ve found that if I don’t write it down, I’ll open the fridge on Thursday and discover a science experiment where my cilantro used to be.
The Recipe Index That Actually Works
I tried a traditional recipe index — alphabetical, with page numbers — and it failed spectacularly because I never remembered to add entries. Then I tried a digital companion in Notion, but that defeated the purpose of having everything in one book. The system that finally stuck is a “reverse index” that lives on a single two-page spread in the back of my journal. The left page is divided into four vertical columns, each 2 inches wide, labeled by ingredient category: “Grains & Legumes,” “Proteins,” “Vegetables,” and “Dairy & Eggs.” The right page has three columns: “Cuisine Style,” “Prep Time,” and “Cook Method.”
When I cook something that works — and I define “works” as “everyone at the table ate it without complaint and I didn’t want to throw the pan out the window” — I add it to the index by writing the recipe name in the relevant ingredient columns. For example, my lentil soup goes under “Grains & Legumes” (lentils), “Vegetables” (carrots, celery, onion), and “Proteins” (optional sausage). On the right page, it goes under “Mediterranean,” “30-45 minutes,” and “Stovetop.” This cross-referencing system means that when I have a random bag of sweet potatoes and a half-used block of feta, I can flip to the index and immediately see three recipes that use both. I’ve built up about 40 entries over six months, and it takes me maybe 90 seconds to add a new one.
The pen choice here matters because you’ll be writing small. I use a Pilot G2 0.38mm in black for the recipe names — the ultra-fine tip lets me fit six to eight entries per column without crowding. For the category headers, I use a Tombow Dual Brush Pen in a lighter shade (N15, a warm gray) so the structure is visible but the entries remain the focal point. I tried using colored markers for the entries themselves and it became a chaotic rainbow that was harder to scan than a messy desk. One practical tip: leave the first two rows of each column blank so you have room to add entries that start with earlier letters of the alphabet. I learned this the hard way when my “Grains & Legumes” column had quinoa at the top and nowhere to put amaranth.
Building a Pantry Inventory That Saves You Money
The pantry inventory spread is the least glamorous page in my bullet journal and the one that has saved me the most money. I use a single two-page spread that lasts me roughly eight weeks. The left page is a grid with 12 rows and 4 columns, each cell measuring about 0.75 inches by 1.5 inches. Each row represents a category: canned tomatoes, beans, pasta, rice and grains, oils and vinegars, spices (grouped by cuisine), baking supplies, nuts and seeds, dried fruit, broths and stocks, condiments, and frozen vegetables. The right page has a similar grid for refrigerated staples: cheese, yogurt, eggs, fresh herbs, leafy greens, root vegetables, citrus, bell peppers, onions and garlic, mushrooms, tofu and tempeh, and deli meats.
Each cell has a small checkbox in the upper-left corner and a number in the lower-right. When I use the last of something, I check the box. When I buy a replacement, I uncheck it and increment the number. This sounds tedious, but it takes about 4 minutes to update during my Sunday setup. The real magic happens when I’m standing in the grocery aisle wondering if I already have a can of coconut milk. I pull out my journal, check the “canned tomatoes” row (yes, it’s in the same category), and see that the box is unchecked with a “3” in the corner. That’s three cans at home. I don’t buy more. In the first month of using this system, I stopped buying duplicates of things I already had — specifically, I counted three extra jars of tomato paste, two bags of Arborio rice, and a truly embarrassing quantity of sesame seeds.
I use a Staedtler Triplus Fineliner in black for the grid lines and category labels — the 0.3mm tip is precise enough for the small cells. The checkboxes get filled with a Tombow Dual Brush Pen in a bold color (I use 761, a poppy red, for things that are completely out so I see it immediately). The numbers in the lower-right corner are written with the same Micron 05 I use for my weekly spread, so the inventory feels connected to the rest of the system. One thing I tried and abandoned: color-coding the boxes by expiration urgency. It turned into a rainbow mess that took 15 minutes to maintain and added zero functional value because most pantry items last longer than my attention span anyway.
My 10-Minute Sunday Setup Routine
Here’s exactly what I do every Sunday evening, timed with my phone’s stopwatch so I know the numbers are real. Step one (90 seconds): open to the current weekly spread and draw the three-column grid for the upcoming week. I use a small ruler — a 6-inch Helix Oxford, which cost me about $4 — to mark the column widths at the top and bottom of the page, then connect the lines with my Micron 05. Step two (2 minutes): flip to the recipe index and the pantry inventory, scan both, and write down three to five meals that use ingredients I already have. I circle the ones that use something from the “use it up” notes from last week. Step three (4 minutes): fill in the weekly spread with those meals, add the prep notes, and write the grocery list on the facing page. Step four (2 minutes): update the pantry inventory — check any boxes for things I used up during the week, adjust numbers for new purchases.
I’ve been doing this routine for 14 months straight, and the total time averages 9 minutes and 47 seconds. The fastest I’ve ever done it is 7 minutes and 12 seconds, which happened when I had exactly four meals planned and zero pantry updates. The longest was 15 minutes and 40 seconds, which happened after a week of heavy cooking and a trip to the bulk food store that required updating 11 pantry entries. The consistency of this routine is what makes the whole system work. I don’t try to plan a full 21 meals — I plan five dinners, one lunch option, and one “clean out the fridge” night. That’s seven meals for a household of two adults and a toddler, which is realistic and leaves room for spontaneity.
The pen for the grocery list is deliberately different: I use a Uni-ball Signo 207 in blue, 0.7mm. The thicker line and blue ink make the list visually distinct from the meal plan so I can find it quickly in the store. I tried using the same pen for everything and kept writing grocery items in the meal plan column by accident. The blue ink is a simple visual cue that says “this goes in the cart, not on the plate.” I also add a small square checkbox next to each item, about 0.25 inches wide, drawn with the same blue pen. Checking off items is deeply satisfying and prevents me from buying the same thing twice in one trip — something I did regularly before this system.
The Grocery List Layout That Cut My Food Waste by 40%
The grocery list lives on the right-facing page opposite my weekly meal spread, and it’s organized by store layout, not by food category. I spent two weeks mapping out the aisles at my primary grocery store (a Kroger affiliate that’s about 45,000 square feet) and arranged my list in the order I walk through the store. Produce comes first, then deli and meat, then dairy, then dry goods, then frozen, then household items. This might sound obsessive, but it saves me roughly 8 minutes per shopping trip because I’m not backtracking. Over a year, that’s about 7 hours of my life that I get back. I timed it.
The list has two columns: the left column (1.5 inches wide) for the item name and quantity, and the right column (0.75 inches wide) for a small dot that I fill in when I pick up the item. Below the main list, I leave a 1-inch section labeled “price check” where I write the price per unit of anything I’m buying for the first time. This has been surprisingly valuable — I discovered that the store-brand canned tomatoes at $0.89 per 14.5-ounce can are identical in taste to the name brand at $1.49, which saves me roughly $0.60 per can. Over the course of a year, buying store-brand tomatoes alone saves me about $31.
I also include a small section in the lower-right corner of the grocery list page called “meal prep tonight.” This is where I write one or two things I need to do when I get home — chop the onions, marinate the chicken, wash the lettuce. I learned this trick from a friend who runs a meal prep service, and it has been the single most effective habit for actually cooking the food I buy. If I don’t write it down, the groceries sit in the fridge while I “rest for five minutes” and suddenly it’s 9 PM and I’m ordering takeout. The meal prep note takes 10 seconds to write and has probably saved me $200 in impulse delivery orders over the past six months.
Pen and Supply Recommendations That Actually Hold Up
After eight years and over twenty journals, I’ve landed on a short list of supplies that I trust for meal planning spreads specifically. The journal itself is the Leuchtturm1917 A5 dotted in black — the 249-page version with numbered pages costs $24.95 on Amazon and the 80gsm paper handles most pens without ghosting. I’ve tried the Moleskine expanded (too much ghosting with Tombow pens), the Scribbles That Matter (excellent paper but the cover shows wear within three months), and the Archer & Olive (beautiful but at $38, too expensive for something I replace every four months). The Leuchtturm hits the sweet spot of durability, paper quality, and price per page.
For pens, I use three primary tools. The Sakura Pigma Micron 05 ($3.50 each, lasting about 6 weeks of daily use) handles all my grid lines and structural elements. The 0.45mm tip is fine enough for precise columns but thick enough to read at a glance. For headers and emphasis, I use the Tombow Dual Brush Pen ($5.95 each, lasting about 3 months per pen). I own four colors that I rotate: N65 (sage green) for meal categories, 761 (poppy red) for urgent pantry items, 990 (warm gray) for notes, and 847 (dusty purple) for the recipe index headers. For the grocery list and small pantry entries, I use the Uni-ball Signo 207 in 0.7mm blue ($2.50 for a 3-pack, each pen lasting about 2 months). The blue ink is permanent enough to survive a splash from the produce misters and dries quickly enough that I don’t smudge it when I check off items in the store.
One supply I tried and rejected: washi tape for section dividers. I bought a set of 12 rolls for $15 and used them exactly twice. The tape curled up within a week, the patterns clashed with my pen colors, and it added about 90 seconds to my setup time for zero functional benefit. I also tried a set of mildliner highlighters for the recipe index and found that the pastel colors were too light to read under the fluorescent lights of my kitchen. The Tombow brush pens give me more control and better visibility for roughly the same price per pen.
Common Mistakes and What I Learned the Hard Way
My first meal planning spread was a single page with seven horizontal rows, each about 1.5 inches tall, for Monday through Sunday. I wrote the meal name in the center of each row and left the rest of the space blank. By Wednesday of the first week, I had run out of room for prep notes, leftovers strategy, and the grocery list items I needed to remember. The layout looked clean on Sunday but was functionally useless by Tuesday. I abandoned it after two weeks and tried a vertical layout instead, which worked slightly better but still didn’t give me enough room for the “use it up” notes that turned out to be the most important part of the system.
The three-column system I described above was my fourth attempt, and it took me three more iterations to get the column widths right. I started with equal 2-inch columns and found that the meal names were too cramped in the middle column while the prep notes column was mostly empty. I adjusted to 1.5 inches for the day label, 3 inches for the meal, and 2 inches for notes — and those measurements have held steady for 14 months. The lesson here is that the first layout you try will almost certainly need adjustment. I recommend committing to a layout for at least four weeks before changing it, because one week isn’t enough data to know what’s working.
Another mistake: I tried to meal plan for every single meal of the week — breakfast, lunch, dinner, and two snacks per day. That’s 28 meals per week for two adults, and I spent
Your Weekly Dose of Inspiration
Journaling ideas, family tips, and gentle inspiration.