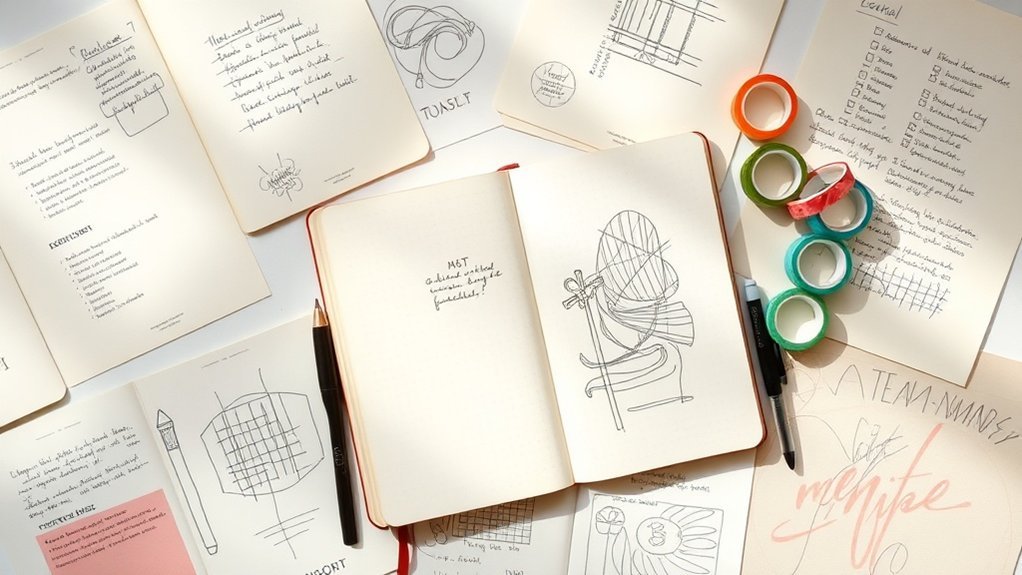
Staring at a blank page can feel like staring into a void, right? That moment when you finally fill it with a simple layout and feel that rush of satisfaction is unbeatable. You don't need to be an artist to create a minimalist bullet journal spread that looks great and works for you. I tried every approach out there, and after three months with this method, I promise it's all about clean lines and functional layouts. Start messy; it all counts! Let’s dive into how you can craft beautiful pages without ever picking up a pencil.
Key Takeaways
- Use a simple A5 notebook with dotted pages for flexibility; grids help maintain structure while blank pages can lead to chaotic layouts.
- Track habits with basic rectangles and grids; this saves time and keeps your focus on what you want to achieve rather than on design.
- Embrace whitespace by leaving at least 20% of your page empty; this enhances readability and keeps your spreads from feeling cluttered.
- Enhance your layouts with washi tape and stickers; a few strategic embellishments can add flair without requiring drawing skills.
- Set a timer for 15 minutes to complete each spread; this combats perfectionism, allowing you to prioritize functionality over artistic detail.
- Accept mistakes as part of the process; reviewing errors helps improve your system and builds confidence in your organizational skills.
Introduction
Ever sat down to journal and felt overwhelmed by all those intricate spreads out there? I get it. I’ve been there, too. After years of experimenting with different styles, I’ve found that minimalist bullet journaling is a refreshing approach. It’s all about functionality—no fancy drawings required. If you’ve ever thought, “I can’t draw,” this method is for you!
Minimalist spreads focus on clean lines and simple layouts. You can use a monochrome palette to create a calm, organized look. Trust me, simplicity not only looks good but helps you focus on what truly matters—tracking your goals and managing your time effectively. Feel that? It’s liberating! Tracking your habits can significantly impact your productivity and well-being, making it easier to stick to established habits.
Supply List
- Notebook: Leuchtturm1917 A5 Dotted ($20) or *Budget-friendly alternative:* Scribbles That Matter A5 Dotted ($15)
- Pens: Micron 05 ($3) or *Budget-friendly alternative:* Papermate Flair Pens ($10 for a pack)
- Washi Tape: A simple black and white set ($5) or *Budget-friendly alternative:* A multi-color set from a craft store ($5)
Skill Level: Beginner
Here’s my go-to approach: Start messy. Seriously! You don’t need to be perfect. I often remind myself that done is better than perfect.
What I love about minimalist journaling is that it lets you personalize your space without the stress of creating a masterpiece.
Step-by-Step Layout: Monthly Overview****
- Draw a box: Create a 4cm x 6cm box, 2cm from the top and 1cm from the left margin, using a 0.5mm black pen. This will be your title area.
- Add a title: Write “October” (or your month of choice) in bold letters at the top of the box.
- Create a grid: Below the title, draw a grid with 7 columns (for each day of the week) and 5 rows (for the weeks). Each cell should be 3cm x 3cm, with 0.5cm spacing between them.
- Highlight weekends: Use washi tape to underline the Saturday and Sunday columns. This adds a little flair while maintaining clarity.
- Add key events: In the boxes, jot down any important dates or events for the month. Use symbols for quick reference—like a star for birthdays or an exclamation mark for deadlines.
Engagement Break:
You might be thinking, “This sounds too simple!” But trust me, the magic is in the minimalism. I used this layout for three months, and it really helped me keep track of my goals without feeling overwhelmed.
Common Mistake Most Beginners Make
One pitfall? Over-decorating. It’s tempting to fill every space with doodles, but remember that every decorative element should serve a purpose. Too much can lead to visual clutter, making it harder to track what you need.
Alternative Approach: Seasonal Themes
As we transition into November, consider a seasonal theme. You could swap out your black and white washi tape for something with autumn leaves or pumpkins. This small change can keep your journaling fresh without complicating your layout.
Try This Today!
Grab your supplies and sketch out your monthly overview. Make it functional and simple—remember, no artistic talent is required. You’ll be amazed at how effective this minimalist approach can be. Give it a go and see how it transforms your journaling experience!
# Fear of Imperfect Artwork
It's common to feel apprehensive about starting bullet journaling due to fears that your artwork won't meet certain standards. This concern often leads beginners astray, focusing too much on aesthetics rather than the true goal of the practice: organization and personal growth. Remember, the essence of a bullet journal is its flexible structure, which allows you to adapt it to your own needs without the pressure of artistic perfection.
Why This Matters
Why You Shouldn't Let Fear Hold You Back from Bullet Journaling
Ever stared at a blank page, pencil in hand, and thought, “I can't do this”? I've been there, too. It’s so easy to think you need to be an artist to bullet journal effectively. But here’s the truth: you don’t! You’re missing out on some fantastic mental health benefits if you let that fear win. Research shows that getting creative—no matter your skill level—can lower stress and boost your well-being.
What I love about bullet journaling is that it’s all about making it work for you. It’s not about perfection; it’s about functionality and self-expression. I’ve tried fancy artistic spreads and minimalist layouts, and guess what? Both have their charm! You don’t need to be Picasso to organize your life. Minimalist designs can be just as powerful. Ready to dive in?
Supplies You’ll Need:
- Notebooks:
- Premium: Leuchtturm1917 A5 Dotted
- Budget-Friendly: Scribbles That Matter A5 Dotted
- Pens:
- Premium: Tombow Dual Brush Pens
- Budget-Friendly: Crayola Supertips
- Fine Liners:
- Premium: Micron 05
- Budget-Friendly: Sharpie Pen
Skill Level: Beginner
Let’s Talk Layouts
Start with a basic monthly spread. Draw a rectangle measuring 20cm x 15cm, and leave a 2cm margin at the top for your month’s title. Use a 0.5mm black pen for clear lines. Inside, divide the box into seven equal sections for the days of the week—each section should be 2.5cm wide.
Feel that? That’s the satisfaction of creating something functional! You can add a little color to the headers using your Tombow pens. Just a light brush stroke will do. Remember, perfect is the enemy of done. Even a simple layout can help you track your goals and tasks effectively.
Common Mistake to Avoid
One mistake I see a lot of beginners make is getting hung up on aesthetics. Don’t stress over making it look like it came out of a magazine. Your bullet journal is for you, not for a gallery! Sometimes, I’ve spent too long on a spread only to realize it wasn’t practical for my daily life. Keep it simple.
An Engagement Break
What I’d do differently? If I could go back, I’d start with a few minimalist spreads instead of diving headfirst into elaborate designs. They’re quicker, easier, and less intimidating. Plus, they give you the chance to focus on what really matters: tracking your goals and reflecting on your day.
The Power of a Mindset Shift
Think of it this way: you’re at a crossroads. You can either stay stuck in unproductive habits or pick up this system that can genuinely help you. Minimalist spreads show you that organization, clarity, and emotional benefits are within reach—even if you don’t draw a single original line.
Try This Today
So, grab your supplies and start messy. Set a timer for 15 minutes and create your first monthly spread. Use those budget-friendly pens and just go for it. Remember, every stroke counts. You’re building a tool that works for you, and that’s what matters most.
You've got this!
Who It Affects
Who It Affects
You’re not alone if the fear of creating imperfect artwork has kept you from starting your bullet journal. I’ve been there, too. That nagging worry about lacking artistic skills? It's a real barrier. Trust me, I’ve talked to so many aspiring journalers who feel their spreads won’t measure up to the Instagram-perfect layouts they see online.
Ever felt that way? You scroll through beautiful layouts and think, “I can’t create that.” It’s a tough cycle, right? This perfectionism can stop you before you even get started. I’ve tried both the elaborate artistic spreads and the minimalist functional layouts, and I can tell you: done is better than perfect.
What I love about the minimalist approach is how it shifts the focus from flawless aesthetics to functionality. You don’t need to confront those artistic insecurities head-on to enjoy the benefits of bullet journaling. Think about it: you can boost your productivity while keeping it accessible and sustainable. Ready to dive in?
Supplies You’ll Need
- Notebook: Leuchtturm1917 A5 Dotted ($20) or budget-friendly alternative: Scribbles That Matter Dotted Notebook ($15)
- Pens: Tombow Dual Brush Pens ($10 for a set) or budget-friendly alternative: Crayola Super Tips ($5 for a set)
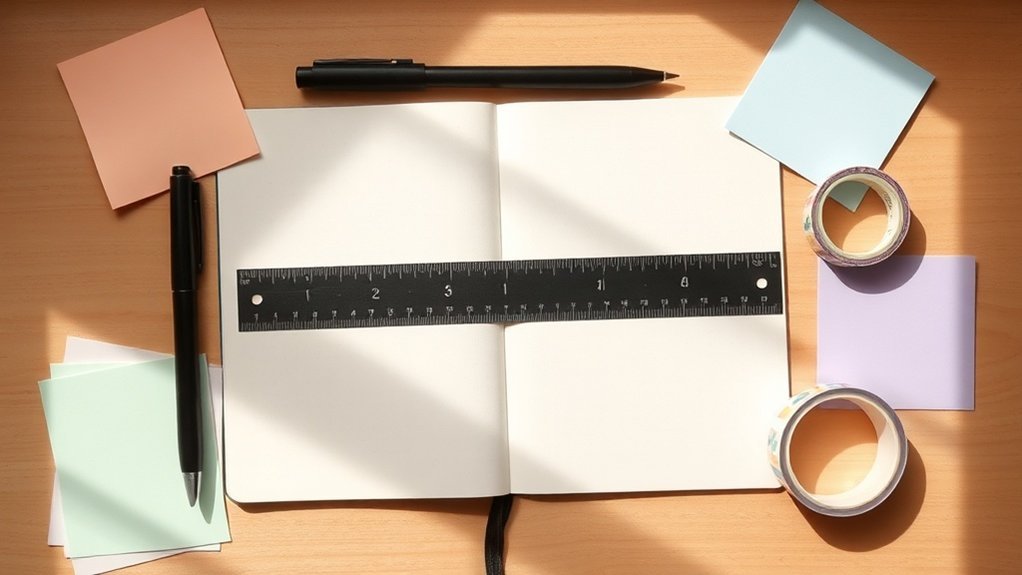
- Ruler: A standard clear ruler (about $2)
- Black Pen: Micron 05 ($3) or budget-friendly alternative: Sharpie Fine Point ($2)
Skill Level: Beginner
Let’s kick off with a super simple layout that’s both functional and stylish. This monthly spread will help you track events, goals, and tasks without the pressure of perfection.
- Draw a 5cm x 8cm rectangle on the top left corner of your page, 2cm from the top and 1cm from the left margin. This will be your month header.
- Inside the rectangle, write the name of the month in big, bold letters. I like to use a black pen for this part.
- Create 4 smaller boxes (each 5cm x 5cm) below the header. Space them out evenly, about 1cm apart. These will be for your weekly goals.
- Now, add a task list on the right side of the page. Draw a 5cm x 12cm rectangle, 2cm from the top and 1cm from the right margin.
Here's where it gets fun! Feel free to add a splash of color with your Tombow pens. Just a little color can make your page pop while still keeping it functional.
A Quick Tip
The mistake most beginners make? Overthinking it! You don’t need to fill every space perfectly. Start messy. That counts as progress!
Engage with Your Journal
As you fill out your spreads, consider how each decorative element can serve a purpose. For example, if you’re using color coding for tasks, make sure it’s easy to scan. The Ryder Carroll method emphasizes practicality, and I’ve found that the more functional my layout is, the more I stick with it.
Action Step
Try this today: set aside 15 minutes to create your own monthly spread! Remember, it doesn’t have to be perfect. Just get started, and soon enough, you’ll find yourself enjoying the process as much as the end result. You got this!
# Perfectionism Blocks Creative Expression
Perfectionism, as we've seen, can stifle your creative expression by imposing unrealistic standards that hinder your journaling journey.
This struggle often stems from fears and comparisons that create anxiety and procrastination.
Knowing this, what steps can you take to break free from these constraints and embrace your creativity? Transforming anxious thoughts into trackable patterns through bullet journaling can help you reclaim your artistic voice.
Let's explore practical strategies to reclaim your artistic voice.
Root Causes
Overcoming Perfectionism in Bullet Journaling
Ever felt that rush of anxiety just before you open your bullet journal? You're not alone. That fear of making mistakes can be paralyzing, can't it? I remember staring at my blank pages, overthinking every design choice. I’d imagine everything going wrong before I even started, which just led to procrastination. It's a cycle that can be tough to break.
What I love about bullet journaling is that it doesn’t require artistic mastery. Trust me, I’ve been there—comparing my spreads to those flawless ones online. It’s easy to feel like anything less than perfect isn’t worth doing, but that’s just a trap. Let’s flip that mindset! Instead of seeing failure as something to fear, think of it as feedback. That's how growth happens.
Supplies You’ll Need
- Notebook: Leuchtturm1917 A5 Dotted ($20) or budget-friendly alternative: Scribbles That Matter Dotted Notebook ($15)
- Pens: Tombow Dual Brush Pens ($10 for a set) or budget-friendly alternative: Crayola Super Tips ($5 for a set)
- Ruler: Any standard ruler (around $5) or budget-friendly alternative: a straight edge from any old notebook or even a piece of cardboard.
Skill Level: Beginner
No experience necessary—let's keep it simple and fun!
Get Started
- Choose a theme: Think of the season or month. For example, for October, you might go for autumn leaves or Halloween motifs.
- Draw your boxes: For your monthly spread, draw a 4cm x 6cm box, 1cm from the left margin, using a 0.5mm black pen. Leave a 1cm gap between boxes. This spacing keeps it clean and organized.
- Add headers: Use a Tombow pen to write “October” in a fun style at the top of your page. Don't worry if it’s not perfect—just have fun with it!
Common Mistake Alert
The mistake most beginners make? Thinking everything needs to be perfect from the start. You don’t have to have a layout down the first time. Start messy—it counts!
Engage with Yourself
Feeling that urge to compare your work to others? Instead, focus on what you enjoy. Is it the process or the end result? Remember, done is better than perfect!
Tips for Functionality
Every decorative element should have a purpose. If you’re doodling leaves, make sure they help you track your tasks or goals. Use color coding to make it easier to scan your pages quickly.
Try This Today
Grab your notebook and some pens. Pick a simple monthly theme and just start! Set a timer for 15 minutes—no pressure to make it perfect. Embrace the messiness of creativity!
You’ve got this! Let’s make bullet journaling feel achievable and fun, one spread at a time.
Contributing Factors
Contributing Factors to Journaling Roadblocks
You know that feeling when you sit down with your journal, ready to create, but then the fear of making a mistake creeps in? Trust me, I’ve been there. It can make you hesitate, or worse, avoid drawing altogether. That’s where perfectionism can derail your entire journaling practice.
Here’s what I’ve learned over the years about the contributing factors that might be holding you back:
- Fear of imperfection: It can trigger all sorts of avoidance behaviors.
- High aesthetic expectations: They can overwhelm your motivation.
- Anxiety about visual appeal: This often prevents you from even starting.
- Self-imposed standards: Sometimes, they exceed what’s realistic.
- Mistake-aversion: It stifles your willingness to explore creatively.
What I love about journaling is that it should be a space for you to express your thoughts freely. The pressure to create Instagram-worthy spreads is totally self-imposed. Your perfectionism doesn’t protect your journal's quality; it keeps you from capturing those brilliant ideas altogether! Feel that?
Embracing Imperfection
Here’s the revolutionary part: when you recognize that functionality trumps aesthetics, you start to see the true value of journaling. It’s all about capturing your thoughts without the pressure to perform.
I’ve tried both ways—restricting myself to perfect layouts and embracing a more relaxed approach. Guess which one stuck? The messy, imperfect one!
Quick Tips for Getting Started
- Start messy: That counts!
- Remember: Perfect is the enemy of done.
Let’s break the cycle together. You don’t need a fancy setup. Just grab some basic supplies:
- Notebook: Leuchtturm1917 A5 Dotted is great, or go for a budget-friendly option like a simple grid notebook.
- Pens: My go-to is Tombow Dual Brush Pens, but Micron 05 pens are a solid, affordable alternative.
- Stickers or Washi Tape: For that little extra flair—check out budget-friendly options at your local craft store.
Skill Level
This approach is perfect for Beginners. No experience needed, just some basic supplies and a willingness to dive in!
Engagement Break
Here’s a common mistake I see: many beginners think every spread must be perfect from the start.
It’s so easy to get caught up in the aesthetics that you forget the purpose. What I’d do differently? Focus more on functionality first. Your journal is there to support you, not to stress you out!
Your Action Plan
Ready to try this today? Grab your supplies, pick a theme—maybe it’s the upcoming month or a seasonal transition—and just start.
You can even set a timer for 10 minutes and see what you create! Remember, it doesn’t need to be perfect. It just needs to be done.
Final Thoughts
So, the next time you sit down with your journal, remind yourself that it’s about capturing your thoughts and ideas.
You’ve got this! Don't let perfectionism hold you back. Start messy and enjoy the process.
# Perfectionism Paralyzes Starting Points
You've likely encountered the same expert consensus: perfectionism stops you before you begin because you're afraid your layouts won't meet your own standards.
While researchers and practitioners differ on whether to embrace minimalism as a workaround or confront the perfectionist mindset directly, one thing is clear: the real challenge lies in overcoming that initial paralysis.
Key Findings
Key Findings
Hey there, fellow journaler! Let’s chat about something I've noticed over the years: perfectionism can really hold us back from diving into our bullet journaling. Ever felt that pressure to make your journal look Instagram-worthy before you’ve even jotted down a single thought? I’ve been there too! It can create a major roadblock.
But here’s the good news: research shows that functionality wins over aesthetics when it comes to boosting productivity and easing anxiety. When I shifted my focus from trying to make everything look perfect to just getting things done, my journaling practice flourished. I started to build real confidence with simple layouts and minimal decorations.
Supplies You'll Need:
- Journal: Leuchtturm1917 A5 Dotted (or a budget-friendly option like the Scribbles That Matter Dotted Notebook)
- Pens: Tombow Dual Brush Pens (or Crayola Super Tips for a wallet-friendly choice)
- Fineliner: Micron 05 (or a Sharpie Pen for an affordable alternative)
Skill Level: Beginner (no experience, basic supplies)
Let’s Get Started!
Here’s a layout I used for three months that kept me on track without all that perfection pressure. It’s a simple monthly overview that works wonders:
- Draw a box: Create a 16cm x 20cm rectangle, 2cm from the top and 1cm from the left margin, using a 0.5mm black pen.
- Divide it: Inside the box, draw one horizontal line 4cm from the top. This creates a header space and a section for your tasks.
- Label it: Write “Monthly Overview” in a fun font at the top. Use your favorite color from the Tombow pens to make it pop!
- Create sections: Below the header, draw two 5cm x 6cm boxes side by side for “Goals” and “Events”.
- Add a habit tracker: Below the boxes, draw a grid for your habits — 4 columns (one for each week of the month) and as many rows as your habits. Each box should be 4cm x 2cm.
Feel that? That’s the thrill of starting without the pressure! Keep it functional; you’ll thank yourself later.
Common Mistake Alert
A mistake most beginners make is getting stuck on how it should look. Remember: done is better than perfect! Embrace the messiness of your thoughts and ideas. You’re creating a space for you, not a gallery piece.
Quick Tip
If you’re feeling overwhelmed, start with one page at a time. You don’t need to fill everything out on day one. Just tackle what feels right.
I’ve tried all kinds of spreads, and what I love about this approach is that it keeps me focused. It’s all about celebrating those little wins — like ticking off a goal or successfully tracking a habit.
Ready to Try This Today?
Grab your supplies and sketch out your monthly overview! Remember: it doesn’t have to be perfect. It just needs to work for you. That’s what makes bullet journaling such a powerful tool. Your journal should be a reflection of your life, not a competition. Happy journaling!
Where Experts Agree
Supply List:
- Notebook: Leuchtturm1917 A5 Dotted ($20) or budget-friendly alternative: Scribbles That Matter A5 Dotted ($15).
- Pens: Tombow Dual Brush Pens ($10 for a set) or budget-friendly alternative: Crayola Super Tips ($6 for a set).
- Stickers: Planner stickers from Happy Planner ($10) or printable sticker sheets from Etsy ($5).
Skill Level: Beginner
—
You know that moment when you stare at a blank page, feeling the weight of perfectionism? I’ve been there, too. The pressure to create a flawless spread can be overwhelming.
It’s easy to get stuck just planning, without ever really diving in. Here’s a little secret: perfectionism is a creativity killer. You might be feeling that analysis paralysis—where the fear of making it “perfect” keeps you from starting at all.
Let’s flip that script. What I love about bullet journaling is that it’s all about functionality first. Seriously, don’t let aesthetics hold you back. A minimalist approach can be a game-changer. By simplifying, you free yourself from the stress of elaborate designs, allowing you to focus on tracking what truly matters.
Here’s my go-to approach: Start messy. Use stencils, incorporate stickers, or stick to basic layouts. These tools can take away that drawing anxiety while keeping your journal effective. You don’t need to be an artist to make it work.
Remember: perfect is the enemy of done.
Step-by-Step Layout:
- Monthly Overview: Draw a rectangle measuring 14cm x 21cm, 2cm from the top and 1cm from the left margin. Use a Micron 05 pen for clean lines.
- Calendar Grid: Inside that rectangle, create a grid. For a month with 30 days, draw 7 columns (2cm wide each) for the days of the week. Make sure to leave 1cm between each row for spacing.
- Decorative Header: At the top, write “October” in a bold, fun font. Use a Tombow Dual Brush Pen in a warm orange for a pop of color.
- Add Stickers: Use seasonal stickers to mark important dates (like Halloween). This adds a personal touch without overwhelming the page.
- Daily Log: Under the calendar, leave space for daily tasks. Draw a box measuring 14cm x 5cm for each day, separated by a 0.5cm gap.
Feel that? It’s the freedom of starting without the pressure.
—
Common Mistake Alert
The mistake most beginners make is trying to make everything perfect from the start. Trust me, I’ve tried that, and it’s exhausting!
I found that keeping it simple really helped me stay consistent. The first few months, I focused on functionality, and that’s what actually stuck.
Engagement Break
Here’s an alternative approach: If you’re feeling adventurous, try a themed spread. For example, use spooky colors and doodles for Halloween!
It keeps things fun and seasonal while still being functional.
—
Final Thoughts
Ready to give it a shot? Grab your pens and notebook, and start today.
Where They Disagree
Where They Disagree
Have you ever stared at a blank page, feeling overwhelmed by the idea of making it look perfect? I totally get it! As a creative journaler with over seven years of experience, I’ve been there too. It can feel like a lot of pressure—minimalists say function is key, while traditionalists believe you need that visual flair to keep the motivation going.
But here's the thing: striving for perfection can actually hold you back. When you fixate on creating flawless spreads, you might find yourself paralyzed, unable to start. That pressure turns your journal into an intimidating blank canvas. Trust me, I've tried both ways—sometimes the simplest layouts are the most effective.
The Minimalist Approach
What I love about minimalism is that it encourages sustainable habits. You don’t need to be an artist; you just need to track your life! Simple layouts using stencils or stickers can be both functional and decorative without the stress of perfect drawing skills.
You’ll sidestep the perfectionism trap entirely and focus on what actually matters: consistency. Remember, done is better than perfect!
Supplies You'll Need
- Notebook:
- Leuchtturm1917 A5 Dotted (around $20)
- Budget-friendly: Scribbles That Matter A5 Dotted (around $15)
- Pens:
- Tombow Dual Brush Pens (around $10 for a set)
- Budget-friendly: Crayola Supertips (around $5 for a set)
- Stickers:
- Cute decorative stickers from your favorite shop (around $5)
- Budget-friendly: Printable sticker sheets from Etsy (around $2)
Skill Level: Beginner to Intermediate
Here’s a simple layout idea to get you started.
- Monthly Calendar:
- Draw a rectangle measuring 20cm wide by 15cm tall on the top half of your page.
- Divide the rectangle into 7 equal columns, each 2.8cm wide.
- Mark the days of the week at the top: Sunday to Saturday.
- Underneath, create 6 boxes (3 columns of 2 boxes) for each week. Each box should be 2.5cm tall.
- Habit Tracker:
- Below the calendar, draw a 20cm x 10cm box.
- Divide this box into 5 rows (each 2cm tall) for different habits you want to track.
- Leave space on the left side (about 2cm wide) to write the habit names.
- Decorate:
- Use your Tombow pens to add color to the headers and habit names.
- Stickers can be added in the corners or along the edges for a bit of flair without overwhelming the page.
A Quick Engagement Break
Feel that? Sometimes, less is more! If you find yourself getting frustrated with your designs, remember that it’s okay to keep things simple.
What would you do differently? Maybe try a black-and-white theme one week?
Building Habits
If you focus on functionality first, you’ll find it easier to stick with your journaling practice. I’ve used similar layouts for months, and they really helped me build a consistent habit.
Plus, they’re easy to adapt for different months—just switch out colors or themes based on the season!
The Mistake Most Beginners Make
One big mistake I see is overcomplicating designs. Remember, the goal is to track your life, not spend hours perfecting a spread.
If a spread takes longer than 30 minutes to set up, reconsider its practicality. What’s important is that you enjoy the process and find it helpful.
Try This Today
Grab your supplies and create a simple monthly calendar and habit tracker. Start messy; it all counts! Embrace the freedom to be imperfect, and watch how it transforms your journaling experience.
You’ve got this!
# Skip Elaborate Decorations
By bypassing elaborate decorations, you create space to hone in on organization and consistency.
This streamlined approach not only saves you time but also paves the way for a sustainable journaling habit.
What You Can Do
What You Can Do: Crafting a Minimalist Bullet Journal
Ever find yourself staring at a blank page, feeling the pressure to make it look perfect? Trust me, we’ve all been there. But here’s the thing: creating a minimalist bullet journal doesn’t mean you have to sacrifice style or personality. You can totally have visual interest without being an artist!
Let’s dive into some practical techniques that can elevate your spreads while keeping things functional:
Supply List
- Tombow Dual Brush Pens (or Crayola Super Tips for a budget-friendly option)
- Leuchtturm1917 A5 Dotted Notebook (or Moleskine Classic Notebook)
- Micron 05 Pens (or Sakura Pigma Micron for a more economical choice)
Skill Level: Intermediate
If you’re comfortable with basic layouts and hand lettering, you’re in the right spot!
- Stencils: These are a game-changer. They help create sharp, consistent designs without the hassle of freehanding. Just grab a stencil set with various shapes and patterns. Place it on the page, and trace with your pen. Voilà! Instant style.
- Washi Tape: This stuff adds such fun texture and color. Use it to create borders or section off parts of your page. Just tear off a piece and stick it down. It’s that easy! Plus, you can layer it for even more visual interest.
- Stickers: I love using seasonal stickers to bring a theme to life. They’re perfect for planning around holidays like Halloween or summer vacations. Just peel and stick where you want them.
- Negative Space: This is all about making your journal easy to read. Leave blank areas on the page so your content stands out. It helps you focus on what’s important without overwhelming yourself.
- Hand Lettering Basics: Don’t stress about being perfect. Start with simple letterforms and practice a bit each day. What I love about this is that it really helps you develop a unique style that feels like you.
Each of these techniques prioritizes function while keeping things visually appealing. Your journal should work for you, not the other way around.
Feel that? It’s the freedom to create without the burden of perfectionism. Remember, done is better than perfect. Don’t be afraid to start messy; that counts!
Engagement Break
What I’ve learned over the years is that the mistake most beginners make is getting too caught up in making every page look flawless. You don’t have to! Try focusing on what you want to track or plan for the week, and let your creativity flow from there.
Seasonal Touches
As you plan your spreads, think about the seasons. For example, in October, you might want to incorporate fall colors—think deep reds and oranges. You can use your stencils for leaf shapes or add washi tape with autumn patterns.
Here's a quick layout tip: draw a 4cm x 6cm box, 1.5cm from the top margin, to create a header for your monthly goals. Fill it with a bold color from your Tombow pens, and use white space to separate it from the rest of your content.
What I Love About This
I used this layout for three months, and it helped me stay organized without feeling overwhelmed. The combination of washi tape and stencils kept my pages looking fresh and fun—but not too busy.
Try This Today
Pick one technique from above and incorporate it into your next spread. Maybe you’ll use a stencil for a fun header or add a splash of washi tape to brighten up a page.
Whatever you choose, just remember—your journal is a reflection of you. Embrace the process, and let your personality shine through!
What to Avoid
What to Avoid in Your Minimalist Journal
Hey there, fellow journaler! Let’s chat about something I’ve learned the hard way: keeping your minimalist journal functional while resisting the urge to over-decorate. I’ve been there—spending hours on intricate designs only to realize they muddled my purpose. Sound familiar?
Here’s the deal: intricate artwork can distract from what really matters—capturing your thoughts and plans. Instead of filling every inch with doodles, embrace whitespace. It’s like a breath of fresh air for your pages! This won't only make your spreads more usable but will also give your eyes a break. Trust me, it's a game changer.
Supply List:
- Pens: Tombow Dual Brush Pens (or Crayola Supertips for a budget-friendly option)
- Notebook: Leuchtturm1917 A5 Dotted (or a simple Moleskine Classic)
- Fine Liners: Micron 05 (or a set of Paper Mate Flair pens)
Skill Level: Beginner
Streamlining Your Aesthetic
What I love about this approach is that every mark you make should have a purpose. Skip the ornate borders and detailed illustrations that can turn your spread into a visual noise fest. Instead, think about using simple icons that help you track what you want, without overwhelming your pages.
For example, a small star for tasks or a heart for gratitude. It’s quick, easy, and effective!
Here’s a quick tip: try a monochrome palette. I’ve found that sticking to one or two colors not only saves time but also reduces decision fatigue. Overthinking colors can just lead to stress!
Engagement Break: Ever made a beautiful spread that took way too long to finish? I have! Sometimes, the spreads that look the most stunning on Instagram aren’t practical for daily use. What I’d do differently? Keep it simple!
Practical Layout Ideas
Let’s get into some specifics! Draw a 5cm x 5cm box in the top right corner for your monthly overview, 2cm from the top and right margins. Use a black pen for the outline, and fill it with light gray for contrast.
Recommended for You
🛒 Dotted Journal Notebook
As an Amazon Associate we earn from qualifying purchases.
This draws the eye in and keeps your important notes organized.
For daily tasks, create a checklist with simple bullet points. I usually leave a 1cm margin on the left for easy checking off. It feels so satisfying to mark things as done, doesn't it?
Real Talk: This minimalistic style looks sleek but can feel too bare for some. If you find yourself missing the creative flair, try adding a simple line or two of washi tape that matches your theme. It adds a personal touch without cluttering.
Keep It Functional
Remember, your journal is a tool, not a decorative project. I’ve tried both flashy and simple spreads, and honestly, the simpler ones stick with me longer.
This minimal approach keeps me focused and helps me track my life efficiently.
Try this today: Choose one spread to simplify. Maybe it’s your weekly layout or a monthly tracker. Strip it down to the essentials, and see how it feels! You might just find that less is truly more.
The mistake most beginners make? Overcomplicating their layouts. Start messy. Embrace the simplicity. That counts! You’ll be amazed at how freeing it's to let go of perfectionism. Go ahead, give it a shot!
Comparison of Approaches
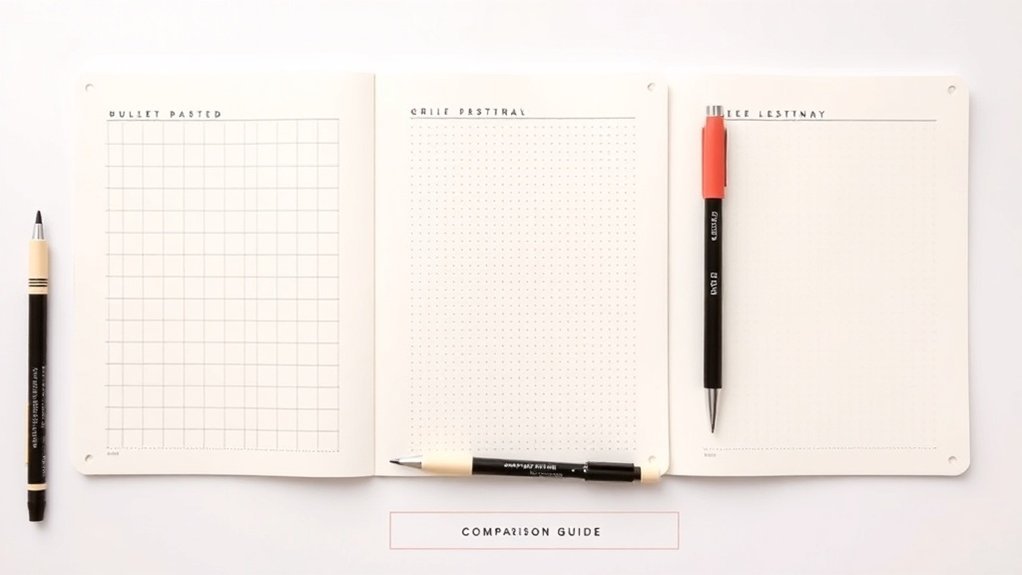
Finding Balance in Your Bullet Journal: Minimalist vs. Elaborate Approaches
Ever sat down to journal and felt overwhelmed by all those perfectly crafted, colorful spreads on Instagram? I’ve been there, too. After seven years of bullet journaling, I’ve tried everything from intricate designs to straightforward layouts. Here’s the thing: both can work, but it’s all about what fits your life right now. Ready to explore?
Core Technique: Minimalist Spreads****
Minimalist bullet journaling is all about stripping away the fluff and keeping it functional. You don’t need advanced drawing skills or hours of free time. Instead, think clean lines, simple layouts, and a focus on what you really want to track. You’ll find that these spreads help you prioritize tasks without the pressure of making it look perfect.
Supply List
- Notebook: Leuchtturm1917 A5 Dotted ($20) or a basic composition notebook ($3)
- Pens: Micron 05 ($2) or any black gel pen ($1)
- Colors: Tombow Dual Brush Pens ($7 for a pack) or Crayola markers ($6 for a pack)
Skill Level: Beginner (no experience, basic supplies)
Setting Up Your Minimalist Spread
- Choose Your Layout: Start with a simple weekly spread. Draw a 4cm x 6cm box in the top left corner for your title. Use a 0.5mm black pen and leave 1cm from the top and side margins.
- Days of the Week: Below your title, draw seven 2cm x 3cm boxes for each day. Space them 0.5cm apart. This helps you track daily tasks easily.
- Habit Tracker: Next to your days, create a 4cm x 6cm grid for your habit tracker. Make six rows for each habit you want to track—give yourself enough space to check off each day.
- Color Coding: Use one color from your Tombow pens for the days of the week and a different one for your habit tracker. This makes it visually pleasing without being overwhelming.
- Final Touches: Add a small area at the bottom for notes or reflections. Just a simple box will do!
Personalized Perspective
What I love about this approach is how quickly I can set it up. I used a similar layout for three months, and it really helped me focus on my habits without the pressure of making everything look perfect. Done is better than perfect, right?
Why Minimalist Works
You’ll find that minimalist spreads speed up your setup, letting you focus on tracking your habits and managing your tasks. Plus, there’s no guilt in comparing your work to those intricate designs you see online. Clean layouts and monochromatic palettes can transform your journal into a powerful productivity tool.
Common Mistake
The mistake most beginners make? Trying to make their spreads look like the ones they see online. Trust me, it’s okay to start messy! You don’t need to be a pro artist to create a functional journal.
Engagement Break
Ever thought about a hybrid approach? Mixing minimalist and elaborate elements can be a fun way to express yourself while still keeping things manageable. Maybe add a splash of color or a doodle on a special occasion but keep the structure simple.
Try This Today
Take a moment today to set up a minimalist spread. Grab your supplies and just start! Even if it’s not perfect, remember: it counts. You’re creating a system that supports you, not one that adds pressure. Happy journaling!
Key Takeaways
Key Takeaways for Minimalist Bullet Journaling
Hey there! If you've been diving into minimalist bullet journaling, you might’ve noticed that it’s all about functionality over fancy designs. Isn’t it refreshing? You’re not in a race to create a masterpiece—you're just optimizing your organization. Let’s chat about what to focus on next!
Minimalist bullet journaling strips away the pressure—it's about optimizing your organization, not creating a masterpiece.
Here’s what I’ve learned that works wonders:
- Stick to monochrome palettes and clean lines. This really helps in decluttering your visual space. Trust me, less is often more!
- Use stencils, stickers, and washi tape to spice up your spreads without needing to channel your inner artist. It’s a lifesaver if you’re not into drawing!
- Prioritize negative space. Give your layouts some breathing room. It makes everything feel more organized and less chaotic.
- Create consistent tracking systems for your tasks and goals. This keeps you accountable and on track.
- Schedule regular journaling sessions. Building a habit is key, and consistency is your best friend!
What I love about this approach is that it strips away the pressure. By cutting down on unnecessary decorations, you can focus on what truly matters: tracking your progress, setting intentions, and cultivating mindfulness.
Plus, this streamlined method gets you results without needing to be an art prodigy or spending hours on it.
My Minimalist Supply List
Before we jump into specifics, here’s a quick supply list to get you started:
- Notebook: Leuchtturm1917 A5 Dotted (premium) or Scribbles That Matter Dotted Journal (budget-friendly)
- Pens: Micron 05 (premium) or Papermate Flair Pens (budget-friendly)
- Washi Tape: Any fun designs (premium) or Dollar Store Washi Tape (budget-friendly)
- Stencils: Reusable stencils from Amazon (premium) or DIY stencils from cardstock (budget-friendly)
Skill Level: Beginner to Intermediate (no experience needed, just some basic supplies)
Getting Started
- Choose a monochrome color scheme. For me, black and white is a classic combo. Use a black pen for outlines and a gray pen for softer elements.
- Draw a 4cm x 6cm box on the top left of your page, 1cm from the top margin, using a 0.5mm black pen. This will be your monthly tracker. Inside, jot down your key tasks for the month.
- Leave 1cm of space below the box for a brief reflection section. Here, write down what you learned or what you accomplished.
- Add a 1cm border around the page. This helps frame your content and makes it feel organized.
- Space out your entries with at least 1cm between each section. This keeps everything readable and not cramped.
Engage and Reflect
Feel that? That’s the freedom of a minimalist layout! You’re simplifying the process so it feels less overwhelming.
Remember, it’s normal to start messy. I’ve tried both elaborate designs and minimalist setups, and honestly? Both have their charm. But what’s important is finding what works for you.
Common Mistake Alert: The mistake most beginners make is overcomplicating their layouts. Keep it simple! Focus on what you need to track and don’t stress over making it look ‘perfect'.
Try This Today
Ready to give it a go? Choose a simple layout, maybe start with just one month of tracking.
Frequently Asked Questions
What Supplies Do Minimalist Bullet Journalists Actually Need to Get Started?
What supplies do I really need to start a minimalist bullet journal?
Any notebook works, but a dotted A5 gives you the most flexibility. You’ll just need a pen you enjoy using; try the Uni-ball Jetstream ($11 for 3) for smooth writing.
If you want to add some flair, grab a ruler for neat lines. Stick with these basics to keep it simple and effective!
How long will it take to set up my first spread?
This spread takes about 30 minutes to set up.
Once you have the layout figured out, it’ll only take you about 5 minutes daily to fill in. You’ll find your groove quickly!
Don’t worry about perfection; the beauty is in the process.
Can I use any pens, or do I need special ones?
You can use any pen!
If you’re looking for a recommendation, the Muji Gel Pen ($12 for 5) is a great choice for smooth writing.
If you want different effects, try the Tombow Dual Brush Pens ($25 for 10) for some color, but they’re not essential. Just pick what feels good to you!
How much time should I dedicate to my bullet journal each week?
Set aside about an hour each week for planning.
This includes setting up your spreads and reflecting on your goals.
You can break it into short sessions, like 15 minutes a day, to make it manageable.
How Can I Organize My Spreads Without Traditional Grid Layouts or Rulers?
Q: How can I organize my spreads without a traditional grid?
You can definitely do it! Try using intuitive spacing and natural line breaks instead. For instance, stack related items vertically and separate categories with breathing room.
A dotted A5 notebook gives you the most flexibility, like the Leuchtturm1917 ($20) or a budget-friendly option like the Scribbles That Matter ($15). This setup takes about 15 minutes to layout.
Q: What about creating visual hierarchy?
You can create a clear visual hierarchy without rulers! Use dashes, bullets, or simple symbols.
Try Tombow Dual Brush Pens ($25 for 10) for vibrant accents, or Crayola Supertips ($6 for 20) if you're just starting out. This method takes around 10 minutes to set up and just a few seconds to maintain daily.
Q: How can I make my spreads feel fresh?
Embrace asymmetry for a modern look! Align text with subtle indents instead of rigid grids.
Using organic margins feels more inviting. Opt for a dotted notebook like the Rhodia Webnotebook ($30) for a smooth writing experience. It’ll take about 15 minutes to set up your first spread, but you’ll get quicker as you go!
Q: How do I use whitespace effectively?
Whitespace is your friend! It helps keep things clean and functional.
Separate sections with space to let your designs breathe. You can use a simple A5 notebook like the Moleskine Classic ($25) for this purpose. Setting up a spread with intentional whitespace might take 20 minutes, but maintaining it daily will only take a minute or two.
What Fonts or Handwriting Styles Work Best for Minimal Bullet Journal Pages?
What fonts or handwriting styles should I use for my minimal bullet journal pages?
Any basic sans-serif font works—try Helvetica or Futura for a clean look!
Embrace your own handwriting; it doesn’t have to be perfect. Mix uppercase and lowercase letters for added flair without clutter.
Use bold headers with lighter body text to create a nice hierarchy.
You can set up your layout in about 20 minutes, and it’ll take only 30 seconds daily to fill in.
For pens, consider Tombow Dual Brush Pens ($25 for 10) or Crayola Supertips ($6 for 20) to keep things neat.
How Do I Maintain Consistency Across Spreads While Keeping Designs Simple?
Q: How can I keep my journal designs consistent without being too strict?
You can totally maintain consistency by creating a flexible design system! Start with a limited color palette, like a mix of pastel shades, to use across your spreads. Standardize header styles and spacing for a cohesive look.
It takes about 15 minutes to set up a layout, and just a few seconds to fill it in daily. Try using Tombow Dual Brush Pens ($25 for 10) for clean lines.
—
Q: What tools should I use for simple designs?
Any notebook works, but a dotted A5 gives you the most flexibility. For pens, I recommend Tombow Dual Brush Pens ($25 for 10) or Crayola Supertips ($6 for 20) for vibrant colors.
Set aside about 20 minutes for your initial layout and 30 seconds daily to add details. Remember, it’s all about having fun with it—imperfections are totally okay!
—
Q: How do I create a rhythm in my journal without overcomplicating it?
Start by repeating simple elements like lines, boxes, and dots to build visual rhythm. It takes about 10 minutes to set up a spread this way.
Use consistent pen widths and margins to keep everything looking neat. Plus, you can switch up patterns while keeping your core design intact. You’ll find your style evolves beautifully, even with minor changes.
—
Q: What's the best way to innovate within my journal constraints?
You can innovate by rotating simple elements while sticking to your established design. This approach keeps your aesthetic fresh—try adding new shapes or layouts every few spreads!
It’ll take about 15 minutes to brainstorm and set up each new design. Use a good-quality notebook like Leuchtturm1917 A5 ($20) for a polished look that holds up over time. Don't stress—it's all part of the fun!
Can I Combine Minimalist Spreads With Functional Tracking Without Losing Simplicity?
Can I combine minimalist spreads with functional tracking without losing simplicity?
Absolutely! You can definitely merge these styles. Start with a dotted A5 notebook for flexibility.
Use clean grids, simple checkboxes, and icons for function without fuss. Setting up a habit tracker or mood log takes about 15 minutes, and you’ll spend just 30 seconds daily filling it in.
Try using Tombow Dual Brush Pens ($25 for 10) or Crayola Supertips ($6 for 20) for easy color coding. Remember, it doesn't have to be perfect!
What’s the best way to track my habits without clutter?
You can keep it simple! Use tables or dotted lines to create your trackers.
This setup takes about 15 minutes to create and only a few seconds each day to update. A dotted A5 notebook works wonders here.
Consider using a ruler for straight lines and colored pens like Papermate Flair ($15 for 12) to keep things visually appealing. You’ve got this!
How can I make my mood logs more effective yet simple?
Easily! Just use a simple grid layout with a few symbols to represent different moods.
It’ll take around 10 minutes to set up, then just 30 seconds to fill in daily. A good choice is a Leuchtturm1917 Dotted Notebook ($20) for its quality and ease of use.
Remember, it’s all about keeping it straightforward, so don’t stress if it’s not perfect!
What’s the quickest way to set up a goal progress tracker?
You can set it up in no time! Create a simple table with your goals and progress indicators.
This will take about 15 minutes initially, then just a minute or two to update weekly. A Midori MD Notebook ($20) is a solid pick for its minimalist design.
Keep it simple and focus on your wins—imperfections are part of the process!
Conclusion
Go for it—perfection isn’t the goal here! Grab your journal and a black pen. On the next blank page, draw a simple 2×3 grid. That’s your first weekly tracker. Fill in today’s column with your top three tasks. Done beats perfect every time!
Now, take a moment to look at that grid and think about how you'll fill it out this week. Next, consider adding a habit tracker—just three circles for each day of the week to mark off when you complete a new habit. You’ve got this!