In This Article
- Understanding Bullet Journal Monthly Spreads
- Essential Monthly Spread Layouts
- Must-Have Elements for Monthly Spreads
- Step-by-Step Setup Guide
- Customization Ideas for Different Lifestyles
- Tools and Supplies for Monthly Spreads
- Common Mistakes and How to Avoid Them
- Advanced Tips and Techniques
- Making It Stick: Your Monthly Spread Journey
Did you know that you who write down their goals are 42% more likely to achieve them? Here is the thing: After seven years of bullet journaling, I have seen this statistic play out countless times in my own life and in the journaling community.
This post contains affiliate links. If you purchase through these links, we may earn a commission at no extra cost to you.
Monthly spreads have become the backbone of my planning system, and honestly? They have completely transformed how I approach my goals, habits, and overall life organization. Want to know the secret? Whether you are a complete beginner or looking to level up your existing bullet journal, this guide will walk you through everything you need to create monthly spreads that actually work for your life.
By the end of this article, you will know exactly how to design, set up, and customize monthly spreads that keep you organized, motivated, and on track. You will appreciate this. Ready for this? Let me show you how your journal can become your most powerful productivity tool.
Understanding Bullet Journal Monthly Spreads
What Is a Monthly Spread?
Here is where it gets interesting: Think of a monthly spread as your bird's-eye view of the month ahead. You get a two-page layout that gives you space to see all 30-31 days at once, along with your goals, habits, and important events.
I remember my first monthly spread back in 2017 – it was a mess! But here is what You probably miss: I tried to cram everything onto one page and ended up with tiny, unreadable text. That is when I learned that monthly spreads need breathing room to actually be useful.
The beauty of monthly spreads lies in their flexibility. This matters to you because Here is the truth: Unlike pre-printed planners, you can adjust them based on what matters most to you each month. Busy work month? You add more project tracking. Focusing on wellness? You include mood and habit trackers.
Think about it: Your journal should work for you, not against you.
Core Components of Effective Monthly Layouts
Every successful monthly spread I have created includes these essential elements that you need to know about:
Calendar Overview: Whether it is a traditional grid or a creative layout, you need to see all the dates clearly. What you should remember is Pro tip: I prefer leaving enough space to write 2-3 words per day.
Goal Section: This does not have to be fancy. Fair warning: I usually dedicate about a quarter of one page to my 3-5 monthly goals. Keep it realistic – I learned this the hard way after setting 15 goals in my second month and achieving exactly zero.
But here is the catch: Habit Tracker: Even if you are only tracking one habit, having a visual representation is powerful. You can see how I have tried everything from simple checkboxes to elaborate color-coded grids.
Important Dates: Birthdays, deadlines, appointments – anything you absolutely cannot forget gets highlighted here. Here is the good news: You will never miss another important date when you have this system in place.
Reflection Space: Often overlooked, but this small section for monthly reflections has been game-changing for my personal growth. So what does this mean for you? You get to track patterns and celebrate wins.
Benefits of Monthly Planning vs. As you might expect, Weekly or Daily
Here is why I swear by monthly planning: perspective. When you are planning week by week, it is easy to lose sight of bigger goals. Daily planning can feel overwhelming and reactive for you.
Monthly spreads force you to think strategically. You will find that But wait, there is more. You will notice that they help you spot patterns – like why you always feel overwhelmed the third week of every month (hello, recurring work deadlines!).
I still do weekly and daily planning, but my monthly spread is the foundation that keeps everything else aligned. You will find that the bottom line? You need this big-picture view to make real progress on what matters most.
Essential Monthly Spread Layouts
Here is what nobody tells you: The layout you choose can make or break your monthly planning system. For you, This means for you Let me walk you through the options that actually work.
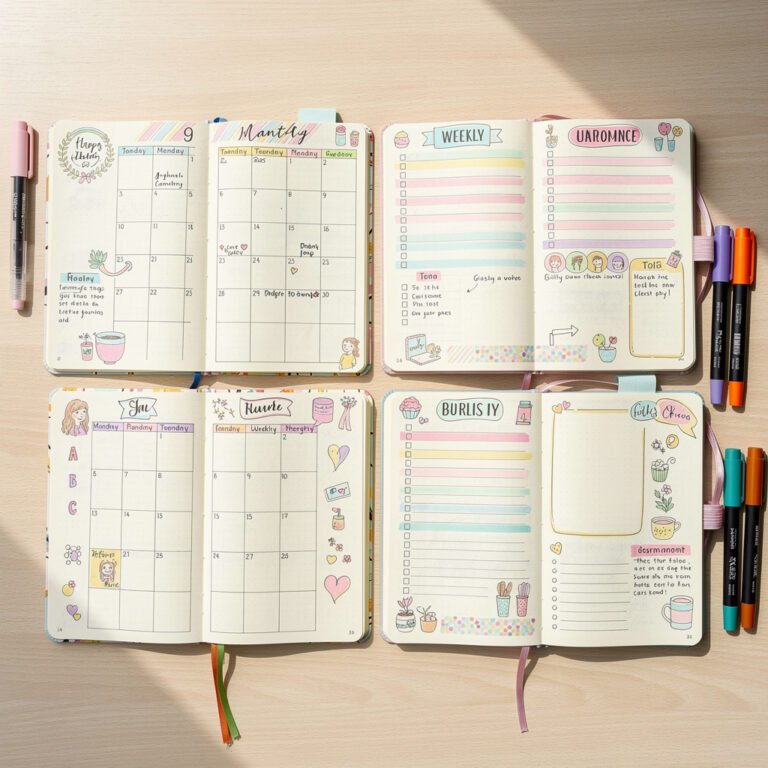
Traditional Calendar Grid Layout
The classic grid is popular for a reason – it works for most people. Here is how you set yours up:
Draw a 7×5 grid (or 7×6 for months with 31 days). Leave enough space in each box for your handwriting. Notice how you can Quick note: I use about 1 inch squares. Write the days of the week across the top, then fill in the dates.
Pros: Familiar format, easy to read, plenty of space for daily notes
Cons: Can feel boring, takes up lots of space
Best for: You if you like traditional planners, you are a heavy scheduler, or you coordinate multiple family calendars
But here is what You probably miss: You do not need to make every square the same size. Give yourself bigger boxes on days when you know you will need more writing space.
Minimalist Linear Timeline
Plot twist: This layout changed my life when I was going through a particularly busy period. Think about how you would Instead of a grid, you list the dates vertically down your page, like this:
1 │ ________________
2 │ ________________
3 │ ________________
It is clean, space-efficient, and perfect when you do not need to write much for each day. Think about it: Why waste space on a big grid when you only write one thing per day?
Best for: You if you love minimalist approaches, you have irregular schedules, or you want more space for goals and trackers
Creative Circular and Artistic Designs
Okay, these are not always practical, but they are so much fun! Here is where it gets interesting: I have experimented with spiral calendars, mandala-style monthly layouts, and even calendars shaped like flowers.
My favorite? A circular calendar with dates around the perimeter and goals/habits in the center. But here is the catch: It does not hold much information, but it is perfect for months when you want to focus more on habits than heavy scheduling.
Fair warning: These take longer to set up, but you might find the creative process relaxing and inspiring.
Functional Hybrid Approaches
This is where I have landed after years of experimentation. You might wonder why Here is the truth: You can combine a simple calendar (usually linear or small grid) with dedicated sections for different life areas:
- Left page: Calendar + important dates
- Right page top: Goals (work, personal, health)
- Right page bottom: Habit tracker + notes
Pro tip: Play around with combinations until you find what clicks for your brain. Your perfect layout might be completely different from mine, and that is exactly how it should be.
Must-Have Elements for Monthly Spreads
Ready for this? Let me show you the elements that transform a pretty layout into a productivity powerhouse.
Goal Setting and Achievement Tracking
Here is what nobody tells you: The secret is not in the structure – it is in making your goals visible to you every single day.
I write 3-5 goals max, and I include a simple progress tracker next to each one. For “Read 2 books this month,” I might draw two small book icons that you can color in as you finish each book. This is where you benefit. Mind-blowing, right? Visual progress is incredibly motivating.
Monthly Goal Categories You Should Rotate Through:
- Career/Work projects
- Health and fitness
- Learning and personal development
- Relationships and social connections
- Home and lifestyle improvements
But here is the catch: You need to choose goals that you can actually influence. “Get promoted” is less actionable than “Complete certification course” for you.
Habit Tracker Integration
After trying dozens of habit tracker styles, here is what I have learned: simpler is almost always better for you. My current go-to is a simple grid: habits listed on the left, dates across the top, with small circles to fill in.
Fair warning: Start with 3-5 habits maximum. I have been there with the 20-habit tracker that I abandoned by day 3. Here is what you gain: You will find that the real question is: Is it better for you to consistently track a few habits than to sporadically track many?
Habit Ideas That Actually Stick for You:
- Drink 8 glasses of water
- 10-minute morning stretch
- No phone first hour after waking
- Write 3 things you are grateful for
- Take vitamins
Pro tip: Choose habits you can do in under 10 minutes. You are more likely to stick with them.
Important Dates and Deadlines
I use a simple symbol system that has served me well for years, and you can adapt it for your needs:
★ = Birthdays and celebrations
⚡ = Deadlines (work, bills, etc.)
✈ = Travel or time off
🏥 = Appointments
📅 = Events and social plans
Here is the good news: You can pick symbols that make sense to your brain. Do not overthink it – just be consistent once you choose.
Monthly Reflection Space
This small section has probably contributed more to my personal growth than any other element. You should pay attention here. Here is what you will do: Answer three simple questions at the month's end:
Quick note: Sometimes I only write one sentence per question. That is enough for you too. The bottom line? Reflection turns experience into wisdom.
Step-by-Step Setup Guide
Think about it: Before you touch pen to paper, you need a plan that works for your specific life.
Planning Your Monthly Layout
Here is where it gets interesting: Spend 5 minutes thinking through your month before you start drawing. You will want to remember this. What are your priorities? Do you have a lot of appointments, or is it a quieter month? Are you focusing on building new habits?
I sketch my layout in pencil first, or sometimes on a separate piece of paper. Want to know the secret? This saves so much frustration later when you discover your spacing is off.
But here is what You probably miss: You should look at last month's spread and ask yourself what worked and what did not. Your best teacher is your own experience.
Drawing and Design Techniques
You do not need to be artistic to create beautiful, functional spreads. You will appreciate this. Here are my essential techniques that you can master:
Use a ruler. I cannot stress this enough for you. Even if you are going for a “relaxed” look, straight lines make everything look more intentional.
Start with pencil. Sketch your layout lightly, then go over it with pen once you are happy with the spacing. Fair warning: Skipping this step leads to cramped, uneven layouts.
Leave white space. Your spread does not need to use every square inch. This matters to you because White space makes everything more readable and less overwhelming for you.
Pro tip: Keep line spacing consistent. Whether it is 0.5 inches or 0.75 inches, pick a spacing and stick with it throughout your spread.
Color Coding and Symbol Systems
Here is the truth: You need to develop a system and stick with it for at least three months. Changing systems constantly defeats the purpose of having one.
My color system that you can adapt:
- Blue: Work-related items
- Green: Health and fitness
- Orange: Social and family
- Purple: Personal projects and hobbies
The kicker? Keep it simple. You are not creating art; you are creating a tool that serves your life.
Testing and Iteration Process
Give any new layout at least one full month before you decide if it works. What you should remember is But here is what You probably miss: Sometimes what feels awkward in week one becomes second nature by week three for you.
Take notes on what is not working. Too cramped? Not enough goal space? Habit tracker too complicated? Here is the good news: These notes become your guide for next month's improvements.
So what does this mean for you? You are not looking for perfection – you are looking for progress.
Customization Ideas for Different Lifestyles
Here is what nobody tells you: One size does not fit all For monthly spreads. Your life is unique, so your planning system should be too.
Student-Focused Monthly Spreads
When I was finishing my master's degree while working full-time, my monthly spreads looked very different. You can see how Here is what you need as a student:
Assignment deadlines prominently displayed. I used to write these in red so they would jump off the page. Pro tip: You should add these to your spread before anything else.
Exam schedule integration. Block out exam dates and the study time leading up to them. Think about it: You can see your entire exam season at a glance.
But wait, there is more: GPA or grade tracking. Simple but motivating for you to see progress over the semester.
Study goal setting. “Finish Chapter 3 notes” is more actionable than “Study biology” for you. As you might expect, Here is the truth: Specific goals get achieved.
Professional and Career-Oriented Layouts
Working professionals often need to balance multiple projects, deadlines, and goals. Ready for this? Consider adding these elements to your spread:
Project timelines. Use symbols or colors to track different projects across your month. You will never lose track of competing deadlines again.
Meeting preparation space. A small section to note upcoming presentations or important meetings. You will find that The real question is: How much stress could you avoid with better preparation?
But here is the catch: Professional development goals. Skill-building, networking, or career advancement objectives need dedicated space in your layout.
Work-life balance tracking. Maybe a simple scale rating how balanced you felt each week. Mind-blowing, right? You can actually measure and improve your balance.
Family and Household Management
Managing a family's schedule requires a different approach entirely. Here is what you should try:
Color-coding by family member. Each person gets their own color for easy visual scanning. For you, This means for you You will spot scheduling conflicts immediately.
Meal planning integration. Even just noting “meal prep Sunday” can be helpful for you. The bottom line? Less daily decision fatigue.
But here is what You probably miss: Chore rotation tracking. Who is doing dishes this week? When is the last time you vacuumed? Your household will run smoother.
Family goal setting. “Visit two new parks this month” or “Have three family game nights.” You are building memories, not just managing schedules.
Creative and Artistic Approaches
Some months, I just want my bullet journal to spark joy. Fair warning: These elements add personality without sacrificing functionality for you:
Seasonal themes. Autumn leaves in October, snowflakes in December. Notice how you can Simple doodles work great if you enjoy them.
Hand lettering practice. Use your monthly headers as lettering practice space. Think about it: You are improving a skill while planning your month.
Plot twist: Watercolor washes. Light watercolor backgrounds can be gorgeous if you like painting.
Decorative borders. Simple line patterns or doodles around the edges add personality to your spreads.
Here is the good news: Decoration should enhance, not overwhelm, the functionality for you.
Tools and Supplies for Monthly Spreads
After trying countless pens and supplies, here is what you actually need to create amazing monthly spreads.
Essential Writing and Drawing Tools
Here is the truth: You do not need expensive supplies to create functional, beautiful spreads. After trying countless pens, here is what I actually reach for:
For writing: Pilot G2 0.7mm or Muji 0.5mm gel pens. Think about how you would You will notice that they write smoothly and do not bleed on most papers. Pro tip: You can find these at any office store.
For headers and titles: Staedtler pigment liners in 0.3mm and 0.5mm. Clean lines, consistent ink flow that you can count on.
For rulers: A 6-inch clear ruler is perfect for bullet journals. You might wonder why You can see through it to line things up properly. The kicker? Clear rulers prevent you from accidentally drawing crooked lines.
Quick note: For corrections: Correction tape, not liquid. Faster and cleaner for you when mistakes happen.
Decorative Supplies and Accessories
You do not need much, but these supplies can make your spreads more enjoyable for you to create:
Washi tape: Great for borders, dividers, and adding color without artistic skill. This is where you benefit. But here is what You probably miss: You can use it to fix mistakes too.
Basic markers: Zebra Mildliners are popular for good reason – they do not bleed and come in perfect soft colors that you will love.
Stickers: Tiny dot stickers work great for habit trackers. More satisfying than drawing circles, and you will actually want to use them.
Fair warning: Pencils: Always sketch before you commit to pen. This is something you should know: one step will save you so much frustration.
Digital Alternatives and Hybrid Approaches
Not everyone wants or can use paper journals. Here is what you gain: Here is where it gets interesting: Digital options worth considering for you:
GoodNotes or Notability (iPad): Hand-write with all the benefits of digital (easy erasing, infinite colors, backup to cloud). You get the feel of paper with digital convenience.
Notion or OneNote: Great for you if you prefer typing and want powerful linking/search capabilities. The bottom line? Search functions are incredibly useful for tracking patterns.
But wait, there is more: Hybrid approach: Use a paper monthly spread but digital weekly/daily planning. You should pay attention here. Or paper for planning, photos for backup and sharing.
I have tried going fully digital several times but always come back to paper for my monthly spreads. Here is the truth: There is something about the physical act of writing that helps me process and remember better. You might find the same thing.
Common Mistakes and How to Avoid Them
Here is what nobody tells you: You probably sabotage their own success with these completely avoidable mistakes.
Overcomplicating Your First Attempts
I see this constantly in beginner bullet journal communities. What you need to understand is Someone's first monthly spread has 47 different sections, 12 habit trackers, and complex artwork that took 4 hours to create.
Here is where it gets interesting: Start simple. I mean it. Use a basic calendar grid, 3 goals, and maybe one habit tracker. You will want to remember this. You can always add complexity next month.
But here is the catch: Complex systems fail because you will not maintain them. Think about it: Would you rather have a simple system you use every day, or a gorgeous system you abandon by week two?
Pro tip: Your first monthly spread should take you 15-20 minutes to set up, not 4 hours.
Perfectionism vs. Functionality
Your bullet journal is a tool, not a museum piece. You will appreciate this. Here is the truth: I have seen people abandon perfectly good systems because they made one “mistake” on their spread.
Fair warning: Embrace imperfection. Cross things out. Use correction tape. This matters to you because Add things in different colored ink. A messy, used bullet journal is infinitely more valuable than a perfect, abandoned one.
Permission for you to be imperfect:
- Your handwriting does not need to be Instagram-worthy
- Uneven lines are fine for you
- You do not need matching pens in 47 colors
- Function matters more than form in your journal
The real question is: Are you planning your life, or are you creating art? Both are valid, but you need to be clear about your goal.
Maintenance and Consistency Challenges
The most beautiful monthly spread in the world is useless if you do not look at it regularly. Here is what you need to build: Review habits that actually stick.
Weekly check-ins: Every Sunday, you spend 5 minutes reviewing your monthly goals and updating your habit tracker. What you should remember is Ready for this? This one habit will improve your productivity.
Mid-month adjustments: If something is not working for you, change it. Do not suffer through a bad layout for the sake of consistency. But here is what You probably miss: Flexibility is a feature, not a bug.
End-of-month reflection: Actually use that reflection space you created. You can see how So what does this mean for you? You turn experiences into wisdom and improve next month's system.
Advanced Tips and Techniques
After setting up 84+ monthly spreads, here is where it gets interesting: I have learned shortcuts that will save you hours.
Time-Saving Setup Strategies
Here is what nobody tells you: You can set up your monthly spread in under 10 minutes once you have a system.
Create templates. Once you find a layout you love, measure everything and create a template. I have standard measurements written on a sticky note in my journal. Pro tip: You can trace your favorite layouts.
Batch similar tasks. Draw all your lines at once, then add all your text, then add color. As you might expect, It is faster than jumping between tasks, and you will get into a flow state.
But wait, there is more: Prep next month early. I set up next month's spread during my current month's reflection. The month is fresh in my mind, and I can plan improvements immediately.
Think about it: Why start each month scrambling to set up your spread when you can have it ready to go?
Integration with Digital Tools
Your bullet journal does not have to exist in isolation. Here is the truth: Smart integration makes your system more powerful.
Phone photos for backup. I photograph my monthly spread and save it to my phone. You will find that Helpful when you need to check your calendar while out. The kicker? You never lose your planning data.
Digital calendar sync. Major appointments go in both my phone calendar and bullet journal. Redundancy prevents forgotten appointments for you.
Fair warning: Goal tracking apps. Some habits are easier to track digitally. For you, This means for you I use my phone for water intake but paper for reading goals. You should choose the best tool for each job.
Seasonal Adaptations and Themes
Changing your spreads with the seasons keeps bullet journaling fresh for you:
Spring: Focus on new habits, fresh starts, maybe some green colors and floral doodles. You are literally planning growth.
Summer: Travel planning, outdoor activity tracking, bright colors that match your energy. Notice how you can Here is the good news: Seasonal themes keep you excited about planning.
Fall: Back-to-school organization, cozy themes, warm colors. Plot twist: Even adults benefit from “new school year” energy.
Winter: Reflection and planning, holiday coordination, maybe some hygge-inspired minimalism. You can embrace the slower pace.
Quick note: Do not force it, but if seasonal themes spark joy for you, go for it. Think about how you would Your journal should make you happy.
Making It Stick: Your Monthly Spread Journey
Here is what I want you to remember: The best monthly spread is the one you will actually use. Not the prettiest one on Instagram, not the most complex one you can imagine – the one that fits your life, your schedule, and your brain.
Start simple. Really simple. You might wonder why Pick a basic calendar layout, add 2-3 goals, and maybe track one habit. Use it for a full month. Notice what works and what does not for you. This is where you benefit. Then adjust.
But here is the truth: Your monthly spread will change and grow, just like your life does. My spreads from 2018 look nothing like my spreads from 2025, and that is exactly how it should be for you too.
The real question is: Are you ready to take control of your months instead of letting them control you?
Your Next Step:
Right now, before you get distracted by another article or Instagram post, grab a piece of paper. Sketch out a simple monthly spread for next month. Here is what you gain: Just the basics: calendar, goals, one habit tracker. Here is what you should do: Do not overthink it. Do not make it perfect. You should pay attention here. Just make it.
Then use it. Every day. For one month. What you need to understand is Want to know the secret? That is how you will discover the real power of monthly planning. Not by reading about it, not by admiring other people's spreads, but by creating your own and living with it.
Your future self – the one who is more organized, more intentional, and more aligned with their goals – is waiting. Your monthly spread is the bridge that gets you there.
Mind-blowing, right? Your journal becomes the foundation for the life you actually want to live.
Frequently Asked Questions About Bullet Journal Monthly Spread
What is a bullet journal monthly spread?
A bullet journal monthly spread is a two-page layout that shows you your entire month at a glance. You will want to remember this. You can see all your dates, goals, habits, and important events in one place. You probably use it as their planning foundation for the month ahead.
How do you set up your first monthly spread?
What This means for you for you is simple: you should start with a simple calendar grid, add 2-3 monthly goals, and include one habit tracker. Sketch your layout in pencil first, then trace over it with pen. You will appreciate this. Keep your first attempt simple – you can always add complexity later.
Is a monthly spread better than a weekly planner?
Monthly spreads give you better perspective on your bigger goals, while weekly planners help with detailed scheduling. You benefit most from using both – monthly spreads for goal tracking and weekly spreads for daily tasks. They work together perfectly.
How much time does creating a monthly spread take?
You might be wondering, your monthly spread should take 15-20 minutes to set up once you have a system. This matters to you because Complex artistic spreads can take several hours, but functional spreads are quick to create. You will get faster with practice and templates.
Can beginners create effective monthly spreads?
Yes, you can create a simple monthly spread on your first try. Start with just a calendar grid and 3 goals – no fancy decorations needed. What you should remember is You will learn what works best for your lifestyle through practice and experimentation.
What supplies do you need for monthly spreads?
You will discover that you only need a notebook, one good pen, a pencil, and a ruler to create functional monthly spreads. Optional supplies include colored pens, washi tape, and markers for decoration. You can make beautiful spreads with basic tools.
Why do people abandon their monthly spreads?
You probably quit because they start with overly complex layouts or focus on perfection over function. You can see how You are more likely to succeed if you keep your first spreads simple and focus on actually using them rather than making them Instagram-worthy.
Your Monthly Planning Revolution Starts Now
The truth is simple: You have just learned everything you need to improve your planning from chaotic to intentional. But here is what really matters – you now have the power to design monthly spreads that actually fit your unique life.
Start simple, start today, and start building the planning system that will improve your year. Your journal is waiting, and your future organized self is cheering you on.
What will your first monthly spread include? Remember: Your journal, your rules. As you might expect, The beauty is in the process, and creative freedom awaits you on that blank page.
Related Posts


Related Posts
Related Posts

Goal Review Spreads That Keep You Accountable
Bullet Journal For Students
Goal Setting Spreads
Goal Setting Spreads
Recommended for You
🛒 Dotted Journal Notebook
As an Amazon Associate we earn from qualifying purchases.