
- The “Contain & Conquer” Drawer Divider System
- The “Vertical Victory” Pot and Pan Organizer
- The “Label & Locate” Pantry System
- The “Command Center” Countertop Organizer
- The “Upcycled Charm” Spice Rack Solution
- The “Snack Station” Smart Setup
- Conclusion and Your Next Steps
- Frequently Asked Questions
- Are these solutions truly budget-friendly?
- How long does it typically take to implement these solutions?
- Can these solutions be adapted for small kitchens?
- What are the best pens for labeling?
- Related Posts
- Related Posts
- Related Posts
- Related Posts
Disclosure: This post contains affiliate links. If you click through and make a purchase, we may earn a small commission at no extra cost to you. Thank you for supporting this site!
Does your kitchen feel like a chaotic whirlwind, especially during family meal prep or after-school snack attacks? You're not alone! I've filled over 20 bullet journals, and one recurring theme that always pops up is the struggle for kitchen calm. It’s easy to think you need a complete overhaul with expensive custom cabinetry, but what if I told you that achieving a more organized, less stressful kitchen space is totally doable on a budget, and can even be a fun creative project? Forget the Pinterest fails where beautiful pantries are impossible to maintain. We're talking about practical, actionable solutions that actually work for real families, and yes, they can look pretty darn good too. Let's transform that kitchen clutter into a source of calm, one smart, budget-friendly solution at a time.
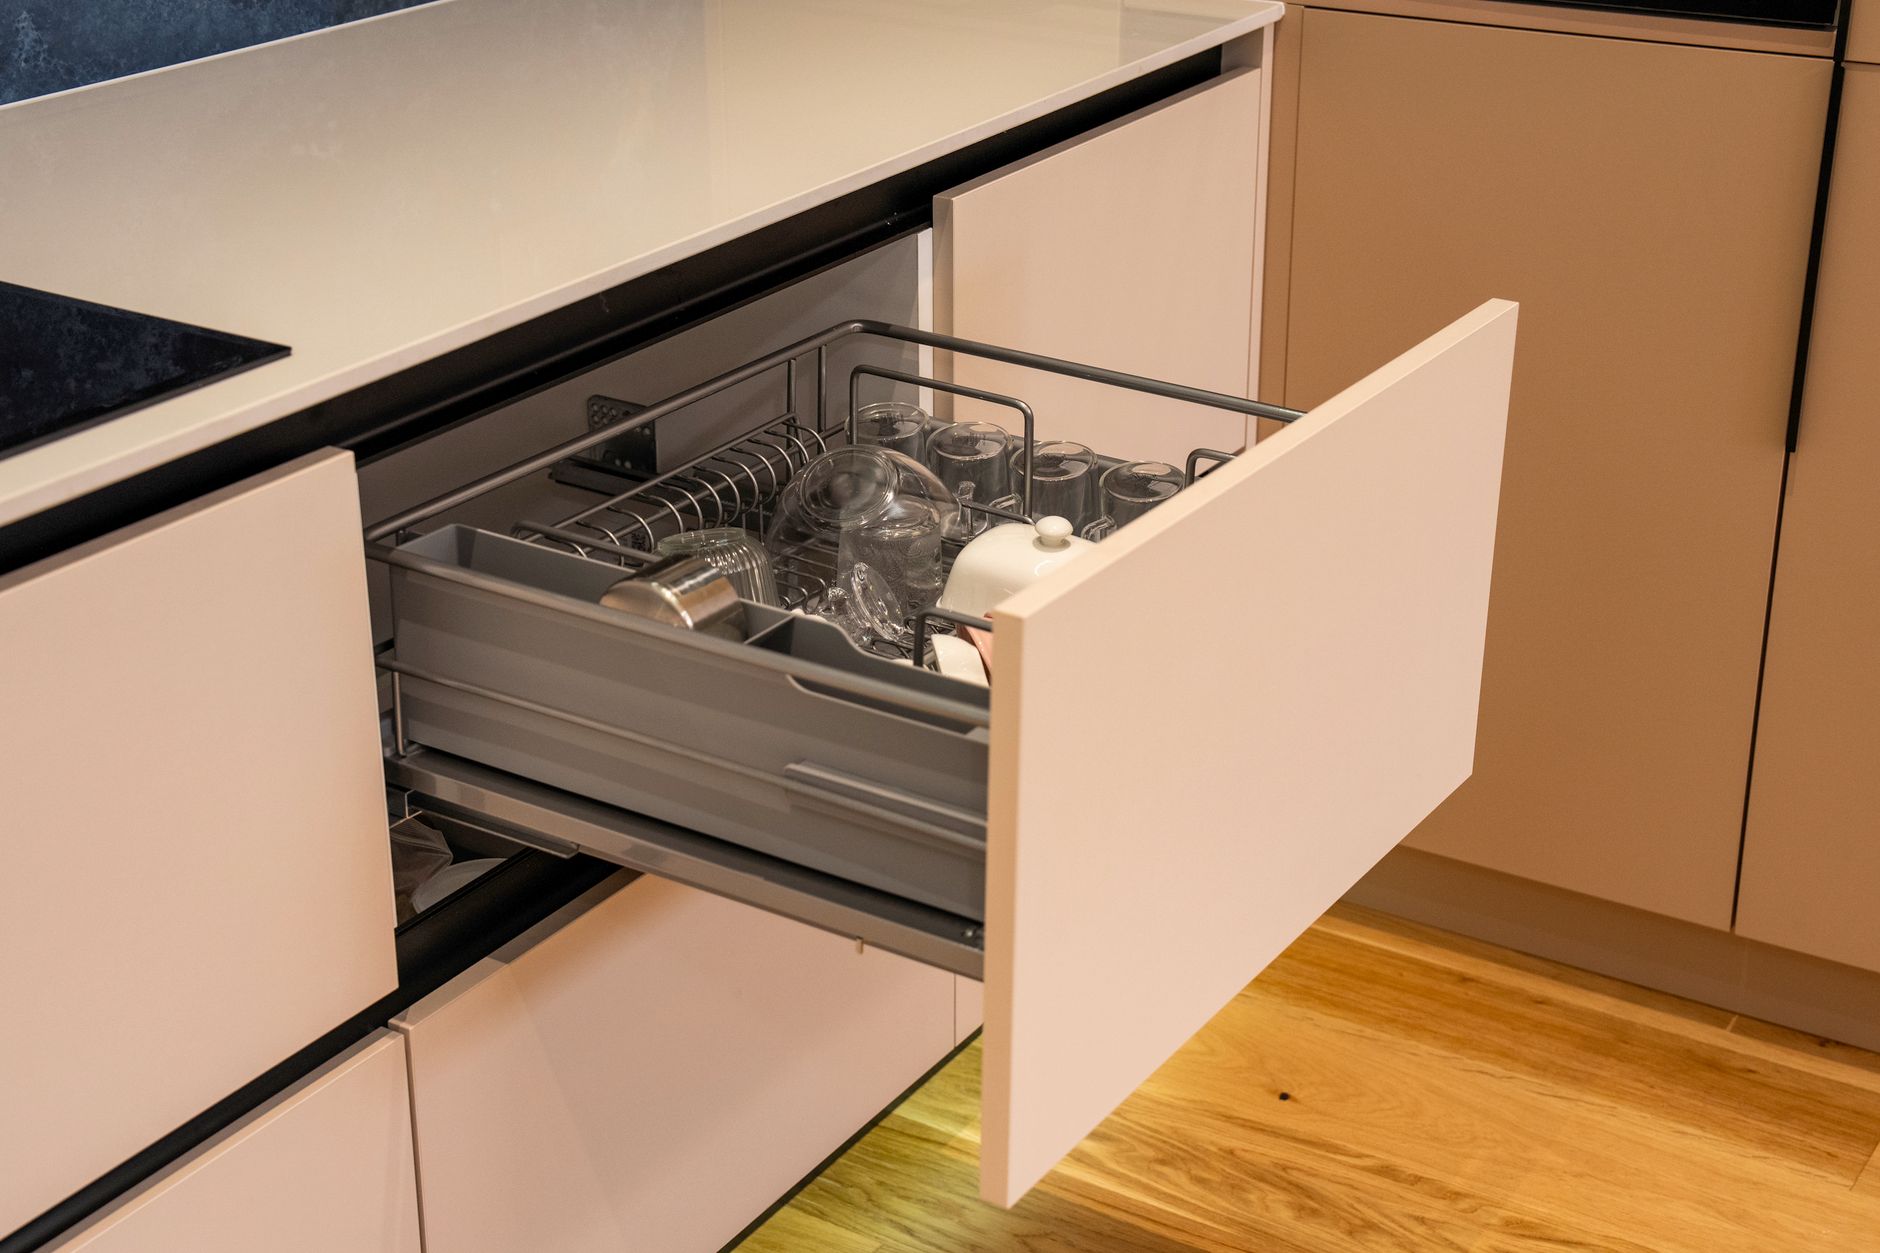
The “Contain & Conquer” Drawer Divider System
Drawers are notorious black holes. Utensils slide around, gadgets get lost, and finding that one specific spatula can feel like an archaeological dig. My first attempt at drawer organization involved a motley collection of old takeout containers. It looked… well, like old takeout containers. Not exactly inspiring, and frankly, a bit messy. The real breakthrough came when I invested in adjustable drawer dividers. These aren't fancy, but they are incredibly effective. For example, the LyxPro Adjustable Drawer Dividers (typically $19.99 for a set of 4) are spring-loaded and can be adjusted from 13 inches to 22 inches. This flexibility means they fit almost any drawer size, from your shallow silverware drawer to deeper pots-and-pans storage.
In my kitchen, I use these dividers to create distinct zones. One drawer is now dedicated solely to baking tools: spatulas, whisks, measuring spoons, and cookie cutters, all neatly separated. Another drawer houses my most-used cooking utensils: wooden spoons, tongs, and ladles. The key is to measure your drawer's depth and width first. For a standard 18-inch deep drawer, you might need two dividers running lengthwise or three running widthwise, depending on what you're storing. I usually opt for a combination, creating a grid system. For instance, in a 20-inch wide drawer, I'd use two dividers placed 7 inches apart lengthwise, and then one divider widthwise, creating three roughly 7×20 inch sections. This simple grid prevents items from migrating and makes everything instantly accessible. The entire process of measuring and placing the dividers typically takes no more than 10-15 minutes per drawer.
Budget Alternative: If the adjustable dividers are still a stretch, you can create similar zones using sturdy cardboard boxes. Cut them to size and reinforce the edges with packing tape. While not as aesthetically pleasing, they serve the same functional purpose of separation. For a more permanent DIY, consider cutting pieces of thin plywood or MDF to size. A 4×8 foot sheet of 1/4-inch plywood costs around $15-$20 at most hardware stores and can yield enough dividers for several drawers. You'll just need a saw and some wood glue.
The “Vertical Victory” Pot and Pan Organizer
Stacking pots and pans is a recipe for scratched surfaces and frustration. How many times have you tried to pull out the bottom pot only to have the whole stack tumble down? I’ve definitely been there, leading to a few choice words uttered under my breath during dinner prep. My solution? A vertical pot and pan organizer. These racks allow you to store pots and pans on their sides, like books on a shelf. The Simplehuman Tension Shower Caddy (while not a kitchen product, the principle applies!) inspired me to think vertically. For kitchens, look for organizers specifically designed for cookware. The Simplehuman Stainless Steel Pot Rack Organizer (around $50-$70, depending on size) is a popular, albeit pricier, option. It typically features 5-7 tiers, allowing you to store multiple pots and pans vertically.
When setting up a vertical organizer, consider the weight of your cookware. Heavier cast iron skillets might need to be placed on lower, sturdier shelves. For a standard 15-inch wide organizer, you can typically fit 2-3 medium-sized pots or pans per tier, depending on their handle size and shape. My setup uses a 15-inch wide, 5-tier organizer. I store my everyday frying pans on the bottom two tiers, my saucepans on the middle tier, and my smaller pots and lids on the top two tiers. This configuration means I can pull out a single pan without disturbing any others. The setup itself is usually straightforward, often requiring no tools, and takes about 5 minutes to assemble. The benefit is immense: you gain back valuable cabinet space and protect your cookware.
Budget Alternative: You can achieve a similar vertical storage effect using DIY methods. Cut sturdy cardboard tubes (like those from carpet rolls or large shipping tubes) to a height that fits your cabinet. Stand them upright and place your pans inside. For a more robust solution, consider using small tension rods (like those used for curtains, typically $5-$10 each) placed horizontally within your cabinet. You can then slide pot lids or even thin baking sheets between the rods. Another effective DIY involves stacking pan lids vertically in a dish rack or a repurposed magazine holder. I’ve seen this work wonders for lid management, which is often the trickiest part!
The “Label & Locate” Pantry System
A disorganized pantry can lead to duplicate purchases and wasted food. My pantry used to be a jumble of half-used bags of flour, pasta boxes, and random spices. I’d often buy another bag of rice only to find three already lurking in the back. The solution for me was a comprehensive labeling system, combined with clear, stackable containers. Brands like OXO Good Grips POP Containers (sets can range from $40-$100 depending on the number and size) are excellent because they are airtight, stackable, and come in various shapes and sizes. A standard 5-piece set might include containers ranging from 0.8 quarts to 4.2 quarts, perfect for staples like flour, sugar, pasta, and cereal.
When setting up your pantry, take everything out first. Group similar items together. Then, measure your shelves. For a standard 24-inch deep pantry shelf, you can typically fit two rows of POP containers comfortably. I prefer to decant dry goods like rice, pasta, sugar, flour, and oats into these containers. Not only does it keep them fresh and prevent spills, but it also creates a uniform, visually appealing look. The real magic happens with labeling. I use a P-touch label maker, like the Brother P-Touch PT-D210 (around $30-$40), to create clear, readable labels. For items like flour and sugar, I also add the purchase date or an “use by” date. This system has reduced my food waste by an estimated 20% and saved me countless trips to the grocery store. The initial decanting and labeling process for a medium-sized pantry might take 1-2 hours, but the daily time savings are enormous.
Budget Alternative: You don't need expensive containers to achieve pantry order. Large, clear glass jars (like repurposed pickle or pasta sauce jars) or even sturdy, clear plastic food storage containers from discount stores work well. The key is consistency in size and shape as much as possible for stacking. For labeling, simple masking tape and a permanent marker (like a Sharpie) are perfectly functional. While less sleek than a label maker, they are incredibly cheap and easy to replace. For about $5-$10, you can get a good set of jars and a marker that will transform your pantry.
The “Command Center” Countertop Organizer
Kitchen countertops are prime real estate, and they can quickly become cluttered with mail, keys, charging cables, and random papers. This was a constant source of frustration in my kitchen; it felt like a dumping ground. My solution was to create a dedicated “Command Center” area. This isn't about buying a fancy organizer, but rather repurposing existing items or investing in a few key, budget-friendly pieces. A great starting point is a tiered tray or a simple wall-mounted organizer. For instance, a 3-tier metal serving stand (often found for $20-$30 at home goods stores) can be repurposed to hold fruit, mail, and even small snack packs. Alternatively, a wall-mounted mail sorter with hooks (typically $15-$25) can keep mail, keys, and dog leashes off the counter.
In my kitchen, I designated a small corner of the counter near the entryway. I use a simple, 12-inch wide, 2-tier metal mesh organizer ($25) to hold our daily essentials. The top tier has a small basket for keys and loose change, while the bottom tier holds a charging station for our phones and earbuds. Adjacent to this, I have a small wall-mounted sorter with three slots for incoming mail, outgoing mail, and important papers. This system has dramatically reduced counter clutter. I estimate it has freed up at least 50% of my usual countertop ‘dumping zone'. The setup took about 20 minutes, including deciding where to place it. Having a designated spot for everything means items are put away immediately rather than accumulating.
Budget Alternative: Get creative with what you already own! A sturdy shoebox can be covered with decorative paper or fabric and used as a mail sorter. An old magazine file holder can serve the same purpose. For a charging station, a small wooden box with holes drilled in the back for cables works perfectly. Even a simple ceramic bowl can corral keys and loose change. The goal is to create defined zones, and you can do this with almost anything! A trip to the dollar store can yield small baskets, trays, and containers for under $5 that can be combined into an effective command center.
The “Upcycled Charm” Spice Rack Solution
Spices are essential for cooking, but a jumbled collection of jars can be overwhelming and inefficient. My spice cabinet used to be a chaotic mess where I’d often forget what I had, leading to expired spices and wasted money. My first attempt was a tiered shelf insert, which helped a little but still left jars rolling around. The real game-changer was creating a dedicated, easy-to-access spice rack. While store-bought options can range from $30 to over $100, there are fantastic budget-friendly and DIY alternatives. Consider a magnetic spice rack that attaches to your fridge or backsplash. Brands like DecoBros offer magnetic spice racks (around $25-$40 for a set of 6-8 jars) which are both functional and space-saving.
If you have wall space, a simple wooden shelf or even a repurposed picture ledge can become a stylish spice rack. For a DIY approach, I took an old wooden cutting board (about 18 inches long) and attached small L-brackets to the underside. This created a mini shelf that I mounted on the wall inside my pantry door. I then used small, uniform spice jars (you can buy a set of 12 for around $20-$30 online) and labeled them clearly. This setup allows me to see all my spices at a glance. I typically arrange them alphabetically or by cuisine type. This method has saved me from buying duplicate spices at least 3 times in the past year, saving me probably $20-$30 in wasted purchases. The installation took about 30 minutes, including drilling and securing the shelf.
Budget Alternative: The ultimate budget solution is often found in repurposing. Collect small glass jars (jam jars, baby food jars) and clean them thoroughly. You can paint the lids or attach labels. Mount them directly to a piece of wood or even directly to the inside of a cabinet door using strong adhesive strips or small screws. Another incredibly cheap option is to use a small wire basket or even a repurposed cutlery organizer mounted inside a cabinet door. The key is ensuring jars are upright and easily visible. For less than $10, you can create a functional and personalized spice storage solution.
The “Snack Station” Smart Setup
For families, the “snack zone” can become a major source of clutter and chaos, especially with kids constantly reaching for goodies. My kitchen used to have snacks scattered across multiple cabinets and the pantry. It was a free-for-all! Creating a designated “Snack Station” has been a sanity saver. This isn't necessarily about a single product, but a strategic grouping of items. I use a combination of clear bins and a dedicated shelf or cabinet. For example, using clear acrylic bins (like those from the iDesign Linus collection, typically $8-$15 each) on a shelf allows kids to see what's available and makes cleanup easy. A standard 10-inch by 14-inch bin can hold a surprising amount of snacks.
In my kitchen, I dedicated the bottom shelf of a pantry cabinet to snacks. I use three clear bins: one for granola bars and fruit snacks, one for crackers and pretzels, and one for fruit cups and applesauce pouches. This setup means kids know exactly where to look and where to put things back. I also have a small wire basket on top of the bins for items that don't fit neatly, like individual bags of popcorn. This system has reduced snack-related arguments by an estimated 60% and made it easier to keep track of inventory. The initial setup took about 15 minutes. It’s amazing how a simple, defined zone can bring order to the snack situation!
Budget Alternative: You don't need fancy bins. Use any sturdy boxes you have on hand – shoe boxes, small cardboard boxes from online orders, or even repurposed plastic food containers. The key is to group similar items together. If you have a cabinet shelf, you can use a simple tension rod to create a visual divider, separating snack items from other pantry goods. For open shelving, consider using a colorful placemat or a piece of shelf liner to define the snack zone visually. The goal is clear separation, and that can be achieved with minimal cost.
Conclusion and Your Next Steps
Transforming your kitchen from chaotic to calm doesn't require a huge budget or a complete renovation. By implementing just one or two of these budget-friendly storage solutions, you can make a significant difference. Remember, the goal is functionality and peace of mind, not Pinterest perfection. Start small, pick the solution that addresses your biggest kitchen pain point, and see how it impacts your family's daily routine. You might be surprised at how much calmer your kitchen, and your life, becomes.
Here are three actionable steps to get you started:
- Identify Your Biggest Kitchen Clutter Hotspot: Is it the drawers, the pantry, the countertops, or the spice cabinet? Choose one area to tackle first.
- Measure and Plan: Before buying anything, measure your space. Sketch out a quick plan for how you’ll use dividers, bins, or organizers.
- Implement One Solution This Week: Whether it's installing drawer dividers, decanting pantry items, or creating a snack station, commit to implementing one change.
For a truly inspiring and practical next step, I highly recommend checking out the “Kitchen Organization Hacks” printable kit available on our sister site, familyflourish. It includes detailed templates for pantry layouts and drawer dividers, along with a comprehensive checklist to guide your organization project. It's a fantastic resource to complement these ideas and make your kitchen transformation even smoother!
Frequently Asked Questions
Are these solutions truly budget-friendly?
Yes, the focus is on using affordable products and DIY alternatives. While some branded items are mentioned as examples, the “Budget Alternative” sections offer cost-effective options that can be implemented for under $20-$30 for most solutions. The goal is to provide accessible strategies for everyone, regardless of their budget.
How long does it typically take to implement these solutions?
Most of these solutions are designed for quick implementation. Setting up drawer dividers usually takes 10-15 minutes per drawer. A pantry decanting and labeling session might take 1-2 hours for a medium-sized pantry, but the daily benefits are immediate. Countertop organizers can be set up in under 20 minutes. The time investment is minimal compared to the long-term gains in organization and reduced stress.
Can these solutions be adapted for small kitchens?
Absolutely! Many of these ideas are particularly beneficial for small kitchens. Vertical storage solutions, wall-mounted organizers, and effective drawer dividers maximize limited space. Decanting items into uniform containers also makes smaller pantries feel more spacious and organized. The principles of containment and verticality are key for efficient small-space living.
What are the best pens for labeling?
For clear, durable labels, I highly recommend the Tombow Dual Brush Pens (around $3-$4 each) for a touch of color and creativity on your labels, especially if you're creating custom tags or decorative elements. For straightforward, legible text on containers or jars, a Sakura Pigma Micron 05 (around $3-$4) is excellent – it’s waterproof and fade-resistant, ensuring your labels last. If you prefer a more professional look, a P-touch label maker like the Brother P-Touch PT-D210 ($30-$40) offers clear, printed labels that are easy to read and stick well.
Related Posts




Related Posts
Related Posts
Related Posts
Your Weekly Dose of Inspiration
Journaling ideas, family tips, and gentle inspiration.
Love this content?
Join the BulletJournals.net community for exclusive tips, guides, and updates.
Subscribe Free

