Table of Contents
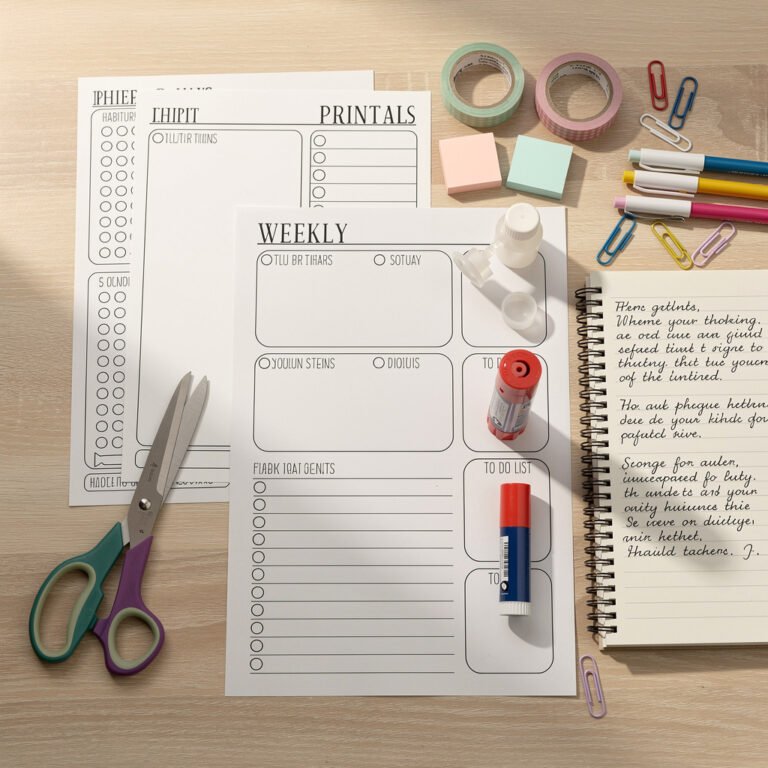
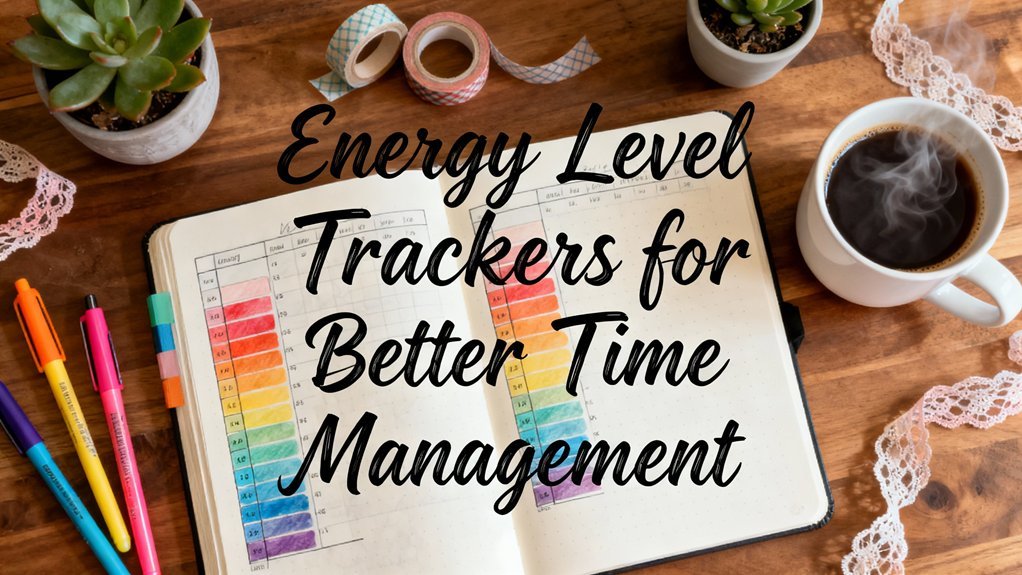
50 Bullet Journal Templates Pack
Ready-to-print spreads for habit tracking, weekly planning, mood logs, and creative layouts.
Staring at a blank page can be daunting, but there’s something magical about filling it with a monthly spread that finally clicks. Picture this: a simple layout that helps you tackle your commitments without the chaos. Over the last three months, I’ve tried all sorts of systems, and I’m excited to share what’s worked best for me. You’ll learn how to create a spread tailored to your life, making organization feel effortless. Remember, start messy—perfection isn’t the goal, progress is! You’ve got this!
Key Takeaways
- Use a dotted notebook for versatile layouts — it allows for creativity without the constraints of lined pages, making organization easier.
- Invest in fine-tipped pens ($2-10) for clear, precise writing — legible notes and plans boost your productivity and reduce miscommunication.
- Design a 7×5 grid layout with days of the week — this structure helps pinpoint daily tasks and commitments at a glance.
- Create a habit tracker section to monitor progress — tracking daily habits boosts accountability and reinforces positive routines throughout the year.
- Implement a color-coding system for tasks and goals — visual organization simplifies prioritization and keeps you focused on what matters most.
- Schedule monthly reviews to assess goals and plans — dedicating 30 minutes each month ensures you stay on track and adapt as needed.
Introduction
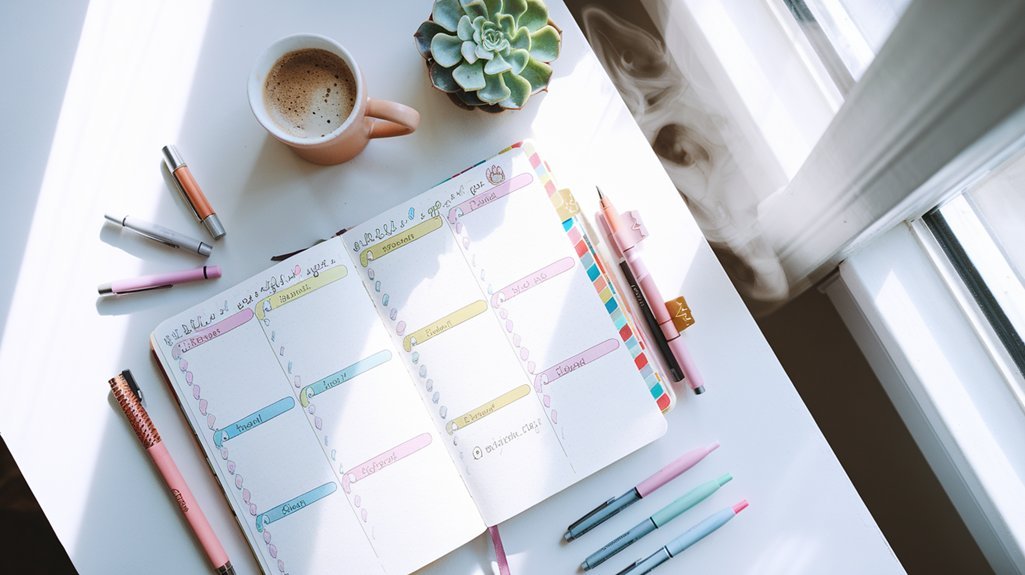
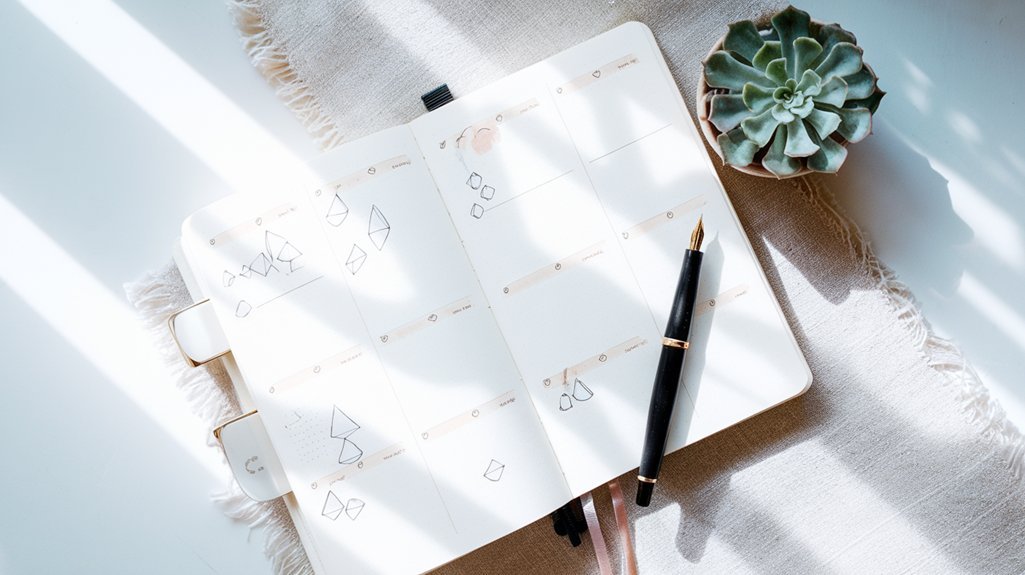
 bullet journal layout”>
Supplies You'll Need:
- Journal: Leuchtturm1917 A5 Dotted (around $20) or a budget-friendly option like a basic dotted notebook ($5).
- Pens: Micron 05 (about $2) or a set of fine-tipped gel pens ($10 for a pack).
- Markers: Tombow Dual Brush Pens ($30 for a set) or Crayola Super Tips ($10 for a set).
- Ruler: Any standard ruler (less than $5).
Skill Level: Intermediate
—
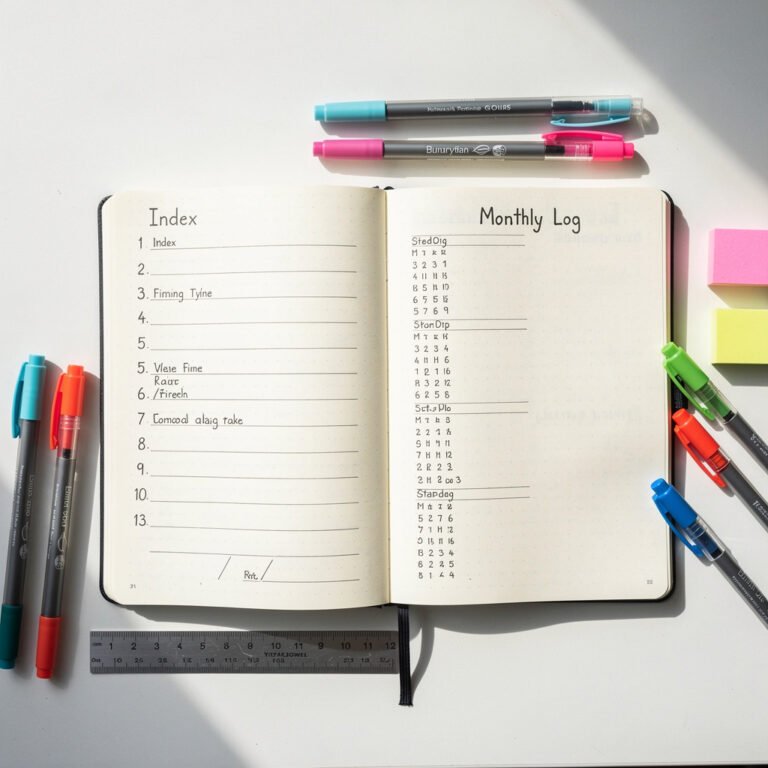
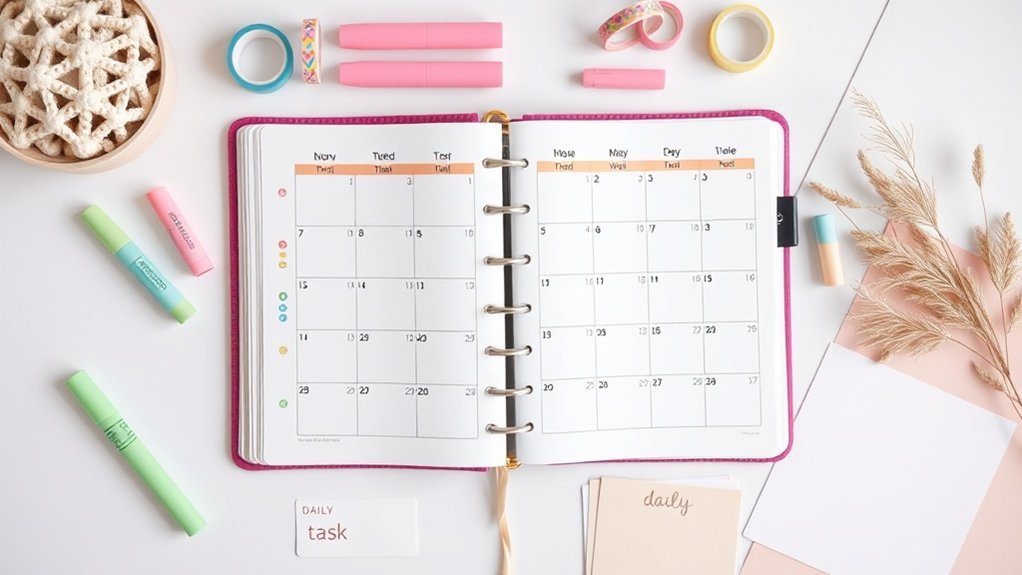
You know that feeling when the calendar starts to fill up, and you can’t quite see how it all fits? That’s where a monthly spread shines. It’s like having a clear window into your commitments, allowing you to balance work, social life, and personal projects all in one glance. Monthly bullet journal setup is essential for mastering your planning.
What I love about this layout is how customizable it is. You can go for a sleek grid, a playful horizontal format, or even a creative twist that reflects your style.
Let’s get started with the layout!
- Draw the Base: Start with a rectangle measuring 18cm wide by 25cm tall, about 2cm from the top of the page. This will be your main calendar area.
- Create the Grid: Divide this rectangle into a 7×5 grid. Each box should be 5cm x 4cm. This gives you a nice space for each day of the week and a little extra room for notes.
- Add Headers: Use your Micron pen to write the days of the week at the top of each column. I like to use a thicker pen for the headers and then switch to a finer tip for notes — it really helps with readability.
- Color It Up: Grab a Tombow pen in a color you love and add a splash of creativity to your spread! Maybe you’ll highlight weekends or special dates. Just remember, it doesn’t have to be perfect to look great. Start messy; that counts!
- Personal Touches: You can add doodles, stickers, or washi tape around the edges. But here’s a pro tip: make sure each decorative element has a purpose. It should either highlight an important date or give you a little joy when you look at it.
Engagement Break:
Ever felt overwhelmed by your own creativity? I’ve been there! Sometimes less is more. If you find yourself spending too much time on the decoration, try focusing on function first. You can always add the fun stuff later!
—
Improving Usability
What about tracking your habits or goals? You can add a small section at the bottom of your spread, measuring 5cm tall by 18cm wide. This would be perfect for a habit tracker or a notes section for important reminders.
- Draw the Tracker Box: Use the same Micron pen to outline this section, leaving a 1cm margin on the bottom and sides.
- Label It: Write “Goals” or “Habits” at the top in your favorite lettering style.
- Divide It Up: Leave space for at least 5 habits or goals, each with a checkbox.
Remember, the mistake most beginners make is overcomplicating their spreads. It’s easy to get caught up in making everything look perfect. Trust me, what matters most is that it works for you.
I’ve tried layouts that looked stunning but were impractical for daily use. You want something you can stick with!
—
Try This Today!
Feeling inspired? Grab your supplies and sketch out a simple monthly spread. Don’t worry about making it perfect. Just get those commitments down on paper.
You’ll be amazed at how much clearer your month can look! Let me know how it goes, and remember, every spread is a step towards a more organized life!
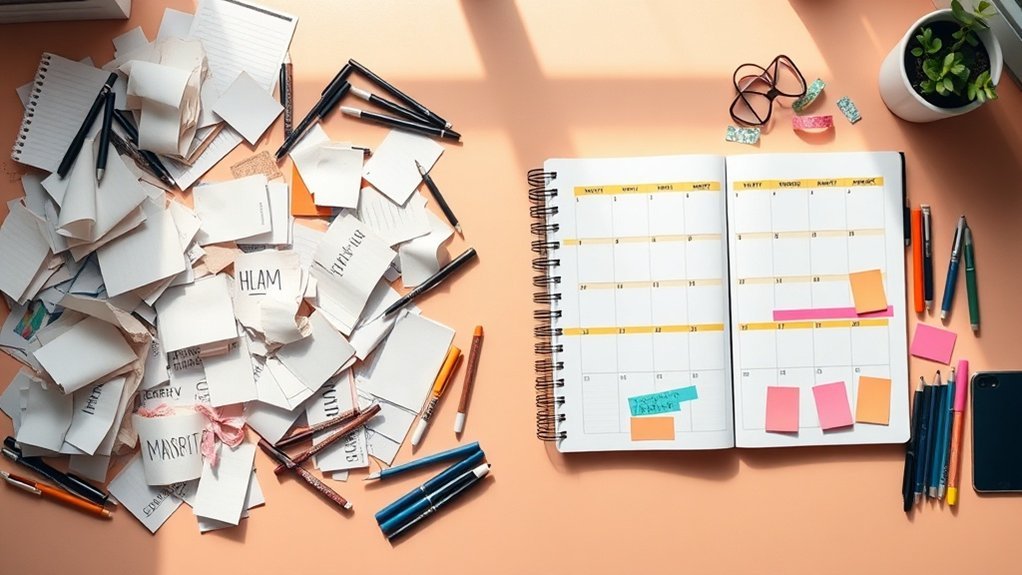
Disorganized Schedules Cause Stress
When you're juggling disorganized schedules, you're not alone in feeling overwhelmed—stress levels spike as your brain struggles to track commitments without a clear system.
This chaos affects everyone from students managing coursework to professionals balancing multiple projects, leaving you vulnerable to missed deadlines and forgotten appointments.
Recognizing how disorganization impacts your mental health sets the stage for exploring practical strategies to regain control and enhance your overall well-being. Implementing time blocking strategies can significantly improve your ability to manage tasks effectively.
Why This Matters
Why This Matters
Ever feel like you’re drowning in a sea of to-do lists and appointments? You’re not alone! I’ve been there, and it’s no fun. A whopping 74% of adults say they feel overwhelmed by their commitments, and that chaos can really mess with your mental health. Disorganization can lead to anxiety and even depression.
But here’s the kicker: 80% of folks feel way more in control when they take the time to organize their schedules.
Let’s talk about time—did you know that disorganization can cost you about two hours a day? That’s a lot of missed opportunities! It also affects your work-life balance. If you’re like 61% of people, you might find it tough to squeeze in time for relationships and personal activities when your schedule‘s all over the place.
What I love about monthly spreads is they can flip this situation on its head! They give you that visual clarity and structure you need to regain control, ease stress, and tap into your true potential. Ready to give it a shot?
Supply List
Essentials:
- Notebook: Leuchtturm1917 A5 Dotted ($20) or budget-friendly alternative: Scribbles That Matter A5 Dotted ($15).
- Pens: Tombow Dual Brush Pens ($20) or budget-friendly alternative: Crayola Super Tips ($10).
- Ruler: Westcott 12-Inch Ruler ($5) or budget-friendly alternative: any standard ruler from a dollar store.
Skill Level:
- Beginner: No experience, basic supplies.
- Intermediate: Comfortable with rulers and hand lettering.
- Advanced: Specialized tools or techniques.
Crafting Your Monthly Spread
Let’s dive into creating a monthly spread that not only looks good but works for you!
- Start with the Basics: Open your notebook to a fresh spread. Leave at least a two-page layout for your month. You’ll thank yourself for the space later!
- Draw Your Title: At the top of the left page, write the month in big, bold letters. Use a Tombow brush pen for a fun effect. I like to use a dark blue or green for a calming vibe.
- Create a Calendar Grid: On the right page, draw a 5×7 grid (5 rows and 7 columns). Each box should be about 4cm x 4cm. Leave a 1cm margin from the top and sides. This is where you’ll jot down important dates.
- Decorate with Purpose: Add small doodles or stickers related to the month—think leaves for October or snowflakes for December. Just a few touches can make it feel personal without cluttering the space!
- Monthly Goals: At the bottom of the left page, create a section for your goals. Draw a box that’s 7cm x 5cm and title it “Goals for [Month].” This is where you’ll remind yourself what you want to focus on.
- Track Habits: If you're keen on tracking habits, create a 1cm x 1cm grid below your goals. Label each day of the month across the top. This is a great place to check off your progress.
Personal Note
I used this layout for three months straight, and it really helped me stay on track with my goals. I found that incorporating small doodles made the whole process enjoyable, and I actually looked forward to filling it out each week!
Engagement Break
What I'd Do Differently: If I could redo my first month, I’d simplify my doodles. Sometimes less is more! The mistake most beginners make is getting lost in decorations, making it harder to read the important stuff. Keep it functional!
Final Thoughts
Start messy—it's all about finding what works for you. You’ll be amazed at how much clarity a simple monthly spread can bring to your life. Grab those supplies and give it a try today! You might just find that structure leads to a whole new level of creativity and calm.
Who It Affects
Who It Affects
Ever feel like your calendar’s a chaotic mess? Trust me; I’ve been there. Disorganized schedules can really mess with your mental space. Whether you’re a student juggling classes, a professional balancing work projects, or just someone trying to keep personal commitments in check, that chaos can seriously weigh you down.
I remember the days when I’d miss deadlines, and it felt like a snowball effect—lower performance evaluations, career stress, the whole nine yards. You’re definitely not alone in feeling overwhelmed. The American Psychological Association backs this up, indicating that messy schedules can lead to anxiety and a decline in overall well-being.
But here’s the good news: you can break free from that cycle! Ready to dive into some creative organization? By using strategic monthly spreads, you’ll lighten that cognitive load and reclaim some control. Research shows that organized planning can boost productivity by 25%! That’s a game-changer for how you work and live. Remember, getting organized isn’t a luxury; it’s essential for keeping your mental health in check.
Supplies You’ll Need
- Notebook: Leuchtturm1917 A5 Dotted ($20) or a budget-friendly alternative like a basic dotted journal ($10).
- Pens: Tombow Dual Brush Pens ($10 for a pack) or a budget-friendly set of Crayola markers ($5).
- Ruler: A basic 12-inch ruler ($2) or a clear plastic ruler ($1).
- Stickers: Cute planner stickers ($5) or printables from sites like Etsy (around $3).
Skill Level: Intermediate
You’ll want some comfort with rulers and hand lettering for this project.
Creating Your Monthly Spread
Let’s talk about the layout. I love a good monthly spread for keeping track of everything at a glance. Here’s how to set one up:
- Draw the Base Box: Start by drawing a 20cm x 25cm box on the top half of a page, 2cm from the top and 2cm from the left margin. Use a 0.5mm black pen for a clean edge.
- Divide into Days: Use your ruler to create 7 equal columns, about 2.5cm wide each, leaving a small gap between them (about 1cm). This gives you space for each day of the week.
- Label the Days: At the top of each column, write the days of the week in a fun, bold font. Use your Tombow Dual Brush Pens for a pop of color—try a gradient effect for a fun twist!
- Add a Tracker: Below your calendar, draw another box (15cm x 5cm) for habit tracking. I like to divide this into sections for things I want to keep an eye on—like water intake or exercise.
- Decorate with Function: Use stickers or doodles sparingly. Remember, every decorative element should help you stay organized. I love adding little icons next to tasks that remind me of their importance.
Quick Tips
- Start Messy: If you’re new to this, don’t stress about perfection. Just getting it down on paper counts!
- Spacing Matters: Make sure there’s enough space between sections so you can easily write in your tasks. No one enjoys crammed notes!
Engagement Break
What’s the mistake most beginners make? They try to make everything look perfect right from the start. But guess what? Done is better than perfect! Embrace the messiness; your future self will thank you.
Try This Today
Ready to give it a shot? Grab your supplies and sketch out that monthly spread today! You’ll be amazed at how much clarity it brings. You’ll start to feel more in control and less overwhelmed. Every step counts, and you’re on your way to a more organized, balanced life.
# Root Causes of Disorganization
Disorganization doesn’t occur in a vacuum; it arises from specific root causes like overwhelming tasks and unclear goals.
As we explore these foundational issues, it’s clear that cluttered environments and poor time management only deepen the chaos. Additionally, implementing a bullet journal system can help streamline your organization and clarify your goals.
Root Causes
Root Causes of Chaos in Your Journaling Space
Ever sat down to journal, only to feel completely overwhelmed by the clutter around you? Trust me, I've been there too. Before we can tackle organizing our journaling space, let's dig into what’s really causing that chaos.
What I love about this process is that once you pinpoint the root causes, you can create targeted solutions that work for *you*.
Disorganization often springs from unclear goals and priorities. If your focus is scattered across too many tasks, it’s no wonder your journal feels like a battleground! Have you ever underestimated how long a project would take? Those time management gaps can lead to missed deadlines and, honestly, a mountain of stress.
Then there are those pesky emotional barriers—like anxiety and overwhelm—that sneak in and sabotage our best efforts. And let’s not forget our environments; a chaotic physical or digital space can distract us more than we realize. Feel that? It’s tough, but you can turn it around!
Finally, inconsistent routines can keep us from building those sustainable systems we crave. What I’ve found is that identifying the factors that impact you most makes all the difference. From there, you can design a monthly spread that addresses these root causes directly, giving you clarity, structure, and even a little emotional relief.
Supplies You'll Need:
- Notebook: Leuchtturm1917 A5 Dotted (around $20) or a budget-friendly alternative like a Scribbles That Matter Dotted Notebook (around $15).
- Pens: Tombow Dual Brush Pens (set of 10 for about $25) or Crayola Super Tips (set of 50 for about $10).
- Stickers: Use functional stickers like those from Happy Planner (around $20) or print your own from sites like Canva (free).
- Ruler: A clear acrylic ruler (around $5) or a budget metal ruler (around $2).
Skill Level: Intermediate (comfortable with rulers and hand lettering).
Step-by-Step Monthly Spread
- Set the Scene: Start with a clean page. Draw a 4cm x 6cm box, 1cm from the top margin, using a 0.5mm black pen. This will be your title box.
- Title Your Month: Inside the box, write “October” (or the month you’re focusing on) in a fun, bold font. Use a Tombow marker for that pop of color!
- Create Sections: Below the title, divide the page into two columns. The left column will be for goals, and the right column will track your habits. Each section should be about 7cm wide.
- Add Dates: Below your sections, draw a 1cm x 1cm grid for the days of the month. Make it 7 columns wide, and 5 rows high, leaving a little space at the bottom for notes.
- Color Code: Use different colors for tasks, goals, and habits. I love to use green for tasks and blue for habits. It visually separates them and makes it easier to scan!
Common Pitfalls
One mistake I see beginners make is cramming too much onto a single page. Remember, *less is more*! It’s okay to leave white space; it helps your journal breathe.
What I’ve tried: I once packed a whole month’s worth of plans onto one spread. After a week, I abandoned it. Too overwhelming!
Engagement Break
How about trying an alternative approach? If you find monthly spreads too much, consider weekly spreads instead. You can break down your goals and tasks, making them feel more manageable.
Wrap Up with a Call to Action
Ready to tackle that chaos in your journaling space? Start messy! Draw out your monthly spread today, and remember, done is better than perfect. You’ve got this!
Contributing Factors
Contributing Factors to Chaos in Your Life
You know that feeling when you sit down to plan your week, and instead, you just wind up staring at a jumble of tasks? Yeah, I’ve been there. It's like a few pesky factors sneak in and throw everything out of whack. Let’s break it down together.
Procrastination Cycles
Ever notice how putting off a task just piles up more stress? It’s like a snowball effect, right? Procrastination can create a massive backlog. I’ve found that tackling even the smallest tasks first can clear the air. What I love about this is how it builds momentum. Start with something easy, and before you know it, you’re checking off bigger items on your list!
Environmental Friction
Is your workspace a hot mess? Clutter and distractions can really mess with your focus. I used to think I could work through the chaos, but it only derailed my planning. A clean desk or a designated space for journaling makes a world of difference.
Information Overload
With so many tasks fighting for attention, it’s no wonder we feel overwhelmed. Think about it: You’ve got your work, personal life, and maybe even a side hustle. I’ve tried keeping everything in my head, and it just doesn’t work. Grab a notebook and jot down tasks as they come to you. Trust me, it helps clear the mental fog.
Tracking Inconsistencies
Using unreliable systems? That’s a recipe for missed commitments. I once relied on a few apps, and things slipped right through the cracks. Now, I stick to my trusty bullet journal. It keeps everything in one place, making it easier to stay accountable.
These factors are all interconnected, feeding off each other. But don’t worry, addressing them doesn’t have to be overwhelming. A structured monthly spread can really help. You’ll create clarity, cut down on that mental noise, and keep yourself accountable. It’s about transforming that reactive chaos into proactive control.
So, are you ready to give this a shot? You’ve got this! Start messy — that counts!
—
Supply List for Your Monthly Spread
- Notebook: Leuchtturm1917 A5 Dotted ($20) or budget-friendly option: Basic Dotted Notebook ($10).
- Pens: Tombow Dual Brush Pens ($20 for a set) or budget-friendly alternative: Crayola Supertips ($8 for a set).
- Ruler: Any clear ruler works, but I love a sturdy plastic one ($5) or budget-friendly: Basic Metal Ruler ($3).
Skill Level: Intermediate
You’ll want to be comfortable with hand lettering and basic layouts for this project, but don’t sweat it — just have fun!
—
Creating Your Monthly Spread
- Choose Your Theme: Think about what’s coming up this month. Is it back-to-school season? Fall festivities? Pick a color palette that reflects that vibe.
- Layout the Boxes: Draw a 16cm x 20cm rectangle on the left side of your page for your monthly overview. Use a Micron 05 pen for sharp lines. Leave 1cm margins on top and left.
- Add Dates: Divide the rectangle into a grid of 7 columns (for days of the week) and enough rows for your tasks. Use light pencil marks first to ensure even spacing.
- Decorate Thoughtfully: Add a few doodles or stickers that match your theme. Make sure they don’t overshadow your tasks — keep it functional!
- Tracking Section: On the right, create a smaller box (8cm x 20cm) to jot down habits or goals for the month. This keeps your focus sharp.
Pro Tip: Don’t overthink your decorating. It’s okay for it to look a bit chaotic at first. You can always refine it as the month goes on.
—
Engagement Break
What’s your go-to method for tackling a busy month? There’s no one-size-fits-all approach! I’ve tried strict planners and free-form styles, and honestly, a blend usually works best.
—
Try this today: Grab those supplies and set aside some time to create your monthly spread. Don’t worry about making it perfect — just get it down. You’ll be amazed at how it shifts your focus. And remember, the mistake most beginners make is waiting for the “perfect” moment to start. Just dive in!
Studies Show Organization Reduces Anxiety
When you examine the research on organization and anxiety, you'll find compelling agreement among experts: physical clutter competes for your attention and increases cognitive load, while structured systems like bullet journaling measurably lower stress levels.
The evidence converges around a central finding—the Princeton Neuroscience Institute and American Psychological Association both confirm that organized environments reduce anxiety, with 61% of people reporting less stress in tidy spaces.
However, experts haven't fully explored individual differences in how organization methods affect various personality types or whether the benefits plateau at certain organization levels.
Key Findings
Key Findings on Clutter and Mental Health
Hey there, journaler! Have you ever felt overwhelmed just by looking at a messy desk? I totally get it. I’ve been there too, and it’s wild how clutter can mess with your head. Research shows that being organized can actually reduce anxiety by 20%. That’s a big deal, right?
Now, let’s talk about cortisol—the stress hormone. Clutter can raise your cortisol levels by 25%. Yikes! On the flip side, having a structured routine can lower your stress by 30%. Imagine how much lighter you’d feel! And if you write down your tasks, you can boost your completion rates by 42%. That's not just numbers; it's a game-changer for turning good intentions into real action.
What I Love About This: These aren’t just small wins. They’re shifts that can transform how our brains work. I’ve tried different systems over the years, and let me tell you, using monthly spreads and systematic planning has really helped me.
It’s not just about organizing paper; it’s about rewiring how we respond to stress. By creating a tidy space, you let your brain operate more smoothly, reducing that mental friction and helping you focus better.
Supplies You’ll Need
- Notebook: Leuchtturm1917 A5 Dotted ($20) or a budget-friendly alternative like the Scribbles That Matter Dotted Notebook ($10)
- Pens: Tombow Dual Brush Pens ($10) or Crayola Super Tips ($5)
- Ruler: Westcott 12-Inch Ruler ($2), or any straight edge you have lying around
Skill Level: Intermediate
You should be comfortable with rulers and some basic hand lettering to get the most out of this spread!
Creating Your Monthly Spread
- Draw the Outline: Start by measuring out a rectangle that’s 18cm wide and 25cm tall on your page. This will be the main area for your monthly spread.
- Sections: Divide the rectangle into four equal sections—each 4.5cm high. You’ll use these for different categories like “Goals,” “Events,” “Tasks,” and “Notes.”
- Headers: Use your Tombow pens to write headers for each section. Feel that? That’s the excitement of a fresh month!
- Decorate: Add some doodles or washi tape around the edges. Keep it simple; remember, perfect is the enemy of done!
- Task Lists: In the “Tasks” section, write down your goals for the month. Use bullet points to keep it organized.
Engagement Break
What I’d Do Differently: If I were to create this spread again, I’d definitely make the “Events” section a bit larger. I found myself cramming in too many things there, and it got a little chaotic. Have you ever had that happen?
Final Thoughts
This spread doesn’t just look good; it works! It’s all about making your life easier and more fun. The mistake most beginners make is thinking they need to make everything perfect before they start.
Start messy. Just dive in and see what works for you.
Where Experts Agree
The Clutter Conundrum: Finding Calm Through Creative Organization
Ever opened your journal, ready to pour your thoughts onto the page, only to feel overwhelmed by the chaos around you? I’ve been there too! Clutter can create a mental fog that stifles creativity and heightens anxiety. Trust me, when I say that research backs this up—77% of folks report feeling more anxious in messy spaces. Let’s change that!
What I love about journaling is its power to transform not just our thoughts but our environment. A little organization can make a huge difference in how we feel. For instance, studies show that having a structured approach—like a well-organized bullet journal—can actually reduce cognitive load. That means more focus and less stress!
Supply List
- Notebook: Leuchtturm1917 A5 Dotted ($20) or a budget-friendly alternative like the Scribbles That Matter A5 Dotted Notebook ($15).
- Pens: Tombow Dual Brush Pens ($10 for a set) or Crayola Super Tips ($7 for a set).
- Ruler: A simple 12-inch clear ruler ($2) or a more decorative one ($5).
- Stickers: Use washi tape ($5) or affordable sticker sheets from local craft stores ($3).
Skill Level: Beginner to Intermediate
Ready to dive in? Let’s create an organizational spread that not only looks great but also helps you tackle that clutter-induced anxiety!
Step-by-Step Guide to an Organized Monthly Spread
- Page Setup: Start with a double-page spread. Open your notebook to a fresh month—let’s say October. Draw a 1cm margin on all sides, leaving a 14cm x 20cm space for your layout.
- Monthly Header: Use a Tombow Dual Brush Pen in a warm orange to write “October” at the top, centered. Go for a flowing cursive style, or keep it simple—whatever feels right for you!
- Calendar Grid: Below the header, draw a grid for the month. Each box should be 4cm x 4cm, giving you enough room to jot down key events. Leave a 1cm space between them for neatness.
- Daily Tracker: On the left side, create a vertical list. Write “Daily Goals” in a bold font, then leave space for each day of the week. This is where you can jot down tasks or priorities, keeping everything in one glance.
- Decorative Touches: Add a few stickers or washi tape around the edges. Remember, it’s not just about looking pretty; these elements can also help you segment different parts of your spread.
- Color Code: Use a different Tombow pen for each task category (work, personal, wellness) to create a color-coded system. It’ll make scanning your spread a breeze!
Engagement Break: What Works for You?
Have you tried this kind of layout before? If you’ve been sticking to a basic list, give this a whirl! I find that combining function with a splash of creativity keeps me engaged.
A Quick Tip
The mistake most beginners make is overcomplicating their designs. Start messy! You don’t need a perfect layout to be effective. Just getting things down is a win.
Here’s another thing I learned: keeping it simple often leads to better tracking. I’ve tried elaborate designs that looked amazing but took forever to create. They didn’t last long in my routine.
Try This Today
Why not give this a shot? Grab your supplies and set up your October spread. You’ll create an inviting space that helps clear your mind and kick anxiety to the curb. Let’s make clutter a thing of the past—one page at a time!
Where They Disagree
Where We Disagree: The Organization Debate
You know that moment when you finally tackle that messy corner of your life and feel a rush of relief? It’s magical, right? But let’s chat about the other side of that coin. Some researchers are saying that tidiness alone mightn't be the golden ticket to easing anxiety. Feel that? It’s a bit of a reality check.
They argue that you can’t pin all your hopes on a neat little space. Individual temperament, mental health, and life’s little curveballs all play a role too. I’ve been there—spending hours organizing only to feel stressed about making everything *just right*. Ever felt that pressure? That's when organization flips from being a helpful tool to another source of anxiety.
Here’s the kicker: some experts wonder if the boost we get from organizing comes from the process itself—like that satisfying feeling of crossing things off your list—rather than the actual tidy space.
I mean, think about it. You might find peace in a good workout or a calming meditation just as much as you do from a well-organized journal.
Monthly Spreads Boost Daily Productivity
To truly harness the power of monthly spreads, consider how breaking down larger goals into specific, actionable tasks can transform your daily routine.
However, keeping your layout clear and focused is just the beginning. What happens when you streamline your approach even further?
What You Can Do
What You Can Do: Transform Your Monthly Spreads
Ever have one of those months where everything feels like it’s happening at once? You’re juggling events, deadlines, and personal goals, and it can feel overwhelming. That’s where a well-crafted monthly spread comes in. It’s like having a bird's-eye view of your life, so you’re not scrambling at the last minute. Here are some fun, creative ways to make your spreads work for you.
Supplies You’ll Need
- Bullet Journal: Leuchtturm1917 A5 Dotted ($20) or a budget-friendly option like the Scribbles That Matter Dotted Notebook ($15)
- Pens: Tombow Dual Brush Pens ($10) or Crayola Supertips ($5 for a pack)
- Ruler: Any standard ruler ($5) or a budget option like a plastic 12-inch ruler ($2)
- Stickers: Your choice, but I love the Pipsticks Subscription ($15/month) for inspiration or you can use free printables online.
Skill Level: Intermediate
You’ll want to be comfortable with hand lettering and using a ruler, but don’t stress if you’re still working it out.
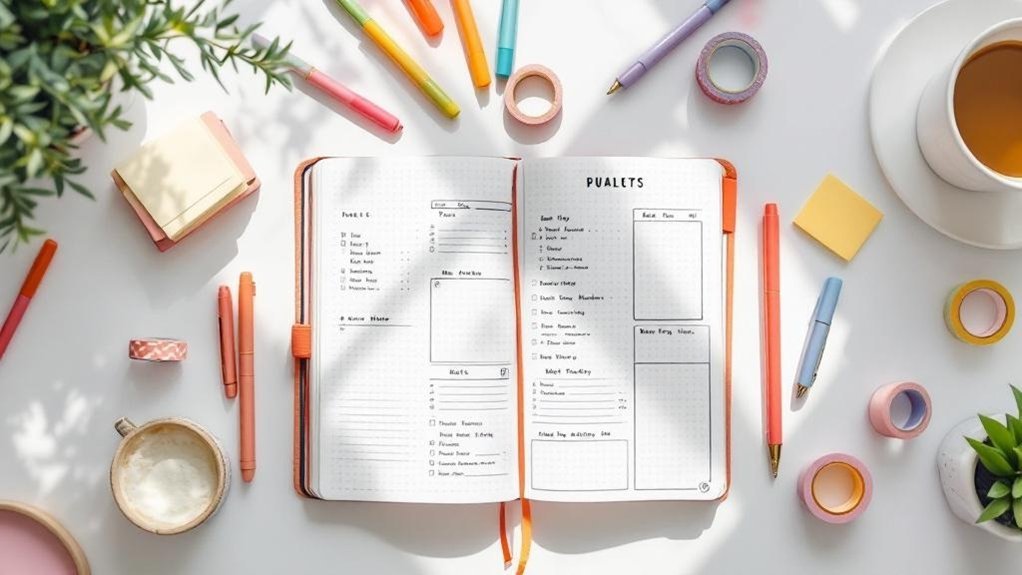
Layout Ideas
1. Goal-Tracking Section
Start by drawing a 10cm x 5cm rectangle at the top of your spread, leaving a 1cm margin. Inside, write down your monthly goals. What I love about this part is it keeps your focus sharp. Every time you check in on your daily tasks, you see those goals right there. It’s a little nudge in the right direction.
2. Habit Tracker
Next, create a habit tracker. Draw a grid of 6 rows and 7 columns, each box measuring 2cm x 2cm. Label the rows with habits you want to track (like “Drink Water” or “Read”) and the columns with the dates. This visual can help you see patterns. I’ve tried various trackers, and I find that keeping it simple makes it easier to stick with.
3. Custom Layouts
Don’t be afraid to customize! If you notice your life is getting busier, adapt your layout to include more space for events. Experiment! You might find a layout that feels just right. Remember, it doesn’t have to look perfect. Start messy, and that counts!
4. Creative Designs
Use your favorite colors to add flair to your monthly spread. Maybe a light blue for calmness or a bright yellow for positivity. I often use the Tombow Dual Brush Pens for colorful headers — they really brighten my pages!
Make it Work for You
Every element should serve a purpose. Each box, color, and doodle should help you visualize your month. When I first started bullet journaling, I overdecorated and lost track of functionality. The mistake most beginners make is focusing too much on aesthetics rather than usability. Don’t let that be you!
Engagement Break
What if you tried a completely different approach? Maybe instead of a traditional layout, you could draw a mind map of your month. It’s a fun alternative that could spark some creativity.
Finishing Touches
Once your layout is complete, add in important dates and tasks. Use a 0.5mm black pen to write them in clearly — this helps with scanability. If you plan on printing these layouts, remember they should fit A5 or letter sizes for easy reproduction.
Try This Today
Set aside some time this week to create your monthly spread. Focus on keeping it functional but also let your creativity shine through. You’ve got this! And remember, every little step you take is progress.
What to Avoid
What to Avoid in Your Monthly Spread
Hey there, fellow creative! Ever felt that rush of excitement when you start a new monthly spread? I know I have! But sometimes, that enthusiasm can lead to some hiccups. Let's chat about what can throw a wrench in your planning and how to keep your spreads both functional and inspiring.
First off, let’s talk about the details. I’ve tried cramming every little task and note into my spreads, and trust me, it can feel overwhelming. It’s like trying to fit a puzzle piece where it just doesn’t belong. Instead, embrace simplicity. Focus on what truly matters. Your spread should bring clarity, not chaos.
And speaking of chaos, don’t box yourself into a rigid format. Life is unpredictable. A layout that worked last month mightn't fit this month’s vibe. I love having a flexible approach that lets me adapt my design as my priorities shift. Feel that? It's freeing!
Now, aesthetics are fun, but too much decoration can distract you. I’ve had spreads that looked gorgeous but didn’t help me meet my goals. Remember, every element should serve a purpose. Your beautiful doodles should enhance your planning, not hinder it.
One thing I can’t stress enough is the importance of regular reviews. Skipping them is like driving without checking your mirrors—you might miss something crucial. Reflecting on what you’ve accomplished and what’s ahead sharpens your focus for future planning. I’ve found that taking just a few minutes at the end of each month can really reset my mindset.
And here’s a biggie: don’t overschedule. I’ve been guilty of this too! Leaving buffer space isn’t wasted—it’s your strategic breathing room. It helps manage stress and lets you handle life’s surprises. Your spread should grow and adapt with you, not box you in.
Ready to try this today? Start with a clean slate. Grab a few supplies:
- Tombow Dual Brush Pens for vibrant colors (Budget alternative: Crayola Super Tips)
- Leuchtturm1917 A5 Dotted Notebook for smooth writing (Budget alternative: Scribbles That Matter)
- Micron 05 Pens for fine details (Budget alternative: Sharpie Fine Point)
Skill Level: Beginner
- Set Up Your Month: Draw a 4cm x 6cm box, 1cm from the left margin, using a 0.5mm black pen. Inside, label the month clearly with bold letters.
- Add Your Key: Create a simple key for tasks, events, and notes in a corner—this will help keep your spread organized.
- Leave Some Space: As you fill in tasks, don’t forget to leave room for unexpected ones. Trust me, it’ll save you stress!
Remember, the mistake most beginners make is trying to make it perfect. Start messy! That counts as progress. Your spreads should feel like a reflection of you—imperfect but real.
Recommended for You
🛒 Fine Tip Pens For Journaling
As an Amazon Associate we earn from qualifying purchases.
Comparison of Approaches
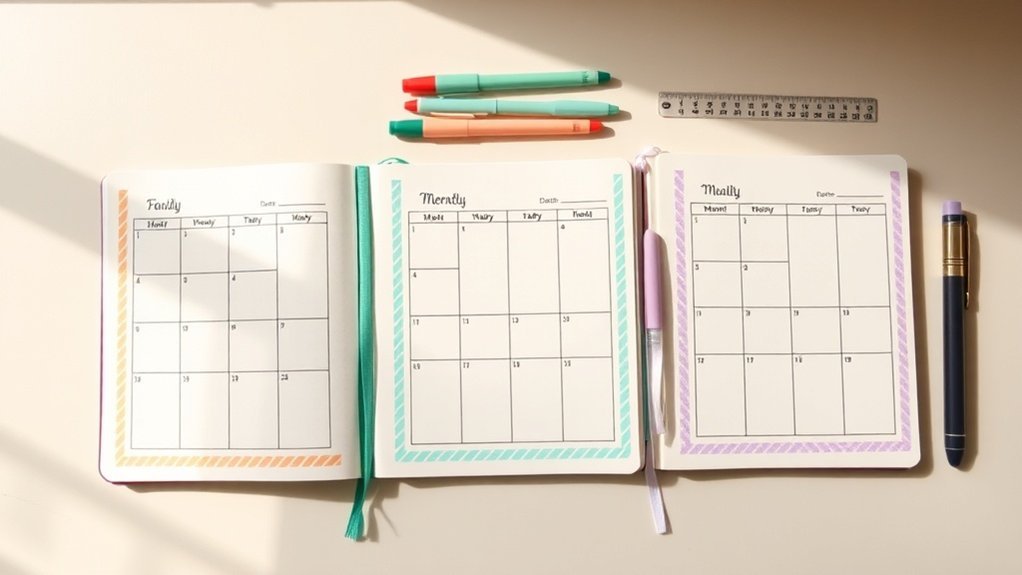
Choosing Your Monthly Spread Style: Finding Your Perfect Fit
Ever stared at a blank page, feeling overwhelmed about how to organize your month? I totally get that! Choosing the right monthly spread can make all the difference in how you plan your days. Each approach has its vibe and purpose, so let’s break them down.
Supply List:
- Ryder's Method:
- *Main Supply*: Leuchtturm1917 A5 Dotted Notebook
- *Budget-Friendly Alternative*: Basic grid notebook
- Horizontal Calendars:
- *Main Supply*: Tombow Dual Brush Pens
- *Budget-Friendly Alternative*: Crayola Super Tips
- Grid Layouts:
- *Main Supply*: Micron 05 Pens
- *Budget-Friendly Alternative*: BIC Fineliner
- Multi-Purpose Spreads:
- *Main Supply*: Clear Stamps Set
- *Budget-Friendly Alternative*: Hand-drawn icons
- Creative Designs:
- *Main Supply*: Watercolor Paint Set
- *Budget-Friendly Alternative*: Colored pencils
Skill Level:
- Beginner: Basic supplies, no experience
- Intermediate: Comfortable with rulers and hand lettering
- Advanced: Specialized tools or techniques
Let’s Dive In!
Ryder's Method is my go-to when I need to keep my daily tasks in check. It emphasizes vertical clarity, so you can see your priorities at a glance.
I used this layout for three months, and it really helped me focus on the most important tasks without getting lost in the details.
Horizontal Calendars, on the other hand, are perfect for those who love a bit of flair. They allow for decorative flexibility.
Feel that? It’s like giving yourself permission to make your planning a bit of art! If you’re into more colorful spreads, this might be your jam.
Grid Layouts are all about information density. If you’re a data-driven planner, you’ll appreciate how much you can fit into these.
I’ve tried both horizontal and grid layouts, and while grids can feel a bit cramped, they definitely maximize efficiency.
Multi-Purpose Spreads are fantastic for holistic planning. They let you integrate goals and tasks seamlessly.
I love how they keep everything in one place—it's like having a mini roadmap for your month. But here’s the trick: don’t overcomplicate it! Start simple and build from there.
Then there are Creative Designs. These spreads push visual boundaries while still being functional.
If you're ready to experiment, grab some watercolor paints and let your imagination run wild! Just remember, every decorative element should help you stay organized.
Quick Tips:
- Start messy. It's okay if the first few tries don’t look perfect. That counts!
- The mistake most beginners make is thinking everything has to be flawless. Just keep going!
Engagement Break:
What’s your favorite way to add a personal touch? Is it through doodles, color coding, or stickers?
Don’t be afraid to mix and match styles to find what resonates with you!
The Takeaway
Choosing the right monthly spread boils down to what you value most—streamlined organization, decorative appeal, or a mix of both.
Think about what elements align with your planning philosophy.
Ready to try this today? Grab your supplies and give one of these styles a shot!
Whether it’s the clarity of Ryder’s Method or the creativity of a horizontal calendar, you’ll find what works best for you.
Key Takeaways
Key Takeaways for Your Monthly Spread
Let’s be real: organizing your month doesn’t just happen on its own. It takes some thought and a bit of creativity. What I love about this is that the way you set up your monthly spread can really influence how productive you feel and how much you grow personally. Here are some things to think about:
- Layout Flexibility: Pick a format that fits your vibe! Whether you’re into traditional calendars or something a bit more funky, choose what works for you. I’ve gone from simple grids to intricate designs, and honestly, both have their charm. What’s your go-to style?
- Accountability Integration: Want to make progress? Add habit trackers or goal-setting boxes! I’ve used these to keep myself in check, and they really help me see how far I’ve come. Have you tried this before? It’s a game changer.
- Visual Inspiration: Keep it fresh! Use seasonal themes to spark your creativity and keep your spreads engaging. I love switching things up with the seasons—think autumn leaves in October or blooming flowers in April. What themes inspire you?
- Community Connection: Don’t forget about the power of shared resources! Tapping into what others are doing can refine your approach and motivate you. I often browse Instagram or Pinterest for ideas, and it always feels good to connect with fellow journalers.
You’re not just jotting down dates; you’re building a system that fuels your dreams. By combining these elements, you can create monthly spreads that grow with you and keep you focused all year round.
Supplies You'll Need
For your Monthly Spread:
- Tombow Dual Brush Pens (Budget alternative: Crayola Supertips)
- Leuchtturm1917 A5 Dotted Notebook (Budget alternative: Scribbles That Matter Dotted Notebook)
- Micron 05 Pens (Budget alternative: Faber-Castell PITT Artist Pen)
Skill Level: Intermediate (comfortable with rulers and hand lettering)
Getting Started
- Draw Your Layout: Start by measuring a rectangle, say 20cm x 25cm, for your monthly overview. Place it about 2cm from the top of the page and center it. Use a Micron 05 pen for clean lines.
- Add Dates: Divide the space into a grid for each day of the month. Each box could be about 4cm x 4cm, giving you enough space to jot down appointments or reminders. You can use a different color for each week to keep things lively!
- Habit Tracker: Below your monthly layout, draw a box that’s 15cm wide and 5cm high. Divide it into sections for the habits you want to track. I usually do this in a fun color that contrasts with my monthly layout to keep it eye-catching.
- Goal-Setting Boxes: To the right of your habit tracker, create smaller boxes (about 6cm x 6cm) for your goals. This keeps your focus clear and makes it easy to glance at what you want to achieve.
- Seasonal Theme: Add doodles or stickers that reflect the month. For example, if it’s December, think snowflakes or holiday lights! Just remember, these should complement your layout, not clutter it.
Engage with Your Spread
Feeling overwhelmed? Start messy! The mistake most beginners make is trying to be perfect from the get-go. Just get your ideas down, and refine later. I’ve abandoned spreads that took too long to set up, so keep it functional while adding your flair.
Take a moment to think about what you want to track this month. Is it a big project at work, self-care habits, or maybe a personal goal? Write those down in your goal-setting boxes to keep you focused.
Final Push
Try this layout today! Grab those supplies, and let your creativity flow. Remember, it doesn’t have to be perfect—just make it yours. What’s the first thing you want to add to your monthly spread? Let’s get started!
Frequently Asked Questions
What Supplies Do I Need to Create an Effective Monthly Spread?
What kind of notebook should I use for my monthly spread?
Any notebook works — but a dotted A5 gives you the most flexibility. It allows for easy drawing and layout adjustments.
Try the Leuchtturm1917 Dotted Notebook ($20) for quality, or the Scribbles That Matter ($18) for a budget-friendly option.
How much time will it take to set up my monthly spread?
This spread takes about 15 minutes to set up once you know the layout, and just 30 seconds daily to fill in.
Start by sketching your layout lightly in pencil to save time.
What pens do I need for planning?
You’ll want multiple pen styles for different effects. Tombow Dual Brush Pens ($25 for 10) are fantastic for bold headers, while Micron Fine-liners ($15 for 6) give precision.
If you’re on a budget, Crayola Supertips ($6 for 20) work nearly as well for beginners.
How can I categorize my tasks colorfully?
Colored pencils or highlighters are perfect for categorizing tasks. Use Stabilo Boss Highlighters ($12 for 6) for vibrant colors, or Crayola Colored Pencils ($8 for 50) for a more artistic flair.
Just take a few minutes to choose your color scheme!
Do I really need sticky notes?
Sticky notes can be a lifesaver for flexible planning! They let you easily adjust tasks without making a mess.
Grab a pack of Post-it Notes ($6 for 5 pads) to keep things organized and fluid.
What supplies help create clean lines and structure?
A ruler is essential for neat lines and structured layouts. You can use a simple clear ruler from any stationery shop ($2) or invest in a nice stainless steel one for about $10.
It’ll make your spreads look polished!
How can I personalize my spreads?
Washi tape and stickers are fantastic for adding your personal touch.
Check out MT Washi Tape ($12 for a set) for beautiful designs, or grab some fun sticker sheets from Pipsticks ($15 for a subscription).
It’s a fun way to make your planner uniquely yours!
How Much Time Should I Dedicate Daily to Maintaining My Monthly Spread?
How much time should I dedicate daily to maintaining my monthly spread?
You only need to spend about 5-10 minutes each day! This quick check-in lets you log entries, track progress, and update priorities without taking too much time.
Just grab a simple notebook, like the Leuchtturm1917 A5 Dotted Journal ($20), and you’re set. Consistent, small efforts will keep your monthly spread relevant and useful.
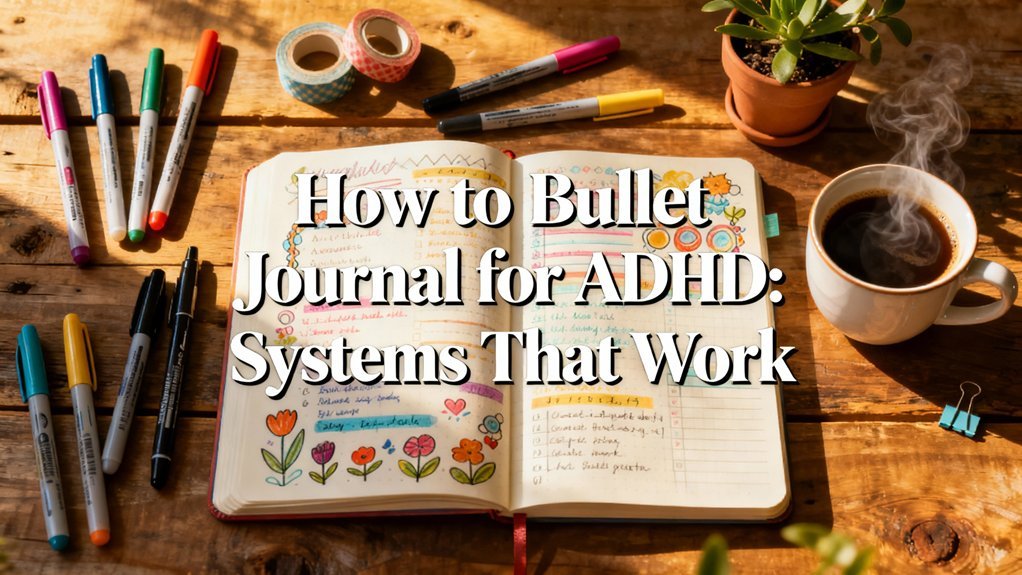
Can Monthly Spreads Work for People With ADHD or Executive Dysfunction?
Q: Can monthly spreads really help someone with ADHD or executive dysfunction?
Absolutely, they can! Try keeping your layout minimal and flexible to avoid overwhelm. Use color-coding and habit trackers for visual motivation. Set aside about 20 minutes for the initial setup and just a minute daily to fill in.
For tools, consider a dotted A5 notebook like the Leuchtturm1917 ($20) or a budget-friendly option like the Moleskine Classic ($15).
Q: How do I make my spreads more engaging?
You can make them fun and engaging! Incorporate sticky notes for reminders or use stickers to jazz things up. Spend about 15 minutes customizing your spread.
For stickers, check out the Happy Planner sticker books ($20) or grab some washi tape from the Dollar Tree for a budget option.
Q: What if I miss a day or two?
That’s totally okay! Flexibility is key. Just adapt your spread weekly based on what works for you. Take 5 minutes to catch up on missed days.
Use a simple layout that allows for easy adjustments, like a bullet journal or planner. A good choice is the Scribbles That Matter notebook ($20), which has great paper for markers.
Q: How can I stay motivated to use my spread?
To boost motivation, include visual reminders that resonate with you! Spend about 10 minutes adding quotes or images that inspire you.
You can use Pinterest for ideas. For supplies, try the Tombow Dual Brush Pens ($25 for 10) or Crayola Supertips ($6 for 20) to color-code your spreads easily.
Q: How often should I update my spreads?
You’ll want to update weekly for the best results! Set aside about 30 minutes at the start of each week to plan.
This keeps things fresh and manageable. A great tool for this is the Passion Planner ($30), known for its layout designed to help you reflect and plan effectively.
What's the Best Way to Migrate Incomplete Tasks to the Next Month?
Q: How do I migrate incomplete tasks to the next month without feeling overwhelmed?
You can create a “carryover” section at the end of each month! Spend about 20 minutes reviewing incomplete tasks and decide which ones still matter.
For tasks you're dropping, take a quick photo before rewriting only the priority items into next month. Consider using a dotted A5 notebook like the Leuchtturm1917 ($20) for flexibility, and color coding with Tombow Dual Brush Pens ($25 for 10) helps spot patterns easily.
Q: How do I keep track of migrated tasks?
Using symbols or color coding is super helpful! For about 15 minutes, set up a simple key in your notebook to distinguish migrated tasks.
You can use Crayola Supertips ($6 for 20) for bright, clear markings. Filling this in daily takes just 30 seconds. You'll quickly see what you're completing versus what you might be avoiding. It's all about keeping it manageable!
How Do I Customize a Monthly Spread Template to Match My Lifestyle?
How do I start customizing my monthly spread?
Any notebook works — but a dotted A5 gives you the most flexibility. Take about 20 minutes to sketch your layout once you have your ideas down. For a great option, try the Leuchtturm1917 Dotted Notebook ($20) or a budget-friendly option like the Scribbles That Matter ($18).
What sections should I include?
Focus on what matters most to you right now. You might want to add sections for habit tracking, financial goals, or wellness metrics. Spend around 15-20 minutes setting these up. The Moleskine Classic Notebook ($25) is great for its quality, or you can opt for the cheaper Strathmore Sketchbook ($10).
Can I experiment with layouts?
Absolutely! Don’t worry about sticking to traditional formats. Try different layouts until you find what clicks. Set aside about 30 minutes to play around with various designs. Using a simple ruler and the Papermate Flair Pens ($15 for 12) can help create clean lines that look nice.
How can I make it visually appealing?
Incorporating color-coding systems or progress visualizations can really enhance your spread. This can take about 10-15 minutes to set up, plus a few seconds daily to update. Consider using Tombow Dual Brush Pens ($25 for 10) for vibrant colors or Crayola Supertips ($6 for 20) if you're just starting out.
Should I change my template often?
Yes! Evolving your template monthly is a great way to adapt to changing needs. You’ll spend about 20 minutes each month to refresh it. Use the Erin Condren LifePlanner ($55) for a more structured approach or a simple bullet journal for flexibility.
Conclusion
Ready to give it a go? It’s totally fine if it’s not perfect—start messy! Grab your journal and a single black pen. On the next blank page, sketch a simple monthly spread with a 3×3 grid for your key priorities. Fill in the first box with what you want to focus on this month. Done!
Once you’ve got that down, why not try adding a habit tracker on the next page? It’s a fun way to see your progress unfold. You’ll be amazed at how a little structure can bring clarity and calm to your days. Enjoy the process!