Table of Contents
Staring at a blank page can be both daunting and freeing, right? But when you finally create a spread that clicks, it feels like magic. Imagine transforming your chaotic freelance life with a simple project tracker and an invoice log. You’ll learn how to design spreads that work for you, not against you. I've used these layouts for three months, and they’ve completely changed my approach to managing clients and deadlines. So grab your pen—start messy. That counts. Let’s build a system that fits your freelance life perfectly!
Key Takeaways
- Create project trackers with clear deadlines to visualize progress — this keeps you focused and accountable, ensuring no project slips through the cracks.
- Use a simple financial tracking table each month to monitor income and expenses — staying on top of finances helps you avoid surprises and plan for growth.
- Implement color-coded tasks in your bullet journal to prioritize effectively — this visual approach reduces overwhelm and clarifies what needs your immediate attention.
- Schedule weekly reviews every Sunday evening to assess accomplishments and adjust plans — this habit enhances time management and keeps your workflow aligned with goals.
- Embrace a “functionality over perfection” mindset; start with basic layouts and adapt as needed — avoiding overcomplication helps maintain motivation and prevents burnout.
Introduction
Ever sat down to plan your week, only to feel overwhelmed by scattered notes and unorganized tasks? I’ve been there! Whether you’re handling a handful of clients or running a solo show, a standard planner just doesn’t cut it. That’s where the Bullet Journal comes in! It’s like a blank canvas, ready for you to paint your unique workflow.
What I love about Bullet Journaling is its flexibility. You can create tailored spreads that totally transform how you track projects, manage finances, and nurture client relationships. Imagine visualizing your timelines, monitoring your income, and organizing all your communications in one cohesive journal. Say goodbye to the chaos of multiple tools!
Supplies Needed
- Notebook: Leuchtturm1917 A5 Dotted (around $20) or a budget-friendly alternative like the Scribbles That Matter Notebook (about $15).
- Pens: Tombow Dual Brush Pens (around $10 for a set) or Crayola Super Tips (about $5 for a set).
- Fineliner: Micron 05 (around $2) or a budget option like Stabilo Point 88 (about $15 for a pack).
- Ruler: Any standard ruler will do (around $1).
Skill Level: Beginner to Intermediate.
Tailored Spreads to Try
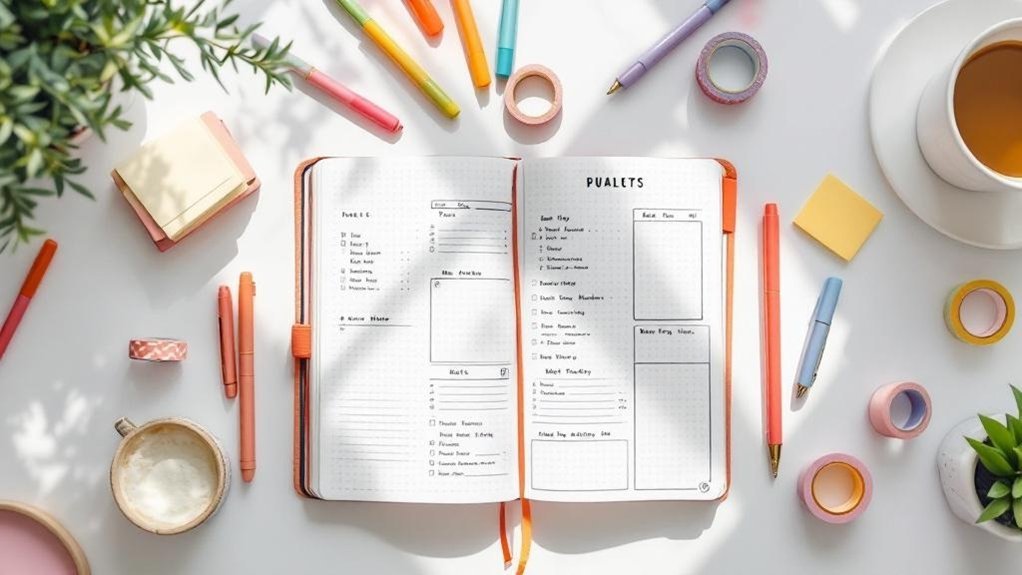
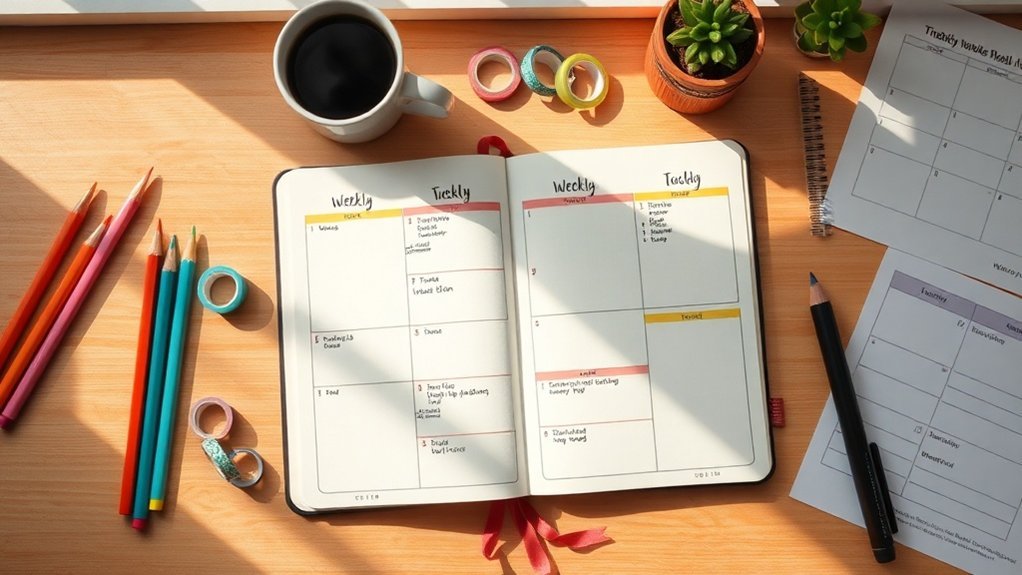
First up, let’s talk about your project tracker. Draw a 10cm x 15cm rectangle, leaving 2cm from the top and 1cm from the left margin. Inside, create columns for project names, deadlines, and status. Use a 0.5mm black pen to outline the boxes, then fill them in with your favorite colors from the Tombow set.
I’ve tried various layouts, but this simple grid helps me see everything at a glance without getting lost in details. Feel that? You’re on your way to a more organized freelance life!
Reflect and Celebrate
Don’t forget to add some reflection spreads! These are where the magic happens. I like to do a monthly review spread. Draw a large circle in the center of a new page, about 12cm in diameter. Around the circle, create smaller boxes (4cm x 4cm) for each client or project. Inside the circle, jot down your biggest wins for the month.
This helps me recognize patterns and celebrate the little victories! A common mistake? Forgetting to actually use these spreads. It’s easy to create beautiful layouts but then not engage with them. Start messy! Just jot down whatever comes to mind. That counts as progress!
Try This Today
Ready to give it a go? Grab your favorite supplies and start by setting up your project tracker. Remember, done is better than perfect! You’ll be surprised at how much clarity a little organization can bring. Plus, incorporating a bullet journal habit tracker can enhance your overall productivity.
And if you find something isn’t working for you, don’t hesitate to switch it up. I’ve abandoned spreads after a month because they just didn’t vibe with my workflow. That’s part of the process!
Embrace the journey of creative organization. It’s not just about aesthetics; it’s about making your life easier and more productive. Happy journaling!
Understanding the Problem
You're juggling multiple clients and deadlines, yet you might find yourself relying on scattered emails, sticky notes, and mental reminders that fail to capture the full scope of your workload.
Most freelancers think they need complex software to stay organized, but what often holds them back is a lack of a centralized system that provides a comprehensive view. Without this clarity, prioritizing tasks becomes a challenge, leading to missed deadlines and escalating stress before you even realize it.
So, what can you do to regain control?
The key lies in implementing a streamlined approach that not only organizes your tasks but also enhances your productivity. For instance, using a bullet journal habit tracker can help you monitor your progress and create a clearer perspective on your workload.
Why This Matters
Why This Matters
Freelancing can feel like a circus act, right? Balancing multiple clients, shifting deadlines, and unpredictable income streams is enough to make anyone dizzy. I’ve been there. Without a solid system to keep track of everything, you might lose invoices, miss deadlines, or even watch your hard-earned money slip away through disorganized finances.
The mental load can get heavy when you’re relying on memory instead of a clear strategy. That’s where a bullet journal can step in and work its magic. Trust me, it transforms chaos into clarity. By visualizing your workload, you can prioritize like a pro and catch everything that might fall through the cracks.
What I love about this approach is that it’s not just about survival; it’s about thriving.
Supplies You’ll Need:
- Notebook: Leuchtturm1917 A5 Dotted ($20) or a budget-friendly alternative like the Scribbles That Matter A5 Dotted Notebook ($15).
- Pens: Tombow Dual Brush Pens ($10 for a set) or Crayola Super Tips ($5 for a set).
- Ruler: Westcott 12-Inch Clear Ruler ($5) or a budget option like a plastic ruler ($2).
- Stickers or Washi Tape: Etsy has some cute options ($5) or you can grab some from the dollar store.
Skill Level: Intermediate
You’ll want to be comfortable with rulers and maybe a little hand lettering.
Setting Up Your Bullet Journal
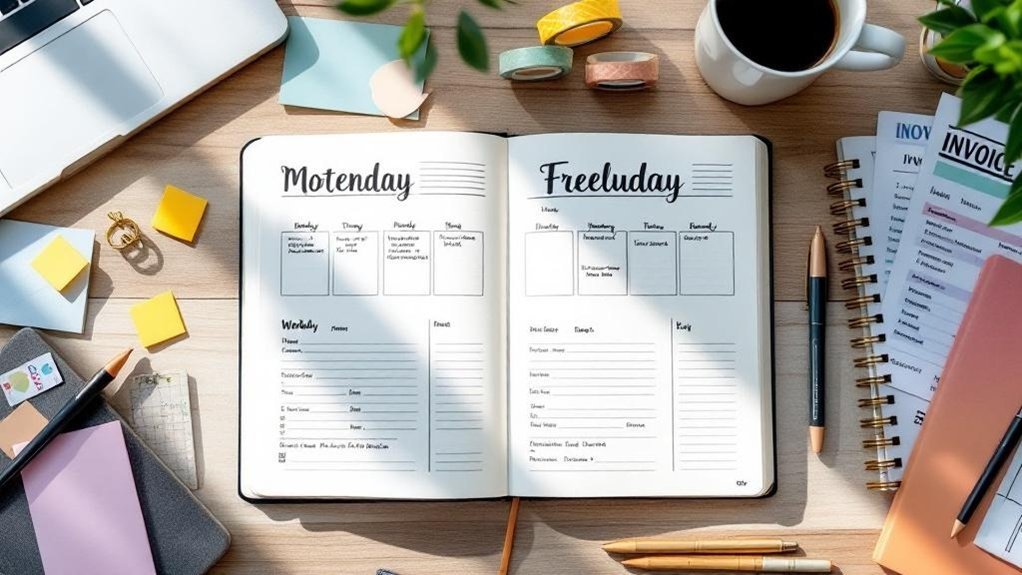
1. Create a Monthly Overview: Start with a two-page spread for the month. Draw two boxes, each 4cm x 6cm, about 1cm apart. Use a black pen to outline them. In the left box, note your deadlines. In the right, jot down client names. This makes it super easy to scan your month at a glance.
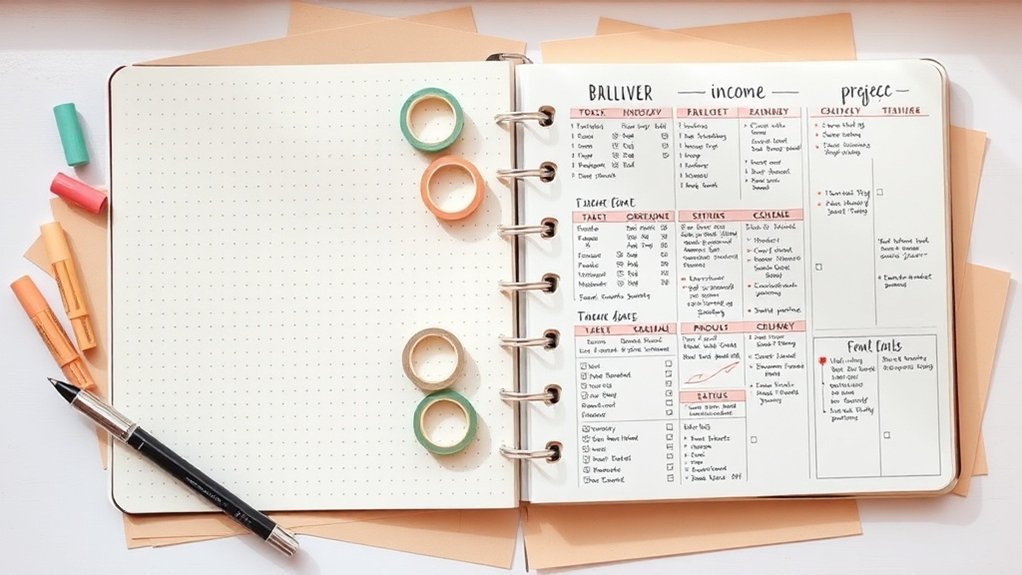
2. Financial Tracking: Dedicate a few pages to tracking your income. Draw a table with six columns: Date, Client, Invoice Number, Amount, Paid, and Notes. Each column should be 3cm wide. Keeping this organized can help you identify cash flow patterns.
I’ve used this layout for three months, and it really helps minimize those unexpected surprises.
3. Client Feedback Section: Create a space for documented feedback. I like to draw a 5cm x 10cm box at the top of the page for each client. This is where you’ll write down their thoughts and your action items for improvement. It’s a great way to build measurable pathways for growth.
The Mistake Most Beginners Make
Many people think they need to create the prettiest spreads right off the bat. But perfect is the enemy of done! Start messy. You can always refine your designs later. Just get your ideas down.
Engagement Break
Feeling a bit overwhelmed? Try this: Instead of planning everything at once, break it down. Focus on just one client’s deadlines for today. You’ll find that tackling things step by step makes it so much more manageable.
Personal Touches
What I’ve found is that decorating your spreads can actually enhance usability. Use color-coded pens for different clients or types of tasks. This makes scanning your pages easier. A little bit of art can go a long way!
Try This Today
Grab your supplies and start with that monthly overview. Even if it’s just a rough sketch, you’re making progress. Remember, you’re not just organizing; you’re building a freelance business that’s sustainable and ready to grow. You've got this!
What Most People Get Wrong
Supply List:
- Tombow Dual Brush Pens (Budget alternative: Crayola Supertips)
- Leuchtturm1917 A5 Dotted Notebook (Budget alternative: Scribbles That Matter A5 Dotted)
- Micron 05 Black Pen (Budget alternative: Paper Mate Flair Pen)
Skill Level: Intermediate (comfortable with rulers and hand lettering)
—
You know that feeling when your finances are just a jumbled mess? I’ve been there, and it’s no fun. When you’re freelancing, tracking your income and expenses mightn't seem like a priority, but trust me—it’s essential. Missing out on those tax deductions can hurt your bottom line. Feel that? It’s a sinking feeling that can be avoided with just a bit of organization.
Here's the kicker: many of us forget to set clear work-life boundaries. Burnout creeps in, and suddenly, your creativity feels stifled. I’ve learned that without time-blocking techniques, you end up reacting to tasks instead of strategically planning them. This leads to missed deadlines and a chaotic workflow.
Tip: Start messy. Doodle your tasks! You’ll find that just getting it down can ease that pressure.
Another common pitfall? Ignoring client feedback. Keeping a log of what your clients say is a game changer. It helps you spot those blind spots in your service delivery. I’ve seen how this small step leads to big improvements.
And let’s talk about your Bullet Journal. Are you treating it like a static document? If you're not adapting your spreads as your projects shift, you're missing out! My go-to approach is to keep it flexible. What I love about this is that it allows my planning to evolve with me. Remember: perfect is the enemy of done.
Engagement Break: Have you ever felt overwhelmed by your own journaling? It’s so easy to get caught up in the aesthetics and forget about functionality. Here’s what I’d do differently: focus on what you need most right now, whether it’s tracking expenses or managing your time better.
Technique Highlight: I like to create a monthly overview spread. Start with a simple 2-page layout: on the left, draw a 20cm x 10cm box for your calendar. Split it into 7 columns for each day of the week, and mark the dates using a Tombow Dual Brush Pen.
On the right, create a section for goals—use a 0.5mm Micron pen for clarity. This layout can help you see your month at a glance and track both personal and work-related goals. It’s practical, too—make sure to leave space for any upcoming deadlines or client meetings.
Remember, every decorative element should serve a purpose. If it looks pretty but doesn’t help you stay organized, it might be time to rethink that choice.
Try This Today: Set aside 10 minutes to jot down your income and expenses for the week. Use your Bullet Journal to create a simple tracking system. You’ll be amazed at how much clarity it brings!
The mistake most beginners make? Thinking they need to create elaborate spreads right off the bat. Start simple! You’ll find your groove as you go. Let your system evolve with you, and you’ll find that strategic organization is really the foundation of your freelance success.
The Solution: Step by Step
With those foundational spreads in place, you're ready to bring them into your daily routine. The next phase emphasizes how to integrate these tools seamlessly, ensuring they truly serve your business goals and yield tangible results. As you implement them, you'll also learn to adapt based on your unique needs and experiences. Additionally, utilizing bullet journal techniques can enhance your productivity and help maintain focus throughout your workflow.
Phase 1: Foundation
With that solid foundation set, you're ready to take your organization to the next level.
The Index will serve as your navigation tool, while the Future Log and Monthly Log provide essential visibility into your commitments.
This clarity not only streamlines your workflow but also empowers you to prioritize tasks effectively, laying the groundwork for a well-structured freelance system.
Key Setup Details
Key Setup Details for Your Creative Journal
Supplies You’ll Need:
- Notebook: Leuchtturm1917 A5 Dotted ($20) or a budget-friendly option like the Scribbles That Matter A5 Dotted Notebook ($15).
- Pens: Tombow Dual Brush Pens ($8 for a pack) or Crayola Super Tips ($5 for a pack).
- Fine Liner: Micron 05 ($3) or a budget alternative like the Staedtler Triplus Fineliner ($8 for a pack).
Skill Level: Beginner to Intermediate
—
Ever sat down to start tracking clients and managing projects, only to feel overwhelmed? I’ve been there! It’s so easy to let things get messy.
Here’s the thing: you don’t need a fancy setup to get going. Let’s build your journal’s backbone with a few simple elements that’ll keep your creativity flowing and your projects on track.
Start with an Index. This is your first step to quick navigation. Just a few lines at the beginning of your journal, noting down page numbers and what’s on each page.
I usually use a 2cm-wide column on the left side of the first page. This way, it’s easy to spot what you need later on.
Next, create a Future Log. Think of this as your long-term vision board. I love to divide this section into three months at a time.
Draw a 10cm x 15cm rectangle, split it into three columns, and label each with the upcoming month. Use a light color for the background — maybe a soft pastel — to keep it inviting. You can jot down important dates, deadlines, or events that might pop up.
Trust me, it’s a lifesaver! Feel that? That’s the clarity starting to build.
Now onto the Monthly Log. This is where the magic happens. Create a calendar for the month — I usually make a grid of 7 columns (one for each day of the week) and as many rows as you need for the month.
Each box should be about 5cm x 5cm. In each box, write the date and add a little space for daily tasks or notes. I often color-code tasks by client, which makes it super easy to see what’s on my plate at a glance.
Here’s what I love about this setup: It streamlines everything! I’ve tried more elaborate systems, but honestly, simpler is often better.
You’ll find you can manage multiple clients without losing track.
Quick Tip: The mistake most beginners make isn't using their Index! It feels extra, but trust me, it saves time later.
Ready to give this a shot? Pick a cozy spot, grab your supplies, and start messy.
Remember, done is better than perfect! You’ll be amazed at how quickly you can set this up and how much easier your project management feels.
Phase 2: Implementation
With your foundational bullet journal spreads in place, it's essential to implement critical checkpoints to monitor your progress and ensure each system's effectiveness.
These checkpoints help you catch discrepancies early—like incomplete time logs or missed deadlines—before they escalate into larger organizational issues.
Critical Checkpoints
Supply List
- Notebook: Leuchtturm1917 A5 Dotted (around $20) or a budget-friendly option like a basic composition notebook ($5).
- Pens: Tombow Dual Brush Pens (set of 10 for about $30) or Crayola Super Tips ($10 for a set of 50).
- Ruler: Any standard ruler (usually around $3) or a clear plastic ruler for about $2.
- Stickers/Decorative Items: Check out Washi tape (around $5) or DIY your own from scrap paper!
Skill Level: Intermediate
You’re comfortable with rulers and maybe even some hand lettering? Perfect! This project’s for you.
—
Ever sat down to journal and felt overwhelmed by all the moving parts of your freelance projects? I remember those days. It’s like juggling flaming torches while riding a unicycle!
But here’s the good news: you can simplify it with some critical checkpoints.
First off, let’s map out your client deadlines, deliverables, and payment milestones. I love creating a visual layout for this in my journal. Here's a quick way to do it: draw a 4cm x 6cm box, 2cm from the top of the page, using a 0.5mm black pen.
Inside, divide it into three sections—label them “Deadlines,” “Deliverables,” and “Payments.” Use your Tombow markers to color-code each section. It makes everything pop and keeps it fun!
Feel that? That’s the excitement of seeing everything laid out! I always add a little space at the bottom for notes or reminders.
Next, how about tracking invoices? Grab a blank page and draw a 1cm x 2cm box for each invoice. I usually create a grid of 5 boxes wide, leaving some space between each column for easy scanning.
You can use your favorite colors to fill in the boxes as payments come in—instant gratification, right?
Now, don’t forget about weekly reviews! This is key. I set aside Sunday evenings to reflect on my week. Grab your ruler and draw a simple line down the center of the page.
Label one side “Accomplishments” and the other “Adjustments.” Keep it minimal. Here’s my trick: start messy! Just write down whatever comes to mind. You can always tidy it up later. Done is better than perfect!
Engagement Break
What I’ve noticed is that many beginners skip the review step. It’s easy to get caught up in the hustle and forget to pause.
Take that time—your future self will thank you for it!
—
For each of these checkpoints, use your favorite colors and doodles. Remember, these aren’t just pretty pages; they’re functional tools that help you make data-driven decisions.
That’s the heart of transforming reactive management into proactive business optimization.
What I love about this approach is that it combines both function and aesthetics. Your journal can look beautiful while still being incredibly useful!
So, ready to try this today? Set up your first checkpoint spread, and let’s make that freelance journey a bit smoother.
You'll feel so accomplished looking back at everything you've tracked!
And remember, the mistake most beginners make is overcomplicating things. Keep it simple, and you’ll find it’s way more manageable—and enjoyable!
Phase 3: Verification
Once you've established a reliable verification system, you’ll begin to see the fruits of your labor in the form of consistent task tracking and newfound insights into your productivity patterns.
This clarity not only streamlines your monthly task migrations but also empowers you to make informed decisions about which projects to prioritize next, backed by solid data.
How to Know It Worked
How to Know Your Bullet Journal Spreads Are Working for Your Freelance Business
Ever stared at your Bullet Journal and wondered if those beautifully crafted spreads are actually moving the needle in your freelance hustle? You’re not alone! After seven years of journaling, I’ve learned that it’s not just about the aesthetics — it’s about the impact.
So, how can you really tell if your spreads are helping?
Track Concrete Metrics****
Start by tracking things that matter. Think completed projects, deadlines met, and shifts in productivity. It’s amazing how powerful numbers can be. Have you ever compared your monthly performance against the goals you set? It’s like a mini celebration when you see progress!
Quarterly Reviews
Every few months, sit down with your journal and conduct a little review. Are your spreads still aligned with your evolving goals? I love doing this — it feels like a fresh start. Just ask yourself: “Is this still working for me?”
Peer Feedback
Don’t forget to gather feedback from fellow creatives. Ask them what they think about your organizational methods. Sometimes, an outside perspective can shine a light on things you mightn't notice. Trust me, it’s worth it!
Personal Perspective
What I love about this whole process is that it’s flexible. I’ve tried everything from intricate layouts to simple lists. You know what? Both can work! The key is to find what resonates with you.
Here's Your Action Plan
1. Set Up Your Metrics
Create a simple chart in your journal. Use a Tombow Dual Brush Pen for headers and a Micron 05 for the details. You can even keep it to a budget-friendly alternative like Crayola Super Tips. Make it colorful but functional!
2. Monthly Comparison
At the end of each month, jot down your metrics. How many projects did you complete? Did you meet your deadlines?
3. Quarterly Reflection
After three months, take a step back and see how your spreads have evolved. You might discover something new that works better for your workflow.
4. Ask for Feedback
Share your layouts with a friend or in a journaling group. You'll be surprised at the insights you can gain!
Common Pitfalls
One mistake I see a lot of beginners make is overcomplicating their layouts. Remember, perfect is the enemy of done! Sometimes simple trackers work just as well as intricate designs.
Stick with what feels good, and don’t stress about making everything look perfect.
Pro Tips From Experience
Pro Tips From Experience: Mastering Your Freelance Bullet Journal
You know that feeling when deadlines pile up, and it seems like chaos is just around the corner? I’ve been there, too! After seven years of bullet journaling, I’ve discovered that a well-structured bullet journal can be your secret weapon in the freelance world. It’s all about finding a system that works for you—no perfectionism needed!
Supply List:
- Notebook: Leuchtturm1917 A5 Dotted ($20) or a budget-friendly alternative like a Scribbles That Matter A5 Dotted Notebook ($16).
- Pens: Tombow Dual Brush Pens ($20 for a set) or budget-friendly Crayola Supertips ($10 for a set of 50).
- Fine Liners: Micron 05 ($3) or a cheaper option like the Staedtler Triplus Fineliner ($1.50 each).
Skill Level: Intermediate — You’re comfortable with rulers and hand lettering.
Color-Coding for Clarity
What I love about color-coding is how it can instantly simplify your life. Assign each client a different color—maybe green for one, blue for another. This way, when you're flipping through your journal, you can quickly spot what needs your attention.
Tip: Use a color key at the beginning of your journal. Draw a small box (2cm x 2cm) in the top right corner of your first page, and fill each box with the corresponding color. This little visual guide can save you time when you’re in a hurry.
Weekly Updates: Keep It Fresh
Instead of getting bogged down with daily updates, try setting aside time each week to refresh your spreads. This approach helps maintain momentum without overwhelming you with admin tasks.
Choose one day—maybe Sunday morning with your coffee—to reflect and plan.
Engagement Break: Have you ever tried a weekly review? It can feel like a mini reset. If you find daily updates too much, give this a whirl!
Digital Meets Analog
I can’t stress this enough: combining digital and analog can be a game-changer. Snap a photo of your spreads with your phone. Now, you can have mobile access!
This way, you keep the joy of writing while also having the flexibility of digital.
Tip: When you photograph your spreads, try to do it in natural light. It helps the colors pop and makes it easier to see your notes clearly.
Quarterly Iteration
I used this layout for three months before realizing it just wasn't working for me anymore. Don’t be afraid to iterate!
Every few months, check in on your system. What’s working? What isn’t? It’s okay to abandon spreads that don’t serve your workflow.
Mistake Most Beginners Make: Sticking to a system that doesn’t fit. Remember, your bullet journal is a living document! Adapt it as your freelance business evolves.
Action Step: Try This Today!
Ready to dive in? Start by sketching out a simple color-coded layout for your clients. Use the supplies listed, and don’t worry about making it perfect.
Start messy; that counts!
Your bullet journal is a reflection of you—embrace its evolution and let it grow with your freelance journey. You’ve got this!
Before and After: What to Expect
Before and After: What to Expect as a Freelancer
You know that feeling when you crack open a fresh bullet journal, and the chaos of your current system just stares back at you? That’s when it hits: missed deadlines, scattered notes—everything feels like a jigsaw puzzle with pieces missing.
| Before | After |
|---|---|
| Scattered notes everywhere | Centralized task organization |
| Missed deadlines | Clear deadline tracking |
| Unclear priorities | Strategic prioritization |
| Low accountability | Enhanced accountability |
| Reactive work style | Proactive goal adaptation |
| Unmeasured progress | Documented growth metrics |
Let’s break it down.
Supplies You’ll Love:
- Journal: Leuchtturm1917 A5 Dotted ($20) or budget-friendly option like a Moleskine Classic Notebook ($10).
- Pens: Micron 05 for fine details ($2) or a pack of Papermate Flair pens ($5).
- Markers: Tombow Dual Brush Pens ($10) for those colorful headers or Crayola Super Tips ($5).
Skill Level: Intermediate (you’re comfortable with basic layouts and hand lettering).
The Magic of Transitioning:
In just a few weeks, you’ll see real change. Your client tracking spreads will light up project timelines with vibrant colors, and those invoice pages? They’ll make managing your finances a breeze. Trust me, the motivation boost when you reflect on completed milestones is unbeatable.
What I love about this? It’s all about finding that balance between artistic flair and practical structure. Habit trackers can be stunning, but they also reveal patterns in your work that can help you identify where you want to improve.
Ask yourself: Ready to try this? Start messy! That counts, and it’s a great way to ease into organized creativity.
Engagement Break:
Here’s a little tip: The mistake most beginners make is overcomplicating their spreads. Keep it simple at first—don’t worry about perfection. You can always build on it later.
Visual Elements that Work:
Imagine this: you draw a 4cm x 6cm box, 1cm from the left margin, using a 0.5mm black pen. Inside, use a bold header for your monthly goals, maybe in a soft pastel color. It’s visually pleasing, and it helps you scan your priorities quickly, making it easier to track your progress.
Don’t forget: Every decorative element should serve a purpose. If it looks pretty but doesn’t help you stay organized, reconsider!
Try This Today:
Grab your supplies and set up a simple monthly spread. Jot down your goals and deadlines. Remember, it doesn’t have to look perfect—what matters is that you start. You’ll be amazed at how this little change can shift your workflow. You'll feel that weight lift, and you’ll be on your way to thriving in your freelance career!
Your Next Steps
Your Next Steps: Crafting Your Bullet Journal for Freelancing
Hey there, fellow journaler! Have you ever stared at a blank page, wondering how to make your freelance life a little less chaotic? I've been there too. But let me tell you, a bullet journal can work wonders. Now, let’s roll up our sleeves and build a system that feels right for you!
Supply List
- Notebook: Leuchtturm1917 A5 Dotted ($20) or Budget-Friendly Alternative: Scribbles That Matter Dotted Notebook ($15)
- Pens: Tombow Dual Brush Pens ($10) or Budget-Friendly Alternative: Crayola Super Tips Markers ($6)
- Fine Liner: Micron 05 ($2) or Budget-Friendly Alternative: Staedtler Triplus Fineliner ($8 for a pack)
Skill Level: Intermediate
(You’re comfortable with rulers and hand lettering, so let’s make this fun!)
—
Step 1: Create Your Project Spread
Start with a simple grid layout. Draw a box measuring 12cm x 18cm, 2cm from the top, using your Micron pen. Inside, divide it into three columns: Deadline, Deliverables, Status. This will keep your projects front and center.
Trust me, you’ll feel the relief when you see everything laid out! What I love about this spread is that it helps me stay accountable. I’ve used a similar format for three months, and it really keeps distractions at bay.
Feel that? You’re already more organized!
Recommended for You
🛒 Dotted Journal Notebook
As an Amazon Associate we earn from qualifying purchases.
—
Step 2: Set Up Your Financial Tracker
Now, let’s tackle the numbers. Create another box, 10cm x 15cm, 2cm below your project spread. Divide it into sections: Income, Expenses, Invoicing.
I like to color-code these sections—green for income, red for expenses. Use your Tombow pens for a pop of color. It makes the spread visually appealing and easy to scan.
Don’t stress about getting it perfect; remember, done is better than perfect. You can always tweak it later!
—
Step 3: Add a Habit Tracker
Here’s where it gets fun! Draw a large rectangle, 15cm x 10cm, on the right side of your financial tracker. Create a grid for habits like networking and skill development—maybe 5 rows for the habits you want to track and 8 columns for the days of the month.
This spread has transformed my approach to growth. I can see at a glance where I need to focus.
—
Engagement Break
What’s one habit you’ve wanted to develop but haven’t yet? Jot it down! Sometimes, just putting it on paper gives you that extra push.
—
Step 4: Monthly Reflection Spread
Draw another box measuring 12cm x 18cm below your habit tracker. Divide it into two sections: What Worked and What Didn’t.
This is where you’ll assess your month. I used a similar reflection spread last January, and it helped me refine my strategies for the rest of the year. It’s all about continuous improvement!
—
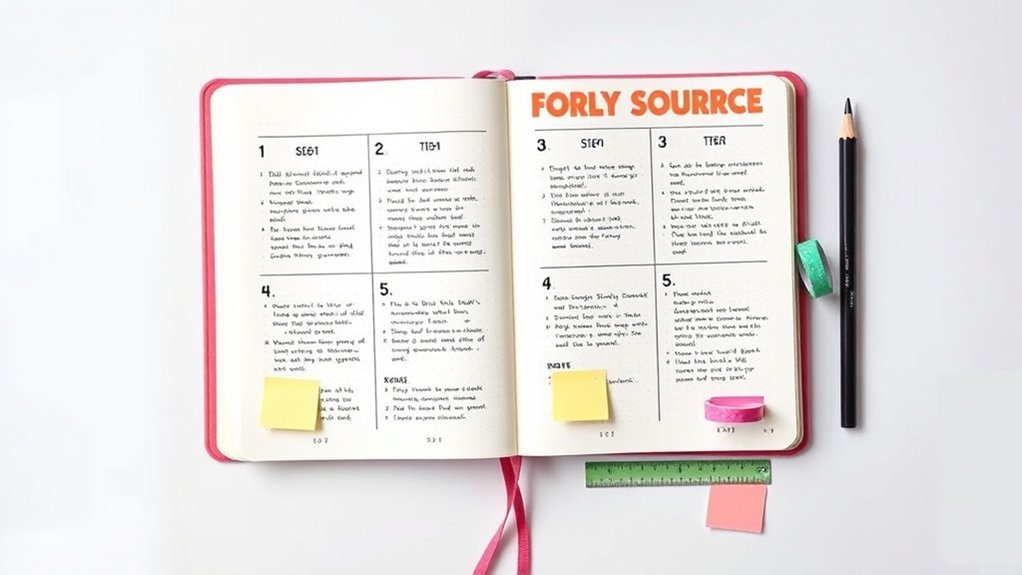
Step 5: Resource Collection
Finally, create a resource spread on the back page of your monthly reflection. Draw a simple list format and label it Tools, Links, Contacts.
You’ll want to keep this handy. I’ve found that having my go-to resources in one place saves me time and keeps my creativity flowing.
—
Try This Today!
Grab your favorite pens and start your project spread! It doesn’t have to be perfect—just get those ideas on paper.
Remember, the mistake most beginners make is overthinking their layouts. Just start messy—it all counts!
Your bullet journal can be a powerful ally in your freelance journey. So go ahead, get creative, and watch how these spreads transform your workflow. You've got this!
Frequently Asked Questions
What Type of Notebook Is Best for Bullet Journaling as a Freelancer?
What type of notebook should I use for bullet journaling as a freelancer?
Any notebook works — but a dotted A5 gives you the most flexibility. It lets you create layouts without the constraints of lines.
Try the Leuchtturm1917 Dotted Notebook ($20) for quality, or go for the Scribbles That Matter ($14) as a budget-friendly option.
Why is a hardcover notebook important?
A hardcover notebook protects your ideas and notes, making it durable for daily use.
Look for one like the Moleskine Classic Notebook ($25) for a sturdy option, or the Rhodia Webnotebook ($20) for a sleek design.
What kind of paper should I choose?
Opt for acid-free paper to prevent yellowing over time.
The Rhodia Webnotebook has fantastic paper quality, and you can grab the Leuchtturm1917 for a great balance of price and performance.
Should I get numbered pages?
Yes, numbered pages are essential for your index. They help keep your system organized and easily accessible.
The Leuchtturm1917 comes with numbered pages, making it a great choice.
How long does it take to set up a bullet journal?
Setting up your bullet journal spread takes about 15 minutes once you have the layout figured out.
The first time might take around 30 minutes, but don't stress about perfection; it’ll get easier!
What supplies do I need for bullet journaling?
You’ll want some quality pens for writing and doodling.
Tombow Dual Brush Pens ($25 for 10) are fantastic, but if you’re on a budget, Crayola Supertips ($6 for 20) work nearly as well for beginners.
How often should I update my bullet journal?
You’ll want to spend about 30 seconds daily to fill in your spreads after the initial setup.
This keeps things fresh and helps you stay organized. Just remember, it’s okay if you miss a day or two!
How Much Time Should I Spend Setting up My Bullet Journal Spreads Weekly?
How much time should I spend setting up my bullet journal spreads weekly?
You’ll want to spend about 15-30 minutes each week on your spreads. That’s enough to keep things streamlined without stifling your creativity.
Start with simple layouts and adjust them as you go. Remember, it’s all about enhancing your productivity, not perfecting every detail. An A5 dotted notebook, like the Leuchtturm1917 ($20), gives you the most flexibility.
What if I don’t have a lot of time to set up?
If you’re short on time, aim for about 20 minutes once you’ve got your layout down. The first time might take closer to 45 minutes, but it gets faster.
Try using a basic weekly spread that you can fill in daily, which takes just 30 seconds each day. A simple pen like the Muji Gel Pen ($3 for 1) works great for quick notes.
How do I keep my spreads from becoming overwhelming?
Start with minimal designs to avoid overwhelm. You can add complexity as you get comfortable.
A quick tip: focus on just 2-3 key areas each week. This keeps your journal functional and manageable. The Scribbles That Matter Dot Grid Notebook ($25) is a solid choice for organizing without clutter.
Can I make changes to my spreads later?
Absolutely! Your bullet journal should evolve with you. Don’t stress about perfection; embrace changes as you discover what works best for you.
If you need to tweak a layout, it only takes a few minutes to adjust. Using erasable pens, like the Pilot Frixion ($12 for 3), can make this even easier.
What materials do I need to get started?
Any notebook works, but a dotted A5 will give you the most flexibility. Pair it with some basic pens and maybe a ruler for clean lines.
The Archer & Olive Dot Grid Journal ($25) is a fantastic option, while Crayola Supertips ($6 for 20) are budget-friendly and fun for color coding.
Can I Use Digital Tools Alongside My Physical Bullet Journal for Freelance Work?
Q: Can I really use digital tools with my bullet journal?
Absolutely! Combining digital tools with your bullet journal can boost your productivity.
Try taking photos of your spreads for cloud backup, and consider using apps like Trello for real-time updates on client projects. This setup can take about 15 minutes initially and just a few seconds daily to maintain.
For a solid app, Asana is great for task management.
Q: Which notebook’s best for this hybrid system?
Any notebook works — but a dotted A5 gives you the most flexibility.
It’s perfect for layouts while letting you easily add digital elements. You can grab a Leuchtturm1917 ($20) or a cheaper option like the Scribbles That Matter ($15).
Either way, you'll love how easy it's to customize!
Q: How long does it take to set up my bullet journal?
Once you’ve got your layout down, setting up a basic spread takes about 20 minutes.
The first time might take around 45 minutes since you’re figuring things out. Don't stress about perfection—just get it started, and you can refine it later!
Q: What if I want to track deadlines effectively?
You can set up a simple deadline tracker in about 15 minutes.
Use color-coded dots for projects and deadlines. To make it easier, try using Faber-Castell Pitt Pens ($20 for a set) for clear, bold lines.
You’ll find it keeps everything visually organized and stress-free!
What Should I Do if I Make Mistakes in My Bullet Journal Pages?
What should I do if I make mistakes in my bullet journal?
Don't worry, mistakes happen! You can easily fix them. Try using correction tape like Bic Wite-Out ($5 for 2), which works great for covering errors.
If you want to get creative, turn mistakes into decorative elements. It takes about 5-10 minutes to adjust your design. Remember, it’s all about the process, and your journal will reflect your unique style.
Can I use digital tools before committing to my journal?
Absolutely! Photographing your pages before using permanent ink is a smart move. You can experiment digitally with apps like Canva or Procreate.
It usually takes about 15 minutes to set up a new layout this way. This method helps you visualize your ideas, so don’t hesitate to try it out!
How can I integrate my mistakes into my journal design?
Embrace those imperfections! You can turn mistakes into fun decorative elements, like doodles or washi tape accents.
This process takes about 10-15 minutes as you brainstorm ideas. Use washi tape from brands like MT ($10 for a set) for a pop of color. Remember, your journal should reflect your personality, so have fun with it!
How Do I Maintain My Bullet Journal System When Traveling for Client Meetings?
Q: What kind of notebook should I take while traveling?
Any notebook works—but a dotted A5 gives you the most flexibility. It fits easily in your carry-on and allows for both writing and drawing.
I recommend the Leuchtturm1917 Dotted Notebook ($20) or the Moleskine Classic Notebook ($18) if you’re looking for something budget-friendly.
Q: How can I keep my bullet journal data safe while on the go?
You can safeguard your data by photographing your spreads daily. This way, you’ll have a digital backup that you can access anytime.
Just take a few minutes each evening to snap pictures of your entries—it’s quick and keeps you organized!
Q: How do I streamline my bullet journal while traveling?
Keep it simple with abbreviated symbols and minimal spreads. This approach takes about 10 minutes to set up and just a minute daily to fill in.
Consider using a basic weekly layout or a travel checklist to stay focused without overcomplicating things.
Q: Is it okay to mix digital and physical journaling while traveling?
Absolutely! You can maintain core tracking digitally and sync with your physical journal later.
This hybrid approach saves time and keeps you organized. Just set aside 15 minutes at the end of your trip to consolidate everything.
Q: How much time should I expect to spend on my bullet journal each day while traveling?
You’ll likely spend about 20 minutes each day filling in your journal once you have your layout figured out.
It’s easy to keep up with, and remember, it doesn’t need to be perfect! Just jot down what matters most.
Conclusion
Give it a go! Remember, it’s totally okay if it’s not perfect. Grab your journal and a single black pen. Draw a 2×3 grid on the next blank page — that’s your first weekly tracker. Fill in today’s column with what you’ve got on your plate. Done beats perfect every time!
Once you’ve got that set up, think about adding a financial table or a monthly reflection spread. You’ll be amazed at how quickly you can turn chaos into order. Start messy and watch your freelance life transform!
Related Posts

Related Posts
Related Posts
Related Posts
✨ Unlock creative energy with spiritual tools:
- AI Spell Generator – Create Personalized Intention Rituals
- Free Tarot Reading – Unlock Creative Inspiration
- Crystal Encyclopedia – Crystals for Creativity & Focus
Powered by Luna's Circle — Free Tarot, Spells & Spiritual Tools
Related Posts
Related Posts
Related Posts

✨ Our Recommendation
Editor's Pick: A durable dot grid journal with numbered pages and an index for organizing freelance workflows.
Your Weekly Dose of Inspiration
Journaling ideas, family tips, and gentle inspiration.