Disclosure: This post contains affiliate links. If you click through and make a purchase, we may earn a small commission at no extra cost to you. Thank you for supporting this site!
There's something almost ceremonial about turning to a fresh month in your bullet journal. That blank spread holds so much possibility — a chance to reset, refocus, and rediscover what matters most. Whether you're a seasoned planner or just starting your bujo journey, your monthly setup is the backbone of your entire system. It's where big-picture goals meet daily reality, where creativity meets structure, and where you get to design a month that truly works for you. In this guide, I'll walk you through every spread I use to set up a new month, from the cover page that sparks joy to the reflection spread that helps me grow. Along the way, you'll see real journal examples and pick up actionable tips you can implement right away. Grab your favorite pen and let's build a monthly setup that inspires you to show up, track what matters, and celebrate the small wins. Your best month starts here.
Cover Page: Set the Tone for Your Month
Your cover page is the first thing you see every time you open your journal for the month. It doesn't need to be elaborate — in fact, some of the most stunning cover pages I've seen use just one color and a simple motif. Think of it as the title page of your monthly story. I like to include the month name in large lettering, a simple border or divider, and a small illustration that captures the season or my current mood. For January, that might be snowflakes and evergreen; for June, maybe citrus slices and sunshine. In the photo example shown here, a February spread uses soft pink lettering with tiny hearts scattered around the border — minimal but instantly uplifting.
The beauty of a cover page is that it gives you permission to play without pressure. You can practice hand-lettering, try a new watercolor technique, or use washi tape and stickers for a low-mess option. I always leave a small space for a monthly word or intention — something like “nurture” or “focus” — that I can come back to throughout the month. This tiny anchor keeps me grounded when the weeks get busy. If you're short on time, a minimalist cover with just the month name in a clean font and a subtle border is perfectly enough. Remember: this page is for you, not for Instagram. The real journals I've photographed for this guide show that the most loved cover pages are the ones that reflect the journaler's true style, not a trend.
Monthly Calendar: Your At-a-Glance Hub
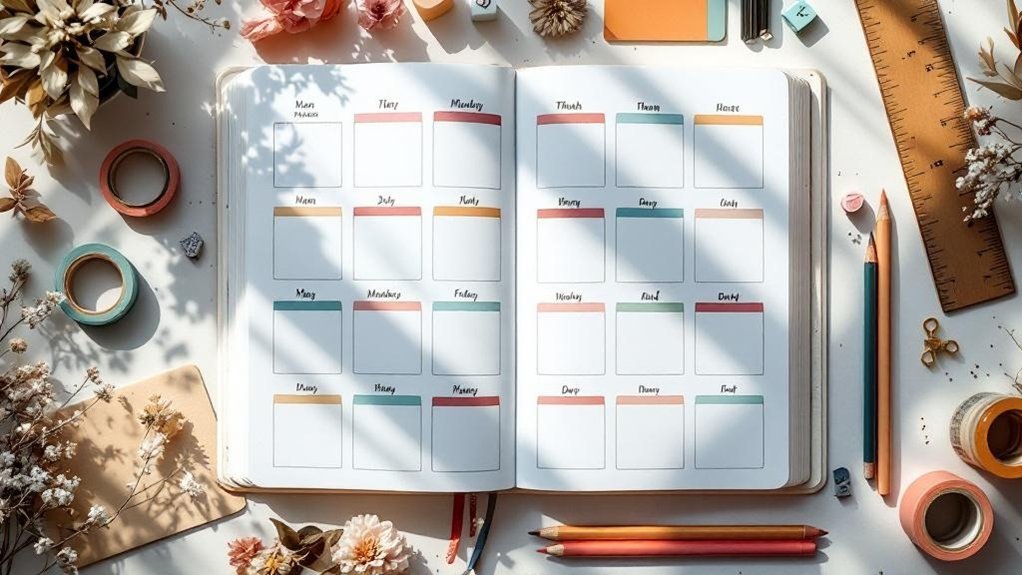
The monthly calendar is the workhorse of your setup. I use a traditional grid layout with the days running left to right, top to bottom, but there are endless variations. A vertical calendar with days listed down the left side and a task list on the right works beautifully for those who prefer a more linear view. Whichever format you choose, the key is leaving enough room for appointments, deadlines, and little notes. I always include a mini key in the corner — a dot for events, a circle for birthdays, a star for priorities. In the example journal spread below, the journaler used a two-page layout with the calendar on the left and a notes column on the right for meal planning and weekly goals.
One of my favorite additions to the monthly calendar is a “highlights” section at the bottom or along the side. Here I jot down a few things I'm looking forward to: a coffee date with a friend, a library trip with the kids, a quiet evening with a new book. This transforms the calendar from a mere scheduling tool into a source of anticipation and joy. I also draw a small box next to each date where I can check off whether I did my morning and evening routines — it's a simple way to stay consistent without overwhelming detail. The monthly calendar should feel like a friendly assistant, not a rigid taskmaster. A reader recently shared her calendar spread with me, and she had added tiny stickers next to each appointment — a fun touch that made the whole page feel celebratory.
Goals and Intentions Spread: Map Your Priorities
Before the month gains momentum, I like to pause and ask: What do I really want to accomplish? My goals spread typically includes three sections: personal goals, family/home goals, and creative or work goals. I keep each category to no more than three items — any more and I spread myself too thin. Under each goal, I list one or two small action steps to get started. For example, “read two books” might have “choose books from my TBR list” and “schedule 20 minutes of reading before bed.” The real journal example in this section shows a clean layout with each goal written in a different pastel color, making it easy to scan at a glance.
I also include a “focus area of the month” — a single word or short phrase that I want to guide my decisions. This could be “simplicity,” “connection,” “health,” or “finish what I start.” I write this at the top of the page in a gentle lettering style and circle it. Throughout the month, I check back in with this focus during my weekly reviews. It keeps me aligned with my deeper intentions rather than just chasing tasks. If you're someone who loves printables, this spread works beautifully as a fill-in-the-blank template that you can reproduce each month. Here are a few focus words I return to regularly:
- Nurture — for months when I need to pour into myself and my close relationships
- Simplify — when life feels cluttered and I need to cut back
- Consistency — for building habits that stick
- Explore — when I want to try new things and expand my horizons
Budget Tracker: Tame Your Finances Creatively
Money tracking doesn't have to be boring or stressful. In fact, making your budget spread visually appealing is the secret to actually using it. I use a simple layout with categories listed down the left side and columns for budgeted amount, actual spend, and actual spend, and the difference. A small color-coded dot system helps me see at a glance which categories are on track (green), borderline (yellow), or over (red). In the real journal photo accompanying this section, the journaler used a vertical layout with hand-drawn coin icons next to each category — a small detail that made the spread feel playful rather than punitive.
I also dedicate a small section to “savings wins” where I note any money I saved through mindful choices, like cooking at home instead of ordering delivery or finding a deal on something I needed. This reframes budgeting as a positive, empowering practice rather than a series of restrictions. At the bottom of the spread, I leave a few lines for “financial notes” — upcoming bills, subscription renewals, or a little note about a money goal I'm working toward. I always date my budget spread at the top and include simple “total spent” and “total saved” boxes at the bottom. This gives me a satisfying sense of closure when I fill in those final numbers at the end of the month. A common budget category list might look like this:
- Groceries
- Dining Out
- Transportation
- Household
- Personal Care
- Entertainment
- Savings
Habit and Mood Tracker: Celebrate Consistency
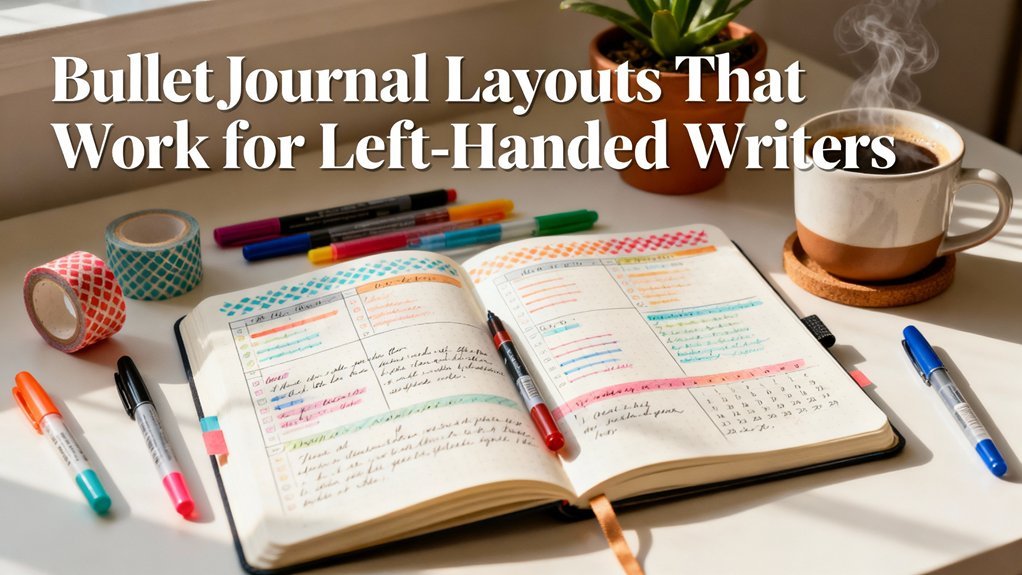
Habit trackers are where the bullet journal truly shines. I use a simple grid with habits listed down the left column and the days of the month across the top. Each day I fill in a small square if I completed the habit. My core habits include drinking enough water, moving my body for at least 15 minutes, reading, and doing a five-minute tidy-up before bed. I keep the list to five habits maximum — any more becomes overwhelming and I lose motivation. The example spread in this section shows a habit tracker with a soft green and blue color scheme, where each completed day is filled with a gentle dot pattern.
Alongside habits, I track my mood with a simple color key. Each day I color a small circle with the shade that best represents my overall mood: calm, happy, tired, anxious, or grateful. Over time, patterns emerge — I notice that weeks where I skip movement tend to correlate with lower moods, and that reading before bed consistently improves my sleep quality. This isn't about being “good” or “bad” at habits; it's about gathering gentle data about what supports my well-being. I use a simple dotted grid for this spread with minimal decoration so the data stays clean and readable. One journaler I know adds a tiny star next to any day where something unexpectedly wonderful happened — it becomes a beautiful constellation of joy by month's end.
Reflection Spread: Close the Loop
A monthly setup isn't complete without space to reflect on what just happened. I dedicate the last two pages of my monthly spread to a reflection section with prompts that help me process and grow. Here are the questions I return to each month:
- What went well this month?
- What challenged me?
- What did I learn?
- What am I grateful for?
- What will I do differently next month?
I answer these in brief bullet points, using a different color pen to make it feel separate from the rest of the setup. The real journal example for this spread shows a two-page layout with each prompt written in a small hand-lettered header, followed by a few lines of reflection. The journaler added a small envelope glued to the back page where she tucks receipts, notes, and small mementos from the month — a lovely tactile element that makes the spread feel alive.
This spread is also where I track my “monthly highlights” — the little moments that made me smile, the unexpected kindnesses, the small victories that might otherwise slip away. I paste in a photo or two, add a scrap of washi tape from a package I received, or jot down a quote that resonated with me. Over time, these reflection pages become a beautiful archive of your life. They're not just logs; they're keepsakes. I always draw a small box labeled “next month's focus” at the bottom of my reflection spread. Whatever emerges from my reflections — a theme, a goal, a word — goes into that box, creating a bridge between the month I'm closing and the month ahead.
Your monthly bullet journal setup is more than just a collection of spreads — it's a tool for living with intention. Each page you create is an invitation to show up for yourself, track what matters, and celebrate the journey. Whether you keep it minimalist or go all out with colors and embellishments, the most important thing is that it works for you. Start with one or two spreads from this guide and add more as you feel inspired. Remember, your bujo is a practice, not a performance. If you're looking for ready-to-use templates to simplify your monthly setup, check out our printable collection in the shop. And I'd love to hear: which spread are you most excited to try? Share in the comments below or tag us on social media — your setup might inspire someone else's next great idea.
How long does a monthly bullet journal setup take?
For most people, a monthly setup takes between 30 and 60 minutes, depending on how much decoration you add. A minimalist setup with just a calendar, goals page, and habit tracker can be done in under 20 minutes. As you get more comfortable with your layout, you'll naturally speed up. The key is to find a rhythm that feels sustainable for your lifestyle.
What supplies do I need to start a monthly bullet journal?
You really only need a dotted notebook and a pen to get started. Many journalers enjoy adding a few colored markers, a ruler, and some washi tape for simple embellishments. Start with what you have and build your collection over time — there's no need to buy everything at once. A simple setup can be just as effective and beautiful as an elaborate one.
Can I use printable templates instead of drawing my own spreads?
Absolutely! Printable templates are a wonderful way to maintain consistency without the time commitment of drawing each spread by hand. Many bullet journal enthusiasts use a hybrid approach, combining hand-drawn elements with printed pages for habit trackers, budget sheets, and reflection logs. This method gives you the best of both worlds — the creativity of a bujo with the convenience of a template.
Related from our network
- Bullet Point ( • ): Symbol, Meaning, Shortcuts & How to Use | Merriam … (mythicalarchives)
- Introducing Moon Ritual Journal 2026: 30 Days to Lunar Connection (moonrituallibrary)
- 7 Moon Journaling Prompts for Each Lunar Phase: A Year's Worth of Growth (moonrituallibrary)
Related Posts

Related Posts
✨ Our Recommendation
Editor's Pick: a premium dot grid journal and assorted journal supplies.
Your Weekly Dose of Inspiration
Journaling ideas, family tips, and gentle inspiration.
