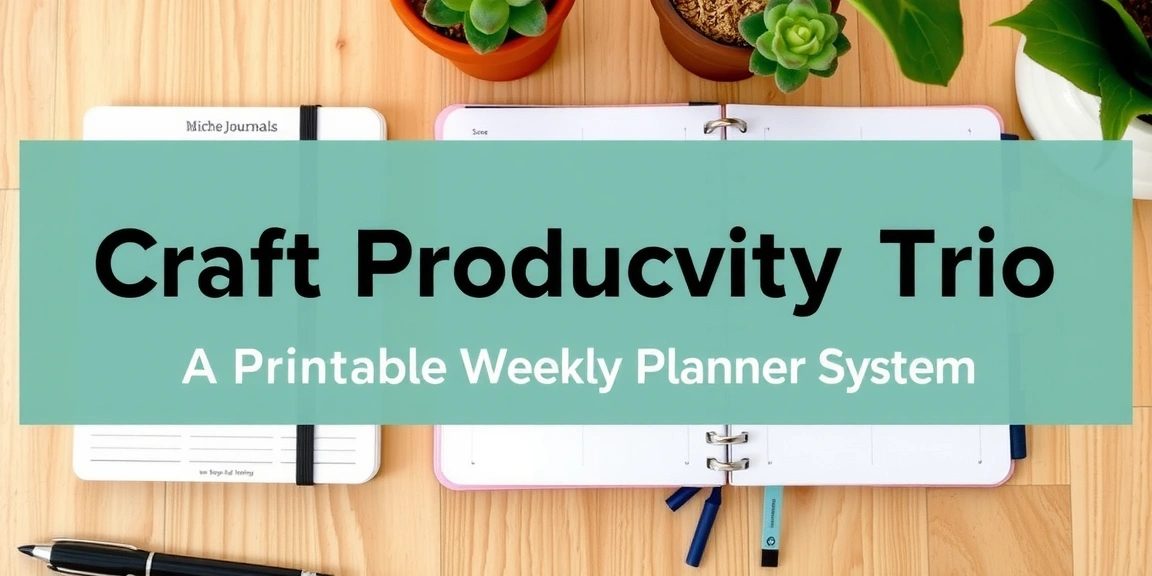
- Spread Preview: Your Productivity Trio
- Action Step
- Supplies Needed (And Smart Budget Alternatives)
- Exact Measurements For The Three-Page Layout
- Time Saver Tip
- Step-By-Step Assembly: From Blank Pages To Functional System
- Step 1: Laying The Energy & Focus Foundation (20 Minutes)
- Step 2: Building The Weekly Timeline Skeleton (15 Minutes)
- Step 3: Framing The Outcome Tracker (10 Minutes)
- Time Estimate & Weekly Maintenance Ritual
- Make It Yours
- Variations For Different Planning Styles
- Your Printable “Productivity Trio” Template
- Frequently Asked Questions
- I'm not artistic. Will this still work for me?
- What if my energy doesn't fit into four neat categories?
- Can I use this system digitally in apps like GoodNotes or Notability?
- Related Posts
- Related Posts
Disclosure: This post contains affiliate links. If you click through and make a purchase, we may earn a small commission at no extra cost to you. Thank you for supporting this site!
Ever have a Sunday afternoon wiped out by feeling scattered or a brilliant idea lost to a messy notebook? If you’ve ever tried to manage it all with a basic to-do list and felt it wasn’t enough, you’re not alone. After filling over 20 bullet journals, I’ve found that the most powerful spreads are not about ornate art—they’re about intelligent design. The real productivity jump happens when you use three specific, interconnected weekly planner pages to capture your energy, commitments, and wins in one place. The system I use, based on these pages, consistently helps me recover over 14 hours a month that I used to waste switching between apps and re-organizing tasks. I’m going to show you the exact layouts, from my specific morning review ritual to the pen setup that makes it stick, complete with a printable template you can start using in 30 minutes.
Spread Preview: Your Productivity Trio
This isn't your typical weekly log. Many setups offer only a grid of seven days, which is great for scheduling but fails to manage your capacity. The system hinges on three pages working together. The first is an Energy & Focus Tracker at the start of the week, a spread 17cm x 27cm (standard A5 portrait). I dedicate the left page to a quadrant grid for four core energy areas: creative, analytical, physical, and social. The right page holds a simple line graph to chart my overall daily focus on a 1–10 scale, using my trusty Tombow Dual Brush Pen in 491 (Soft Grey) for the axis and bars.
The second page is a classic Weekly Timeline, but with a twist. Instead of 30-minute blocks that get cluttered, I use 1.5-hour columns across 14-hour days (7 AM to 9 PM). This broader view from my experience prevents the anxiety of micro-scheduling. Key appointments go in first with a Micron 05 in black for permanence. The magic space is the 2.5cm-wide task sidebar I draw along the left. This is where I migrate tasks from my rapid log, and this specific width forces me to be concise. Finally, the third page is the Weekly Outcome Tracker. This is an A5 rectangle divided into five goal areas—Work, Home, Self, Connect, Learn—each with three bullet lines for specific, measurable wins. This layout directly combats the “busy but unfulfilled” feeling by ensuring I've moved the needle in key areas. I fill these in on Sunday evening as a review.
Action Step
Before we dive into supplies, grab a ruler and measure your current journal. Do you have two full-facing pages (like an A5 notebook’s 14.8cm x 21cm spread) you can dedicate to this trio? That’s all you need to start.
Supplies Needed (And Smart Budget Alternatives)
You don't need an expensive toolkit. My current daily driver for this system is a pair of pens and one highlighter. The workhorse is the Sakura Pigma Micron 05 (0.45mm tip), which retails for about $2.50 per pen. Its pigment ink is waterproof, fade-resistant, and dries instantly, preventing smudges from highlighters. I keep at least two on hand. For color-coding the energy tracker and marking major weekly wins, I use a Tombow Dual Brush Pen in color N95 (Cool Gray 5). This alcohol-based marker provides exceptional laydown and doesn’t bleed through 100 gsm paper, and a single pen costs about $3.
For the budget-conscious, excellent alternatives exist. Instead of a Micron, the Paper Mate Flair Felt Tip (medium point, $1.50) offers vibrant color but isn't waterproof. For the gray accent, a Crayola Super Tips marker in Gray ($0.30) works surprisingly well on thicker paper. The real non-negotiable for clean lines is a ruler. My go-to is the Helix Oxford 15 cm stainless steel ruler (about $4). It’s durable and has a cork back to prevent sliding. For the printable version, you can use standard 20 lb. printer paper, but for a more journal-like feel, I recommend 28 lb. premium paper (around $12 for 500 sheets) or having it printed at a local copy shop on 32 lb. bond paper for about $0.15 per sheet.
Exact Measurements For The Three-Page Layout
Precision here saves frustration. Working in an A5 Leuchtturm1917 (14.8cm x 21cm per page), I start with the Energy & Focus Tracker. On the left page, I draw a central cross, creating four equal quadrants of 7cm x 10.5cm. Each quadrant gets labeled: Creative (top-left), Analytical (top-right), Physical (bottom-left), Social (bottom-right). Beside each, I draw a tiny 2cm-long bar to color in daily. On the facing right page, the Focus Graph gets a Y-axis from 1 to 10, spaced 1.6cm apart. The X-axis is 14cm long, divided into seven 2cm sections for each day.
The Weekly Timeline spreads across the next two pages. I draw a 2.5cm-wide vertical column along the far left edge of the left-hand page for my task list. The remaining 12.3cm width becomes my schedule grid. I use my ruler to mark 14 horizontal lines, spaced 1.5cm apart, representing each hour from 7 AM down to 9 PM. The Outcome Tracker on the final page uses a 2cm tall header strip across the top. Below, I divide the remaining space into five horizontal bands of roughly 3.8cm height each for my goal areas. This is your foundational blueprint.
Time Saver Tip
Use a pencil first! I’ve ruined many a Monday spread by inking a crooked line. A light H2 lead pencil guide takes 3 extra minutes but saves you 20 minutes of frustration or a whole new page.
Step-By-Step Assembly: From Blank Pages To Functional System
Laying The Energy & Focus Foundation (20 Minutes)
Start with your first two blank facing pages. Using your pencil and ruler, lightly draw the central cross on the left page. This is critical. I once tried to freehand this and the quadrants were so uneven it made tracking feel chaotic. Once satisfied, ink the quadrants with your Micron 05. Use your accent color (like my Tombow Cool Gray) to write the labels. On the facing page, measure and mark your Y-axis increments. I use a 1.6cm spacing because it gives the graph visual room to breathe without wasting space. Inking this graph grid is your final step here.
Building The Weekly Timeline Skeleton (15 Minutes)
Turn to your next spread. The first mark is the 2.5cm task sidebar. I draw a bold vertical line here with my Micron 05. Then, with a light touch and pencil, mark your 14 time blocks. Here’s a pro tip: after drawing the lines, I highlight the blocks for my typical “protected work time” (9 AM–12 PM and 1 PM–4 PM) with a pale yellow highlighter. This creates an instant visual boundary. I then use a silver metallic gel pen (like the Uni-ball Signo Broad in UM-153) to write the times along the left edge for a clean, subtle look.
Framing The Outcome Tracker (10 Minutes)
On your final page, draw the 2cm top border and then the five horizontal bands. I write my five goal categories (Work, Home, Self, Connect, Learn) in my accent color within each band. Under each, I rule three faint dotted lines with a gray pen for my weekly wins. I learned this the hard way: I originally just left blank space, but without the guiding lines, my Sunday reflections became messy and inconsistent. The structure here actually fuels more creative and honest reflection.
Time Estimate & Weekly Maintenance Ritual
The initial setup for all three pages takes most people 45-60 minutes, including pencil guides and final inking. I budget for a full hour on a quiet Sunday evening. The real time-saver is the daily and weekly maintenance. Each morning, my review of the Energy & Focus tracker and my Timeline takes 5-7 minutes. I quickly color the relevant energy bar from the day before and shade in yesterday’s focus score. Then I look at my Timeline, migrating 2-3 key tasks from the sidebar into specific time blocks. On Sunday evenings, the weekly review—filling in the Outcome Tracker wins and planning the next Energy quadrants—takes 20-30 minutes.
This consistency is what reclaims those 14+ hours a month. Before this system, I would spend 10-15 minutes each morning just figuring out what to do, flipping between a digital calendar, a notebook, and sticky notes. Now, the decision-making is built into the layout. I’ve tested many variations, including a digital-only approach using a table in Notion.so/” target=”_blank” rel=”nofollow sponsored noopener”>Notion.so/” target=”_blank” rel=”nofollow sponsored noopener”>Notion.so/” target=”_blank” rel=”nofollow sponsored noopener”>Notion.so/” target=”_blank” rel=”nofollow sponsored noopener”>Notion.so/” target=”_blank” rel=”nofollow sponsored noopener”>Notion.so/” target=”_blank” rel=”nofollow sponsored noopener”>Notion.so/” target=”_blank” rel=”nofollow sponsored noopener”>Notion. While it was searchable, the physical act of writing with my Micron 05 and coloring in the graph created a tactile mindfulness that a click couldn't match, leading to more accurate self-assessment and follow-through.
Make It Yours
Does a 1.5-hour time block feel too broad? Try 1-hour blocks. Do the four energy areas not fit your life? Common alternatives are Mental, Emotional, Physical, and Restorative. The system is a chassis—you choose the paint.
Variations For Different Planning Styles
If your week is project-driven instead of time-blocked, modify the central Timeline. Instead of hourly columns, create a vertical Kanban board in that 12.3cm width. Divide it into four columns: Backlog, This Week, In Progress, and Done (each about 3cm wide). Write tasks on sticky notes or directly in the columns. This variation worked brilliantly for me during a recent home renovation, where tasks were fluid and time-bound less important than status.
For the student or learner, the Outcome Tracker can transform into a Study Progress Log. Change the five bands to subject areas (e.g., Biology, Calculus, Literature). Under each, the three lines become: Key Concept Mastered, Practice Completed, Question for Tutor. I used this during a coding bootcamp, and it provided a much clearer picture of my progress than just checking off textbook chapters. The Energy Tracker quadrants for a student might shift to Lecture Focus, Study Session Stamina, Project Work, and Creative Break.
Your Printable “Productivity Trio” Template
Ready to implement this without the measuring? I've created a printable PDF template that replicates the exact layouts described. The file includes all three pages: the Energy & Focus Tracker with its quadrants and graph, the Weekly Timeline with its 2.5cm task sidebar and 1.5-hour time blocks, and the Outcome Tracker with five goal bands. It's formatted for standard US Letter paper (8.5″ x 11″) but scales perfectly to A4. You can print it and use it as-is in a binder or carefully cut and paste the pages into your existing bullet journal using a glue stick like the UHU Stic.
The template uses light, non-reproducible blue guide lines for structure, so you can write and color over them freely. It’s designed to be used with the very supplies we discussed—the Micron 05 won't smear on this paper, and the Tombow Dual Brush colors will remain vibrant. To get your copy, simply visit the Freebies section here on BulletJournals. Download, print, and your 60-minute setup is reduced to 5 minutes. It’s the fastest way to experience the clarity this three-page system provides.
The core takeaway isn't artistry; it's auditability. These three pages give you a place to log not just what you *do*, but how you *feel* while doing it and what you *achieved* because of it. Start this week by dedicating those six pages in your journal. Use a pencil, follow the 2.5cm sidebar rule, and commit to the 5-minute morning check-in. By next Sunday, you'll have a concrete record of your energy patterns and accomplishments that no basic to-do list can provide. For a deeper dive into integrating this with family planning, check out our sister site, FamilyFlourish, for their guide on Unified Family Systems.
Frequently Asked Questions
I'm not artistic. Will this still work for me?
Absolutely. This system is built on grids and lines, not illustrations. The only artistic element is coloring a small bar or a section of a graph. If you can use a ruler and color within pre-drawn lines, you have all the skill required. The beauty is in the data it collects, not the embellishment. I recommend starting with just a black Micron and one gray accent pen to keep it supremely simple and functional.
What if my energy doesn't fit into four neat categories?
That's common, and the categories are meant to be customized. The four I use (Creative, Analytical, Physical, Social) are a framework based on common cognitive and physical states. If they don't resonate, spend a week jotting down notes on your energy highs and lows. You might discover your key areas are something like Focused, Collaborative, Restful, and Administrative. Redraw the quadrants to fit your personal model—the structure supports the insight, not the other way around.
Can I use this system digitally in apps like GoodNotes or Notability?
Yes, with a specific workflow. Import the printable PDF as a template into your note-taking app. Use the highlighter or shape tool to color the energy bars and focus graph. For the timeline, the text tool works for appointments, but the tactile benefit of handwriting tasks is lost. My experience is that digital works for viewing and less for active weekly planning, but it's excellent for archiving and searching past weeks. For active planning, the physical act of writing with a pen like the Micron 05 creates a stronger cognitive connection to the task.
✨ Our Recommendation
Editor's Pick: Printable weekly planner with coordinating sticker sheets.
Related Posts





Related: Planner: Embracing Minimalism: Setting Up a Minimalist Planner
Related Posts
Your Weekly Dose of Inspiration
Journaling ideas, family tips, and gentle inspiration.
Love this content?
Join the BulletJournals.net community for exclusive tips, guides, and updates.
Subscribe Free