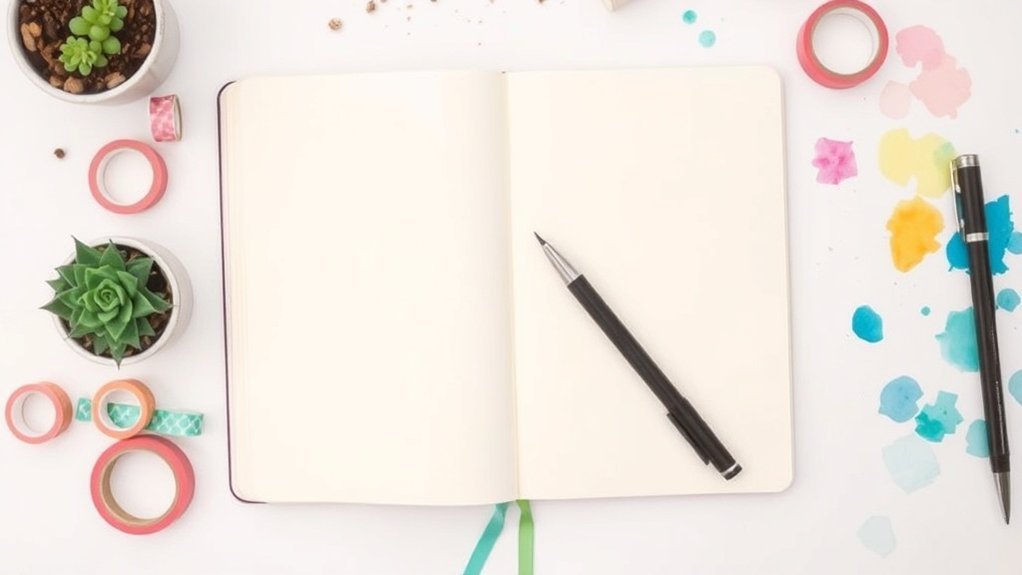
You know that satisfying moment when you flip through a beautifully filled bullet journal, each spread telling a story of progress? After staring at a blank page, I finally crafted a layout that clicked for my remote work routine. You’ll learn how to build a bullet journal system that fits your workflow, just like I did after trying every app under the sun for three months. It’s all about creating a simple daily log and monthly overview that keeps your tasks in check. Start messy—what matters is that you start! Your perfect system is waiting to be discovered.
Key Takeaways
- Use a dotted notebook to create flexible layouts that adapt to your evolving needs — grids restrict creativity and blank pages can feel aimless.
- Dedicate 15 minutes every Sunday for a task review to assess your progress and shift incomplete tasks to the coming week — this keeps you organized and focused.
- Establish core pages like an Index and Monthly Log to track deadlines and visualize priorities — they streamline your planning and ensure you don’t miss anything important.
- Implement color coding for different projects and visual symbols for urgency in your tasks — this allows for quick identification and prioritization, enhancing productivity.
- Perform monthly reflections to compare planned versus completed tasks — this helps you spot patterns, refine your strategies, and improve your work-life balance.
Introduction
Ever had one of those days where everything feels scattered? You’re juggling tasks, deadlines are looming, and it seems like you can't catch a break. That’s where a Bullet Journal can step in and save the day! Trust me, I’ve been there, and after 7+ years of journaling, I can tell you—this analog approach is a game-changer.
A Bullet Journal transforms scattered days into organized clarity—an analog game-changer that actually works.
Here's the thing: a Bullet Journal isn’t just about pretty layouts (though I love those too!). It's a flexible system that molds to your unique workflow. You won’t be distracted by notifications or endless tabs. Instead, you'll find yourself leaning into deeper focus and reclaiming that creative spark that remote work can sometimes dull.
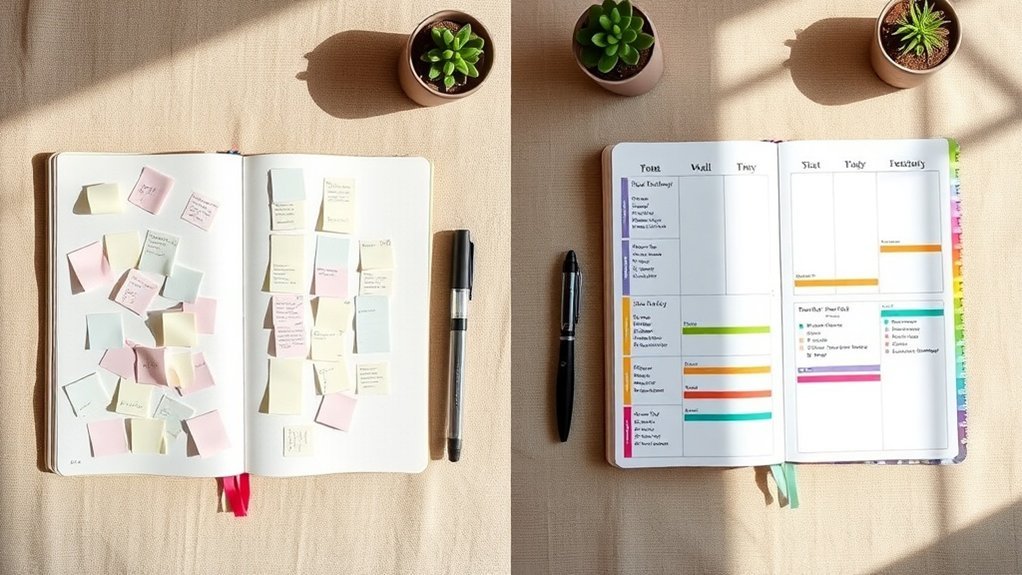
What I love about this is its sheer simplicity. Start with a Daily Log—you’ll jot down your tasks and reflect on what you accomplished. It's a great way to celebrate even the smallest wins! Collections help you categorize everything, from project ideas to seasonal plans. And the best part? Regular task migration keeps you aligned with your goals. You get to reassess what truly matters, which is a key principle in Bullet Journal systems.
Supply List
- Notebook: Leuchtturm1917 A5 Dotted ($20) or Budget Alternative: Scribbles That Matter A5 Dotted Notebook ($12).
- Pens: Micron 05 ($2) or Budget Alternative: Papermate Flair Felt Tip Pens ($5 for a pack).
- Coloring Tools: Tombow Dual Brush Pens ($10 for a set) or Budget Alternative: Crayola Super Tips ($5 for a pack).
- Ruler: Westcott 12-inch Ruler ($3) or Budget Alternative: Any clear plastic ruler from your local dollar store.
Skill Level: Beginner to Intermediate
Feel that? You’re ready to dive in!
Start messy. Seriously. Perfection is the enemy of done! I’ve tried both elaborate spreads and minimalist setups, and guess what? They all work. What matters is finding what feels right for you.
Getting Started
- Set Up Your Daily Log: Draw a box that’s 5cm high and 8cm wide, about 2cm from the top of your page. Use your Micron 05 to outline it. Inside, write the date at the top.
- Add Tasks: Below the date, create a list for tasks. I use bullet points—simple and quick.
- Reflect: At the end of the day, take a moment to write down what you accomplished, even if it’s just one thing. That counts!
Engage with Your Journal
Here's a pro tip: Use color coding for tasks. It’s a quick visual way to see what’s urgent versus what can wait. I usually grab my Tombow pens and create a color key. It makes my spreads pop and helps with scanability.
Common Mistake: A lot of beginners try to make their spreads look perfect right off the bat. Remember, it’s okay if things don’t look Instagram-worthy. Your journal is for you!
Try This Today
Ready to give it a whirl? Set up your Daily Log for tomorrow. Don’t overthink it—just let the pen flow. And remember, every small step counts. You’re on your way to a more organized, creative life!
If you find yourself getting overwhelmed, just take a step back. It's all about what works for you, not what looks good on social media. Keep it functional, make it yours, and most importantly—have fun!
Understanding the Problem
When working from home, the challenge of blurring professional and personal life often undermines both productivity and peace of mind. Many remote workers mistakenly believe that a bit more willpower or a quieter workspace will solve their issues.
However, the real problem lies in the lack of structural boundaries typically found in an office. Understanding this, you’ll find that a Bullet Journal serves as more than just a stylish planner—it’s the essential framework needed to regain control over your time and mental well-being. By tracking your hidden triggers, bullet journaling can help you manage anxiety and create a more focused work environment.
Why This Matters
Why This Matters
Ever feel like your personal life and work are tangled up in an endless loop? I totally get it. Without a structured system, remote work can turn into a chaotic mix where productivity takes a nosedive and stress starts piling up. You know the drill—constantly switching between tasks, losing focus, and feeling overwhelmed by what needs to get done.
That’s where a Bullet Journal comes in. It’s like a magic wand that transforms chaos into clarity! By jotting down your tasks by hand, you’re not just organizing; you’re boosting your memory retention in a way that digital tools often miss. Isn’t that cool?
Plus, with task migration, you can regularly reassess your priorities. This keeps your workload in check and manageable.
What I love about Bullet Journaling is that it’s not just about getting things done; it’s also a way to reflect on your work-life balance. You’ll start to see patterns in your well-being and discover ways to juggle creativity with the demands of remote work. This isn’t just organization—it’s strategic self-management, paving the way for sustainable success.
Supplies You’ll Need:
- Notebook: Leuchtturm1917 A5 Dotted ($20) or a budget-friendly alternative like a basic dotted journal ($10).
- Pens: Micron 05 for fine details ($2) or a set of gel pens for a pop of color ($5).
- Highlighters: Mildliners ($13) or budget-friendly alternatives like Crayola Super Tips ($6).
Skill Level: Beginner to Intermediate
Let’s Get Started:
- Set Up Your Monthly Spread: Draw a box that’s 4cm x 6cm, 1cm from the top of the page. Inside, write the month in a fun, bold font.
- Add Days of the Week: Underneath, make seven smaller boxes, each 3cm x 2cm, spaced evenly. Fill these in with the corresponding days.
- Task List: On the right side, create a column for your tasks. Make it 8cm wide, filling the height of the page. Number your tasks for easy tracking.
- Reflection Section: Leave a space at the bottom of the page for reflections. This could be 4cm high and as wide as your task column.
What I’ve found helpful is to keep it simple at first. You don’t need fancy designs—just make sure everything’s readable and functional.
Feel that?
The beauty of this system is that it’s adaptable. You can switch things up as needed. Maybe you’ll try a more artistic spread next month or keep it minimal. Both approaches count!
Common Mistake:
The mistake most beginners make? Overcomplicating things. Remember, perfect is the enemy of done! Start messy. You can always refine your layouts as you go.
Try This Today:
Pick a day this week and set up a simple monthly spread. Let it reflect your style, and don’t worry about it being perfect. Just get your thoughts on paper! You’ll be amazed at how much clearer your priorities become. Ready to dive in? Your Bullet Journal is waiting!
What Most People Get Wrong
What Most People Get Wrong (And How to Fix It)
Ever find yourself staring at a messy Bullet Journal, feeling overwhelmed? You’re not alone! I’ve been there too. You think flexibility is key, but without some structure, you might just be setting yourself up for chaos.
I remember skipping my setup one month, thinking I’d just “go with the flow.” By week two, I was drowning in scattered tasks and missed deadlines. Not fun, right?
Here’s what I’ve learned: a little organization goes a long way. It doesn’t have to be perfect—just intentional. Try this: start with a clean setup. Use a Leuchtturm1917 A5 Dotted Notebook ($20) or a budget-friendly alternative like the Moleskine Classic Notebook ($15).
Add some Tombow Dual Brush Pens ($13 for a set) for pops of color, or grab some Crayola Super Tips ($10 for a set) if you're on a budget.
Skill Level: Beginner (no experience, basic supplies)
Essential Tips for Effective Bullet Journaling
- Daily Reflections: Don’t skip this! I used to overlook daily reflections, but they’re like a treasure trove of insights that fuel productivity breakthroughs. They help you see what’s working and what’s not. Just jot down a few thoughts at the end of the day. It can be as simple as, “Today I felt productive because I completed my tasks.”
- Task Migration: Make it a habit to migrate incomplete tasks regularly. I’ve found that letting them pile up only leads to overwhelm. Set aside 10 minutes at the end of each week to review and migrate tasks. You’ll feel lighter and more in control.
- Specialized Collections: If you’re working remotely, consider creating collections like project trackers or meeting notes. My go-to is a simple “Weekly Overview” spread. It keeps everything in one place and makes it easy to scan.
- Visual Signifiers: Incorporating visual elements can transform chaos into clarity. Use symbols or color coding to denote tasks, priorities, or due dates. For instance, I use a star for high-priority tasks and a dot for regular ones. It’s quick and helps me focus on what truly matters.
The Mistake Most Beginners Make
Starting without a plan! I get it—sometimes, you just want to dive in. But take a moment to think about what you need.
Try sketching out a layout or brainstorming collections that would serve your current projects. Trust me, it makes a difference!
Engagement Break: What if you tried a spread that combines both art and function? Maybe a monthly calendar with doodles around the edges. That can be both beautiful and practical!
Practical Layout Design
Let’s create a simple monthly calendar layout for November. You’ll need:
- Supplies:
- Leuchtturm1917 A5 Dotted Notebook (or Moleskine Classic Notebook)
- Tombow Dual Brush Pens (or Crayola Super Tips)
- Micron 05 Pen (or Pilot G2 0.7mm Gel Pen)
- Draw a 4cm x 4cm box for each day, starting 2cm from the top of the page and 1cm from the left margin. Leave 1cm between boxes.
- Label each box with the date using the Micron pen. I like to write the day of the week in a fun font above the date.
- Add a header at the top of the page—something like “November Goals.” Use a Tombow brush pen for that extra flair, with a light pink or blue for a calming look.
- Decorate the corners of the page with seasonal doodles—think leaves or pumpkins. This adds charm while keeping the layout functional.
Printable-Friendly Note: This design adapts well to A5 or letter-sized paper. You can easily create a template to print out if you want a cleaner look before you start journaling.
Wrap Up with Action
Feel ready to tackle your Bullet Journal? Try setting aside some time today to reflect on what you need from your journal.
Jot down what’s working and what’s not. Remember: Start messy. That counts. You’ve got this!
The Solution: Step by Step
With your foundational structure established, it’s time to bring your remote work Bullet Journal to life.
How do you transform that structure into a dynamic tool? By implementing daily tracking and conducting weekly reviews, you’ll not only monitor your progress but also ensure your system evolves to meet your productivity needs. Incorporating bullet journal trackers can help you visualize your goals and maintain motivation throughout your remote work journey.
After this phase, we’ll turn our attention to verifying that your setup is truly enhancing your work experience and fine-tuning any elements that may need adjustment.
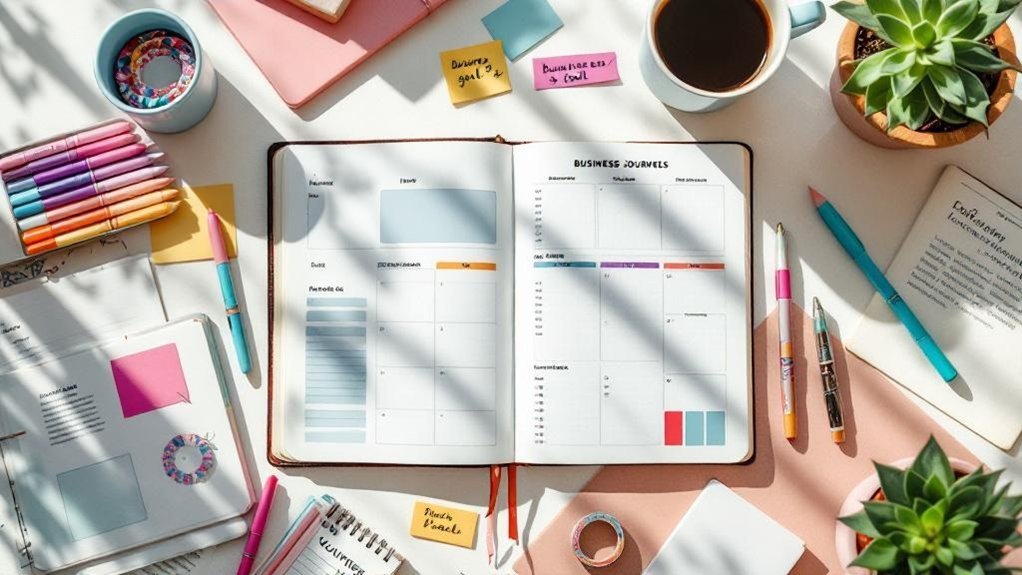
Phase 1: Foundation
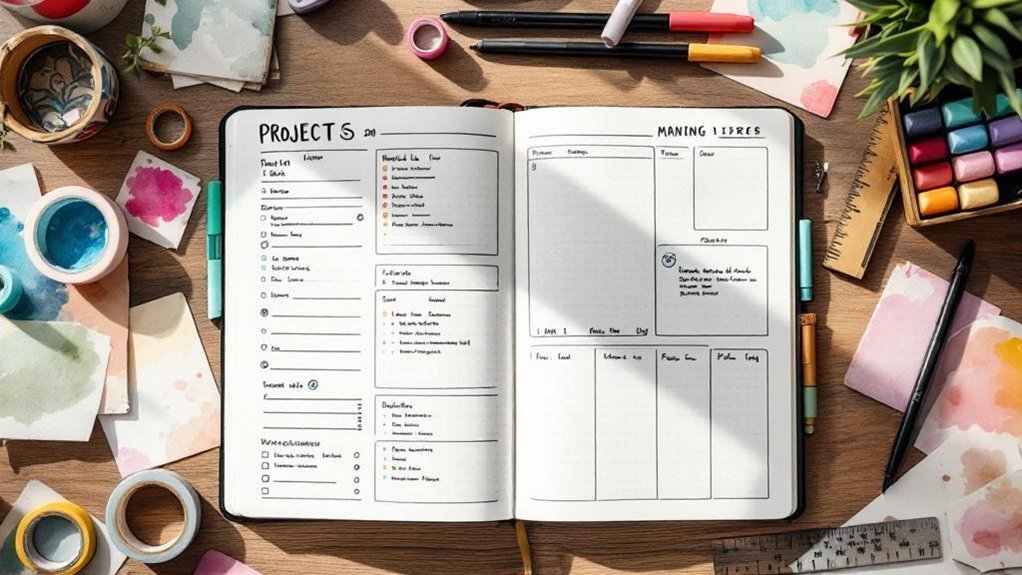
With that foundation established, you’ll want to create a dedicated work section at the front of your journal featuring a clear Index Page to guide you to all work-related entries.
From there, you can set up your foundational spreads—the Future Log for long-term deadlines, a Monthly Log for your priorities, and a Daily Log for task tracking and reflections.
These key components will form the structural backbone that keeps your remote work organized and accessible.
Key Setup Details
Key Setup Details for Your Bullet Journal
Hey there, fellow journaler! You know that moment when you sit down to organize your day, and it feels like you’re staring at a blank page? Yeah, we’ve all been there. But don’t worry! Let’s build a solid foundation for your bullet journal that’ll make daily task management feel like a breeze.
Supply List:
- Notebook: Leuchtturm1917 A5 Dotted ($20) or budget-friendly alternative: Scribbles That Matter Bullet Journal ($15)
- Pens: Tombow Dual Brush Pens ($30 set) or budget-friendly alternative: Crayola Super Tips ($10)
- Fine Liners: Micron 05 ($2) or budget-friendly alternative: Staedtler Triplus Fineliner ($1.50 each)
Skill Level: Beginner
Here’s what I recommend: start with an Index for quick navigation. It’s like your journal’s table of contents, making everything easier to find. Then, set up a Future Log for those long-term deadlines and goals. It’s a lifesaver for keeping track of important events. Finally, create a Monthly Log for strategic planning. This is where you can visualize your month at a glance.
What I love about these core pages is how they transform your journal into a productivity powerhouse. You’ll be able to track objectives and adapt your priorities without the chaos. Feel that? It’s the thrill of being organized!
Visual Setup:
- Index: Leave the first two pages blank for your Index. Use a 0.5mm black pen to create a header. Write “Index” in a fun font at the top, about 3cm from the top edge.
- Future Log: On the next two pages, draw a 10cm x 15cm box for each month (6 boxes total). Space them evenly, about 1.5cm apart. Use colored pens to differentiate each month—maybe a soft pastel for spring months and deeper tones for fall!
- Monthly Log: Dedicate a two-page spread for this. Write the month’s name at the top in a bold, playful font. Below, create a grid with the days of the month, about 2cm wide for each date. This will help you see your tasks and events clearly.
Engagement Break:
What I’ve found is that many people skip the Index thinking it’s unnecessary. But trust me, it’s a game-changer! You’ll save so much time flipping through pages later on.
Pro Tips:
- Keep your layouts simple. You don’t need to spend hours on them—start messy!
- Use pen pressure to create variety in your lettering. Light strokes for the upswings and heavier pressure for downstrokes can add a cool dimension.
- Remember, perfect is the enemy of done. Your spreads don’t have to be Instagram-perfect; they just need to work for you.
The Mistake Most Beginners Make: They often overthink their layouts. I remember spending way too long on a spread that I ended up abandoning after a few weeks. It didn’t serve my needs! Focus on what helps you track and plan effectively.
Phase 2: Implementation

With a solid understanding of how to optimize your remote work setup, it’s time to shift focus to the implementation phase.
Establishing critical checkpoints during this process ensures that your system remains aligned with your productivity goals. These pauses will help you evaluate whether your current approach is effectively supporting your needs or if adjustments are necessary.
Regular assessments will also keep your Bullet Journal relevant and manageable as your work demands evolve.
Critical Checkpoints
Supply List:
- Journal: Leuchtturm1917 A5 Dotted (around $20) or a budget-friendly alternative like the Scribbles That Matter notebook (around $15).
- Pens: Tombow Dual Brush Pens (set for about $20) or Crayola Super Tips for a budget option (around $7).
- Fineliner: Micron 05 (about $2) or the Faber-Castell PITT Artist Pen (around $1.50).
- Washi Tape: Any fun designs (around $5) or Dollar Store tape (just a buck!).
Skill Level: Intermediate
(You should be comfortable with hand lettering and using rulers for layout.)
—
Hey there, fellow journaler! Have you ever found yourself staring at a blank page, wondering how to keep the momentum going in your bullet journal? Trust me, I’ve been there. That’s why I’m excited to share my approach to setting up strategic checkpoints in your BuJo — it’s a game changer!
You’ll want to make weekly reviews a regular part of your routine. Think of it as your personal check-in. Grab your journal, set aside some time, and jot down what you’ve accomplished. Feel that? It’s like a mini celebration!
And don’t forget to migrate any incomplete tasks. I used this layout for three months, and it helped me stay on track without the overwhelm.
Daily logs are your best friends. They capture the nitty-gritty of your work and keep you aware of deadlines. I like to set mine up in the morning, creating a clear path for the day ahead.
Keep it simple: write down what you need to do and maybe even add a little doodle or color splash. Remember, that counts!
Now, let’s talk about meeting logs. They’re perfect for documenting decisions and ideas that pop up during discussions. I’ve tried both detailed notes and quick bullet points, and honestly, quick points work better for me.
You can always expand on them later if needed.
Quick Tip:
Try using color-coded visual signifiers! I love this technique for categorizing tasks and projects. Use a specific color for high-priority items and another for ongoing projects.
This not only makes your journal pretty but also keeps your focus sharp, especially during those remote work hours.
Engagement Break:
What’s the mistake most beginners make? They try to perfect each spread before moving on. Remember, perfection is the enemy of done. Start messy, and you’ll find your rhythm!
—
When it comes to aesthetics, think function too. Each decorative element should serve an organizational purpose. For example, if you’re using washi tape, use it to draw lines between sections or highlight important tasks.
It makes scanning your pages so much easier!
And here’s a little secret: if you find that some spreads take too long, don’t hesitate to simplify. I abandoned one elaborate layout after a month because it just wasn’t practical for weekly use.
Keep experimenting until you find your sweet spot.
Try This Today:
Set up your weekly review page. Grab your colored pens and get creative! Make it a space you look forward to using.
Trust me, it’ll help you keep everything in sight and in mind. Happy journaling!
Phase 3: Verification
You'll know your remote work bullet journal is truly effective when you're consistently completing tasks, reducing time spent searching for information, and feeling more in control of your workday.
As you monitor your use of collections and daily logs each week, you might start to notice a drop in your stress levels as your organizational system solidifies.
But how do you measure these changes? This brings us to the next step: comparing your productivity metrics and task completion rates from before you began journaling to pinpoint tangible improvements in your workflow.
How to Know It Worked
How to Know If Your Bullet Journal‘s Working for Remote Work
Ever sit down with your Bullet Journal, only to feel like you’re just doodling instead of getting things done? Trust me, I’ve been there! After 7+ years of experimenting with different systems, I’ve learned a few tricks to figure out if your setup is truly boosting your remote work productivity.
1. Compare Your Monthly Log****
Take a peek at your Monthly Log and compare the tasks you planned with what you actually accomplished. I love this step because it helps me see trends. Did I finish my tasks? What made me skip some? You can even color-code the completed tasks for a quick visual cue!
2. Weekly Review of Your Daily Log****
This is where the magic happens! Set aside a little time each week to look over your Daily Log entries. What patterns do you notice? Are there days when you crush your to-do list? Celebrate those wins! If you notice you’re stuck on certain tasks, that’s your cue to rethink your strategies.
3. Track Your Time with Signifiers****
Here’s a fun tip: use signifiers (like doodles or symbols) to track how much time you spend on tasks. This little hack helps ensure you’re aligning with your priorities. I often use a small clock icon next to tasks that take longer than expected. It’s a visual reminder to adjust my time management.
4. Monthly Reflections****
At the end of each month, take a moment to reflect. What worked? What didn’t? This is your chance to make adjustments for the next cycle. I’ve found that jotting down just a few notes about my monthly experience helps keep me aligned with my goals.
Supplies You’ll Need
- Notebook: Leuchtturm1917 A5 Dotted ($20) or a budget-friendly alternative like the Moleskine Classic Notebook ($12).
- Pens: Micron 05 ($2.50) for fine lines or the Paper Mate InkJoy Gel Pen ($1.50) for smooth writing.
- Highlighters: Mildliners ($13 for a set) or Crayola Highlighters ($5 for a set) for color coding.
Skill Level: Intermediate
You’ll need some comfort with layout and hand lettering to make the most of this process.
Engage with Your Journal
Feel like you’re stuck? That’s common! The mistake most beginners make isn't reviewing their logs regularly. Trust me, this reflection is where you’ll spot the wins and areas for improvement.
Try This Today!
Grab your Bullet Journal and set aside 30 minutes for a Monthly Log review. See what patterns emerge and jot down a few reflections. You might just surprise yourself with what you discover!
Pro Tips From Experience
Transform Your Remote Work Bullet Journal
Ever sat down to journal and felt overwhelmed by the chaos of your tasks? I totally get it! That’s why I’ve crafted a few essential strategies to help you turn your bullet journal into a productivity powerhouse—without the pressure of perfection.
Your Supply List:
- Journal: Leuchtturm1917 A5 Dotted ($20) or a budget-friendly alternative like the Archer & Olive Dot Grid Notebook ($10).
- Pens: Tombow Dual Brush Pens ($10 for a set) or a set of Crayola Super Tips ($5).
- Fine Liners: Micron 05 ($2) or the Papermate Flair Felt Pens ($8 for a set).
Skill Level: Intermediate
Ready to dive in? Let’s go!
—
1. Designate Your Workspace
What I love about this tip is how simple it is! Create a dedicated section in your journal just for work.
Draw a 10cm x 15cm box on the left-hand page, 2cm from the top, using a black pen. Inside, you can jot down tasks, deadlines, and anything work-related.
On the opposite page, reserve space for personal commitments. This not only separates your worlds but also clears your mind. Can you already feel that clarity?
2. Leverage Collections
Here’s where things get fun! Organize projects by client or initiative.
Draw sections that are 5cm wide, leaving 1cm gaps between each. Use different colors for each project—maybe blue for one client and green for another.
This way, all your notes are in one place, and you won’t waste time searching for scattered info. I’ve tried this method for several months, and it really keeps the chaos at bay.
3. Implement Weekly Reviews
Take a moment each week to reflect. Set aside 15 minutes on Sunday to look back.
Take a moment each week to reflect—set aside just 15 minutes on Sunday to look back and reconnect with your progress.
What did you accomplish? What needs more attention? I often use a simple checklist format: a box for each day of the week where I write down highlights and next-week priorities.
This helps me stay accountable and keeps that momentum rolling. Trust me, it works!
4. Embed Daily Reflections
Next to your task logs, jot down a few thoughts about challenges you faced and how you tackled them.
I find this practice not only helps capture solutions but also allows me to see trends in my work habits over time. It’s like a little self-coaching session!
—
Engagement Break
What’s the mistake most beginners make? They get bogged down by perfection.
Remember, it’s okay if your spreads aren’t Instagram-ready. Start messy! That counts.
—
5. Use Signifiers
This is a game-changer. Use symbols or colors to categorize entries by urgency or type of work.
For instance, a star for high-priority tasks or a circle for personal commitments. Grab your Tombow markers for this!
I usually stick to three colors max—too many can get confusing. This little visual system reduces decision fatigue and helps you adapt quickly to changing priorities.
—
So, what're you waiting for? Try these strategies today!
Set up that workspace, organize your collections, and start those weekly reviews. You’ve got this!
Before and After: What to Expect
Before and After: What to Expect with Your Bullet Journal
Let’s be real: managing remote work can feel like a juggling act. I’ve been there, and I know how overwhelming it can get. But when you commit to a structured bullet journal system, the shifts you’ll notice can be pretty amazing—often within just a few weeks!
| Aspect | Before | After |
|---|---|---|
| Productivity | Scattered tasks, missed deadlines | 30% efficiency gain, clear prioritization |
| Stress Levels | Overwhelmed, disorganized | Considerably reduced through visual management |
| Memory Retention | Digital fatigue, forgotten details | Enhanced cognitive recall of tasks |
Supplies You'll Need:
- Notebook: Leuchtturm1917 A5 Dotted ($20) or a budget-friendly alternative like a Simple Modern Classic Notebook ($10).
- Pens: Tombow Dual Brush Pens ($10 for a set) or Crayola Super Tips ($6 for a set).
- Ruler: Westcott 12-inch Ruler ($3) or any sturdy, straight edge you have.
Skill Level: Beginner (no experience, basic supplies)
Recommended for You
🛒 Dotted Journal Notebook
As an Amazon Associate we earn from qualifying purchases.
What I love about this process is the clarity that emerges when you consolidate all those scattered digital notes into one cozy analog space. Your Daily Log? It becomes a fantastic reflection tool, helping you spot patterns in your work habits that you might not have noticed before.
You’ll find that task migration forces you to continuously evaluate priorities. Feel that? That’s your focus sharpening! Suddenly, you’re not just organizing tasks—you’re flipping the script on how you approach productivity. The cognitive benefits stack up, making remembering deadlines feel effortless and slashing decision fatigue.
Quick Tip:
Start messy. Just dive in! Trust me, it’ll be more rewarding than you think.
What I’ve noticed after using this layout for a few months is how my mental clutter diminished. I used to feel overwhelmed by digital tools, and now I find joy in the tactile experience of writing things down. It’s liberating!
Engagement Break:
What I’d do differently? I’d probably prioritize my Daily Log even more. It’s tempting to overcomplicate things with fancy layouts, but simplicity often wins. I’ve tried both ways, and the straightforward approach has kept me consistent.
Let’s Talk Technique:
Here’s how to set up your Daily Log:
- Draw a header: Use a bold pen and write “Daily Log” at the top center of your page.
- Create a section for tasks: Draw a 4cm x 6cm box, 1cm from the left margin, using a 0.5mm black pen. Inside, list your tasks for the day using bullet points.
- Add a reflection area: Below the task box, leave a space (4cm tall) for notes or reflections about your day. This can help you track what worked and what didn’t.
Remember, each decorative element should serve a purpose. I love to add little doodles or color to make it visually appealing, but it's all about enhancing usability.
The Mistake Most Beginners Make:
They aim for perfection! Don’t fall into that trap. Perfect is the enemy of done. Your spreads don’t have to be Instagram-ready; they just need to work for you.
Your Next Steps
Your Next Steps to a Bullet Journal
Ever had that moment when you’re juggling too many projects, and everything feels a bit chaotic? I’ve been there too! That's where a bullet journal can be an absolute lifesaver. Let’s create one that works for you—starting with a focus on remote work.
Supply List:
- Notebook: Leuchtturm1917 A5 Dotted (around $20) or a budget-friendly alternative like a basic dotted journal from any local store (around $5).
- Pens: Tombow Dual Brush Pens ($10 for a set) or Crayola Supertips ($5 for a set).
- Ruler: Any standard ruler ($2) or a budget one from an office supply store ($1).
- Stickers: Etsy or local craft store stickers (prices vary) or you can print your own from free online templates.
Skill Level: Intermediate (comfortable with rulers and hand lettering).
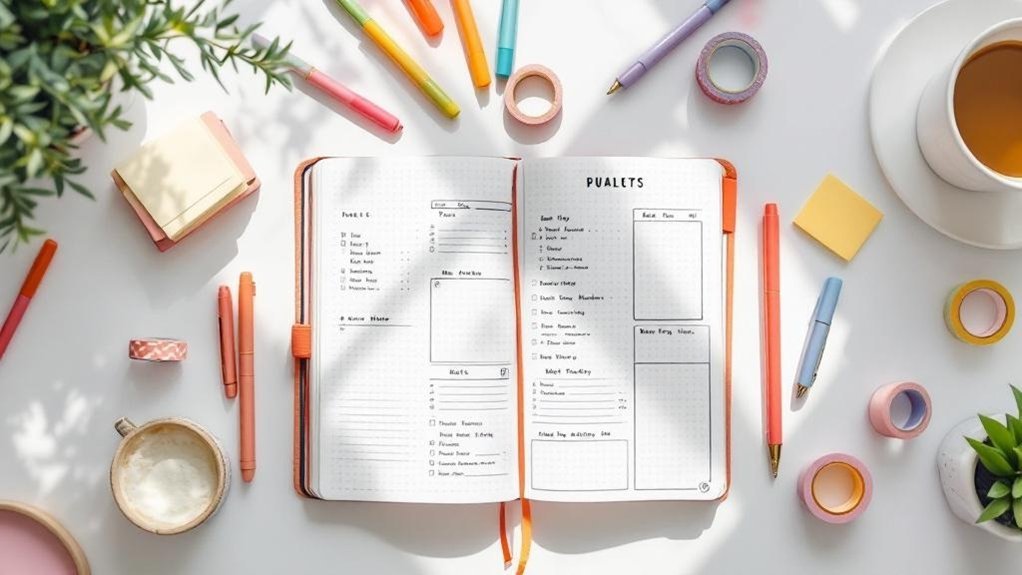
First up, create a Monthly Log. This should highlight your key projects and deadlines for the month. Here’s how to do it:
- Draw a rectangle measuring 15cm x 20cm on the right side of your page, 2cm from the top and 1cm from the side.
- Inside, divide the space into two columns: one for the date and the other for tasks. Each column should be 4cm wide.
- Use a 0.5mm black pen for clean lines and a light touch with your Tombow Brush Pens to add some color.
Feeling that creative spark? Let’s move on to the Daily Log. This is where you track your daily goals and accomplishments.
The Daily Log is where you track your daily goals and accomplishments with intention and clarity.
- Start each day with a 4cm x 6cm box at the top of your page. This is your header for the date.
- Below it, write down your tasks, leaving space for reflection. I usually jot down 3 major goals each day and a few smaller tasks.
- Use dots for ideas and stars for priorities—these visual cues make it easy to scan your tasks at a glance.
What I love about this setup is how adaptable it is. I’ve tried both fancy designs and minimalist approaches, and honestly, the simpler ones often stick around longer.
Engagement Break
Ever felt stuck? One common mistake I see isn't using visual signifiers effectively. If you find yourself overwhelmed, try simplifying your symbols. Just a star for priorities can work wonders!
Now, let’s talk about weekly migrations. This is where you reassess your tasks.
- Dedicate a page at the end of each week to review what’s left.
- Make a note of what didn’t get done and why. This helps you adjust for the upcoming week and prevents that dreaded overwhelm.
I used this layout for three months, and it really helped me prioritize better. I found myself more productive and less stressed—what a win!
Try This Today
Finally, build a resource collection. Think of it as your go-to spot for productivity tips and articles tailored to your work. Reserve a couple of pages for this.
- Use a 5cm x 15cm box for each resource.
- Write down the website or article title, a brief note about why it’s helpful, and a star rating for quick reference.
Remember, the mistake most beginners make is overcomplicating their spreads. Start messy; that counts. Your bullet journal is yours—embrace the process!
Grab your supplies and give this a go today. You’ve got this!
Frequently Asked Questions
What Type of Notebook and Supplies Do You Recommend for Bullet Journaling?
What type of notebook is best for bullet journaling?
Any notebook works — but a dotted A5 gives you the most flexibility. It’s perfect for layouts without limiting your ideas.
Check out the Leuchtturm1917 Dotted Notebook ($20) or the Scribbles That Matter ($18) for quality options that won’t break the bank.
What pens should I use for my bullet journal?
You’ll want to use pens that don’t bleed through. Micron Pens ($15 for a set) are fantastic, but if you're looking for a budget-friendly option, try the Paper Mate Flair Pens ($10 for 12).
They’re both reliable and fun to write with!
How can I add color to my bullet journal?
Using colored markers can really enhance your layouts. Tombow Dual Brush Pens ($25 for 10) are great for blending, but if you're new and want to save, Crayola Supertips ($6 for 20) work nearly as well.
Just remember to have fun with it!
How much time does it take to set up a spread?
This spread takes about 15 minutes to set up, and just 30 seconds daily to fill in.
Once you get the hang of it, you’ll be amazed at how quickly you can create your layouts and keep everything organized.
What tools do I need for clean lines?
You’ll definitely need a ruler for those clean lines. A simple metal ruler works wonders, and you can get one for about $5.
Plus, sticky tabs can help you navigate quickly — the Post-it Tabs ($8 for 24) are super handy for marking important sections.
Can I sketch in my bullet journal?
Absolutely! A good pencil is perfect for sketching initial designs before you commit.
The Ticonderoga Pencils ($6 for 12) are reliable and affordable. Don’t stress about perfection; your sketches just need to be fun and functional!
How Long Does It Typically Take to Set up a Complete Bullet Journal System?
Q: How long does it take to set up my bullet journal system?
You can typically set up your initial bullet journal in about 2-4 hours, but you can get started in just 20 minutes with a minimalist layout.
Focus on key sections like your index and monthly spread first. If you want a solid notebook, consider the Leuchtturm1917 A5 Dotted ($20) for flexibility or a simple Composition Notebook ($5) for budget-friendly options.
Q: How often should I update my bullet journal?
You’ll want to spend about 15 minutes each week updating your bullet journal.
Daily, it’ll take you just 30 seconds to jot down tasks or thoughts. Keeping your entries short and sweet helps maintain consistency. To make it even easier, try using a weekly spread to plan ahead!
Q: What supplies do I need to get started?
Any notebook works, but a dotted A5 gives you the most flexibility.
Grab some pens like the Tombow Dual Brush Pens ($25 for 10) for vibrant colors or Crayola Supertips ($6 for 20) for a budget option. A ruler and some washi tape can also add fun without breaking the bank.
Q: Can I change my layout later?
Absolutely! You’re not locked into perfection, and changing your layout is part of the fun.
It might take about 10 minutes to adjust a spread if you decide to switch things up. Just experiment and see what feels right for you; your system should evolve with your needs!
Can I Use Digital Tools Instead of a Physical Bullet Journal for Remote Work?
Can I use digital tools instead of a physical bullet journal for remote work?
Absolutely! Digital tools can be super effective for remote work.
Try apps like Notion or Todoist for task management—they sync across devices and offer customizable templates. Setting them up might take about 30 minutes initially, but daily updates are just a few seconds.
If you want a mix, consider using a Moleskine notebook ($20) for physical notes while managing tasks digitally.
Don’t stress about perfection; find what works for you!
How Do I Maintain My Bullet Journal if I Miss Several Days of Entries?
Q: What should I do if I miss several days of entries in my bullet journal?
Don’t worry, you’ve got options! You can quickly backfill missed entries by writing down key tasks and highlights from those days—it’ll take about 10-15 minutes.
If you prefer to skip the gap, just restart fresh; it’s a natural reset.
Consider using those missed days to reassess your system and find what works better for you moving forward.
A simple notebook like the Leuchtturm1917 A5 ($20) or a budget-friendly option like the Scribbles That Matter ($15) can help you get back on track!
What's the Best Way to Organize Multiple Projects Across Different Clients or Departments?
Q: How can I organize projects for multiple clients or departments?
You can definitely maximize efficiency with a solid system! Start by creating dedicated sections for each client or department in your notebook.
Using a dotted A5 notebook gives you flexibility to layout as you like, and it’ll take about 20 minutes to set up once you have an idea of your layout.
Consider using color-coded pens like Tombow Dual Brush Pens ($25 for 10) or Crayola Supertips ($6 for 20) to easily distinguish projects.
Q: How do I keep track of all my projects?
You’ll want to create a master project list! This helps you reference specific page numbers easily.
It’ll take about 15 minutes to set up the first time, but afterward it’s quick to update.
Use a simple bullet journal method in your A5 notebook, and don’t stress if it’s not perfect—just make it work for you!
Q: How can I make my project sections easy to navigate?
Indexing your pages is key! Spend about 10 minutes creating an index at the start of your notebook.
Just jot down page numbers next to project names. This way, you can flip through sections quickly.
You can also use tabs or sticky notes for quick access, which you can find at any office supply store for around $5.
It's all about making it easy for you to find what you need!
Conclusion
Ready to dive in? Just remember, it’s totally fine to start messy! Grab your journal and a single black pen. On the next blank page, sketch a simple 2×3 grid — that’s your first weekly tracker. Now, fill in today’s column with your top three tasks. Done beats perfect every time!
Once you’ve got that down, think about adding a mood tracker or a gratitude list. You’ll be amazed at how these little additions can shift your mindset and boost your productivity. Go for it!