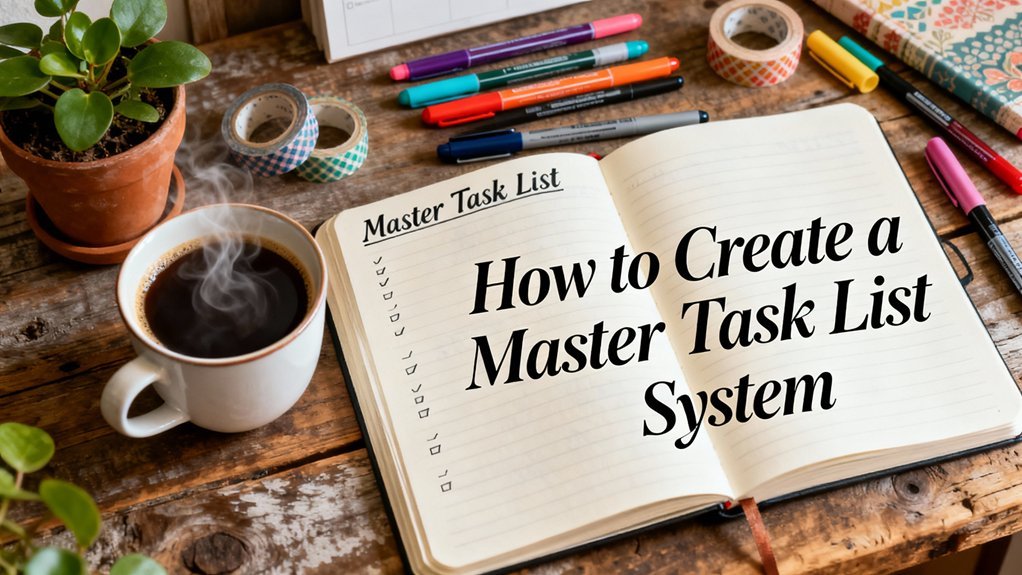
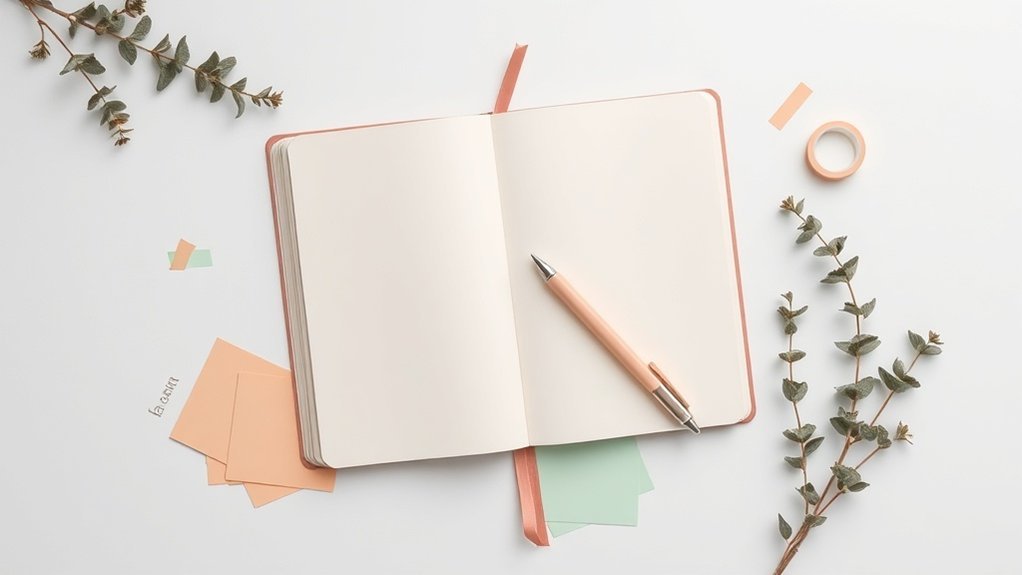
Staring at a blank page, I felt that familiar mix of excitement and dread—what if this spread didn’t work? But then I found a layout that clicked, transforming chaos into clarity. With a simple daily tracker and a visual to-do list, I tackled my tasks without feeling overwhelmed. You’ll learn how to set up a bullet journal that really caters to your ADHD brain. After trying every system out there, this is the one that helped me stay on top of it all for three solid months. Start messy; it all counts!
Key Takeaways
- Choose a simple layout with three sections: tasks, events, and habits. This reduces cognitive overload, making it easier to focus on what matters.
- Break tasks into steps and allocate specific 30-minute time blocks for each. This combats executive dysfunction and keeps your to-do list manageable.
- Use a color coding system with three shades to mark priority levels. This enhances scanability and boosts motivation by visually distinguishing urgent tasks.
- Start with a basic dotted notebook and a black pen. A clutter-free setup prioritizes functionality over aesthetics, helping you stay organized without distractions.
- Set aside 15 minutes each week for reflection on completed tasks. This allows you to adjust your layouts and strategies based on what really works for you.
Introduction
Supplies You'll Need:
- Notebook: Leuchtturm1917 A5 Dotted ($20) or a budget-friendly alternative like the Scribbles That Matter Dotted Notebook ($15)
- Pens: Micron 05 Black Pen ($2) or a set of fine-point gel pens like the Paper Mate InkJoy ($10)
- Highlighters: Tombow Dual Brush Pens ($50 for a set) or Crayola Washable Markers ($8 for a set)
Skill Level: Beginner to Intermediate
—
Ever sit down with a planner and feel that wave of anxiety wash over you? Trust me, I’ve been there. I used to think I'd have to have everything perfect.
Ever sit down with a planner and feel that wave of anxiety wash over you? Let go of perfectionism.
But let me tell you, a bullet journal can change all that, especially if you’re navigating life with ADHD.
What I love about bullet journaling is its simplicity. You don’t need to be an artist or spend hours on fancy layouts to make it work. Just grab a notebook and a pen, and you’re set. That counts, right?
The beauty of a bullet journal is that it’s all about you. You can make it as structured or as free-flowing as you like. Start messy; it’s okay! You’re building a system that evolves with you.
I’ve tried both rigid planners and this flexible approach, and let me tell you, this one fits like a glove.
Essential Components
Let’s dive into some core elements you can start with:
- Index: Reserve the first few pages for your index. This is your roadmap. Jot down page numbers and topics here.
- Future Log: Create a 4cm x 12cm box at the top of a new page, leaving 1cm margins. Divide it into six sections for each month. This is where you'll jot down important dates coming up.
- Daily Logs: Each day, create a 2cm x 6cm box for your tasks. Leave some space for notes or reflections. This helps keep everything in one spot.
Engagement Break
Feel that? That little spark of excitement? If you’re feeling overwhelmed, remember: perfection is the enemy of done.
You don’t need to fill every box beautifully. Just getting your tasks down is a win!
Adding Aesthetic Touches
Want to spice things up? Use color! I recommend using a light pastel for headers—maybe a soft pink or blue.
Just keep it consistent to improve scanability. I love to highlight tasks as I complete them. It’s not just visually pleasing; it gives you a sense of accomplishment.
When I first started, I thought every spread had to be a masterpiece. But I learned that keeping things simple often makes them more effective.
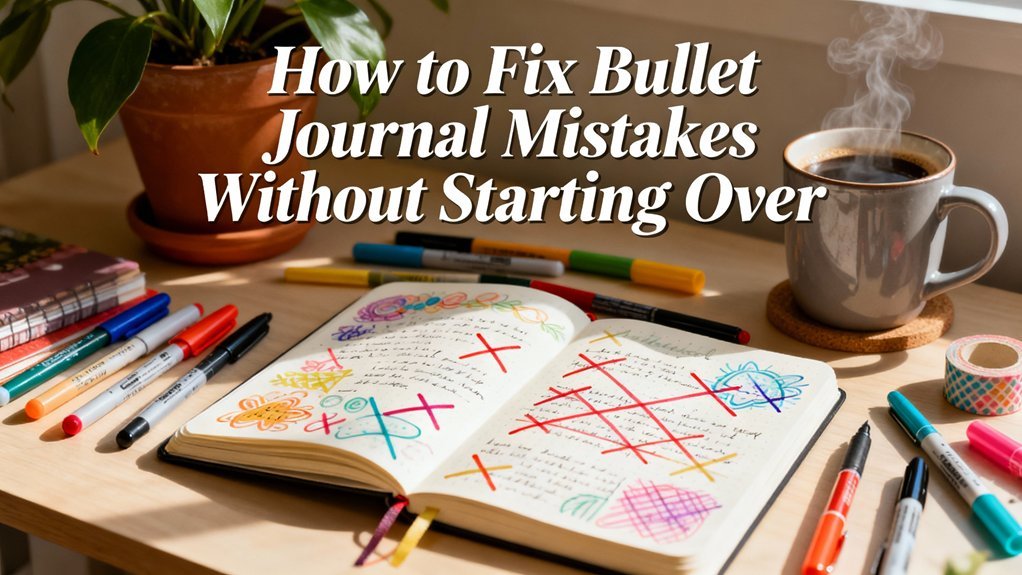
I'd a spread that took me 45 minutes to create, and I abandoned it after a month. Why? It just wasn’t practical.
Common Mistake
The mistake most beginners make? Overcomplicating their layouts.
Start with the basics and build from there. You’ll find what works best for you as you go.
Try This Today
Ready to give it a shot? Set aside a few minutes today to create your index and future log. Remember that bullet journaling for ADHD can offer tailored systems that work for your unique needs.
The Overwhelm of Tasks
You likely know the feeling: your to-do list keeps growing, but your ability to prioritize and tackle tasks doesn't keep pace, leaving you paralyzed by the sheer volume of what needs doing.
If you've got ADHD, this struggle hits harder because executive functioning challenges make it difficult to sort through what's urgent, important, or even realistic to accomplish.
Recognizing this overwhelm is crucial, but what comes next?
Understanding how to implement strategies tailored to your unique way of processing can be the key to regaining control and finding a system that truly works for you. One effective approach is to incorporate time blocks into your bullet journaling practice, allowing for structured yet flexible task management.
Why This Matters
Why This Matters
Ever felt that overwhelming rush when tasks start piling up? You’re not alone! It’s like having too many tabs open in your brain, and it can freeze you in place. I’ve been there. It’s frustrating, right? That cognitive overload not only weighs you down but also saps your energy to actually get things done.
Unorganized tasks create a loop of anxiety. You keep cycling through responsibilities, and before you know it, your mental resources are all consumed. It’s like running multiple background processes at once, draining your focus and motivation. Sound familiar?
What I love about structured documentation is how it can transform this chaos into clarity. Writing tasks down frees up mental space for the bigger picture. A bullet journal can truly be your best friend here! It gives you that visual clarity to separate urgent tasks from secondary ones.
Supply List:
- Notebook: Leuchtturm1917 A5 Dotted ($20) or a budget-friendly alternative like a Scribbles That Matter Notebook ($13).
- Pens: Tombow Dual Brush Pens ($2.50 each) or Crayola Super Tips ($10 for a pack of 50).
- Ruler: Any clear ruler ($2) or a budget option like a plastic one from a craft store ($1).
- Stickers/Decorative Tape: Use some fun washi tape ($5) or a roll from the dollar store.
Skill Level: Beginner
Let’s Get Started
Grab your supplies and let’s dive in! Start by setting up a simple layout. One of my go-to methods is to create a monthly spread that combines both function and aesthetics. Here’s how you can do it:
- Draw a Box: Start with a 4cm x 6cm box, 1cm from the left margin, using a 0.5mm black pen. This will be your title section.
- Add the Month: Inside the box, write the month in a fun font using your Tombow pens. I love using a gradient effect here!
- Create a Calendar Grid: Below the title, draw a grid for your days. Each box should be 2cm x 2cm, leaving a 0.5cm space between them. This way, you’ll have enough room to jot down appointments or notes.
- Decorate: Use washi tape to highlight important dates. This not only adds flair but also makes it easier to spot key events at a glance.
Feel that? That’s the relief of getting organized!
Engage with Your Journal
Here’s where it gets fun! Once you have your monthly layout, consider adding a habit tracker on the side. Just draw another box, about 4cm x 10cm, and list the habits you want to track.
What I’ve found is that combining aesthetics with functionality makes it easier to stick with your journaling. I used this layout for three months, and it really helped keep my tasks visible and manageable.
Quick Tip
The mistake most beginners make? They overthink their spreads, trying to make everything perfect. Trust me, start messy! It’s all about function. What counts is that you’re writing it down.
Try This Today
Ready to take that leap? Set aside a little time this week to create your own monthly spread. Remember, it’s totally okay if it’s not Instagram-perfect. Just getting those thoughts out of your head and onto paper is a huge step forward. You’ve got this!
Who It Affects
Who It Affects
Ever felt like your to-do list is multiplying faster than you can handle? Trust me, I’ve been there. When tasks pile up, it’s easy to feel that mental clutter creeping in, draining your energy and leaving you second-guessing yourself. Unwritten responsibilities weigh heavily, making it hard to figure out what really needs your attention.
That overwhelm can make focusing on what truly matters feel impossible. You’re not lacking skills or talent; it’s just that the noise is too loud. Here’s the good news: you don’t have to push harder to break through it. You can transform that chaos into clarity by changing how you capture and visualize your tasks.
Let’s talk bullet journaling! This method can turn that overwhelming mental mess into a system that works for you. By jotting things down on paper, you free up your mind. It’s like giving yourself a mental reset. When I started this journey, I found that externalizing my thoughts helped me prioritize better and build momentum.
Here’s what I love about bullet journaling: it can be as artistic or as minimal as you want. Start messy! It doesn’t have to look perfect; it just has to work for you.
Supply List
- Notebook: Leuchtturm1917 A5 Dotted ($20) or a budget-friendly alternative like a Scribbles That Matter A5 Dotted notebook ($10).
- Pens: Tombow Dual Brush Pens ($20 for a set) or Crayola Supertips ($10 for a set).
- Fine Liners: Micron 05 ($2.50 each) or a budget-friendly option like the Arteza Fineliner Pens ($10 for a set).
Skill Level: Beginner to Intermediate
If you’re just starting out or comfortable with basic lettering, you can dive into this!
The Power of Structure
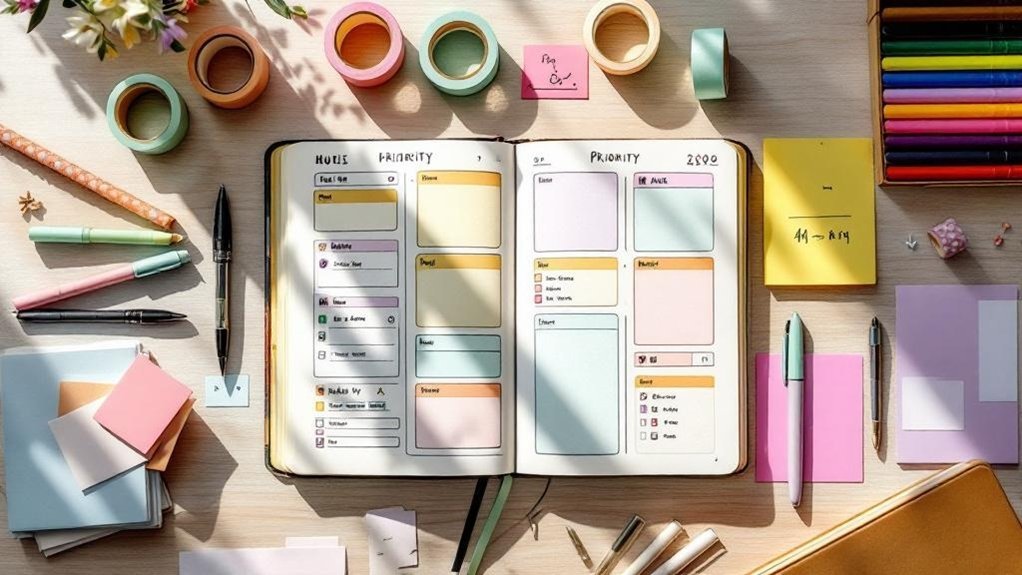
Now, let’s create a simple task tracker. Start by drawing a 10cm x 15cm rectangle, about 2cm from the top and 3cm from the left margin, using a 0.5mm black pen.
Divide it into four horizontal sections, each 3.5cm tall. Label the top section “Tasks,” the second “Due Dates,” the third “Priority,” and the fourth “Notes.” Feel that? You’re already on your way to clear organization!
To make it visually appealing, use a Tombow brush pen to add a splash of color to the headers. For example, try a soft blue for “Tasks” and a light pink for “Due Dates.” Just remember, these colors should help you read and track easily, not complicate things.
Engagement Break
Common Mistake: A lot of beginners try to make their spreads look perfect right from the start. Don’t! That pressure can be overwhelming and often leads to frustration. Just focus on getting your thoughts down.
Building Your Routine
As you use your tracker, you’ll find it easier to see what needs your attention first. Remember, this method aligns with the Ryder Carroll bullet journaling technique, focusing on function alongside aesthetics. Each element serves a purpose, whether it’s to track tasks or jot down notes.
Here’s what I found after using this layout for three months: It really helped me hone in on what was urgent versus what could wait. Plus, I loved the process of creating something that was uniquely mine.
Try This Today
Ready to give it a shot? Grab your notebook and pens, and start your task tracker. The first step is the hardest, but I promise it’ll feel good once you see everything laid out. Remember, perfect is the enemy of done, so just start!
You've got this!
ADHD Executive Dysfunction Explained

Your experience of executive dysfunction stems from the prefrontal cortex—the brain's decision-making hub—struggling to operate effectively with ADHD.
This neurological difference affects your task initiation, prioritization, and time management, leading to procrastination and feelings of overwhelm.
Recognizing these challenges as brain-based rather than personal flaws sets the stage for exploring effective strategies and external supports that can help you navigate these obstacles. Additionally, utilizing bullet journal trackers can transform these abstract goals into actionable tasks, providing a visual cue to stay on track.
Root Causes
Root Causes of Executive Dysfunction in ADHD****
Ever had that moment when you sit down to tackle a project, and suddenly, it feels like you’re staring at a mountain of chaos? You’re not alone! Executive dysfunction is a real challenge for many of us with ADHD. Let’s break it down together.
There are three main hurdles: planning and organizing tasks, working memory issues, and struggles with emotional regulation. Planning can feel like trying to untangle a mess of yarn—it's tough to break projects into bite-sized pieces. You might find yourself juggling so many thoughts that they slip right through your fingers, thanks to working memory constraints.
And when emotions run high, frustration can lead to impulsive choices that just make everything harder. Here’s the kicker: these challenges amplify each other. It’s like a domino effect on your productivity, and about half of people with ADHD face significant executive dysfunction, impacting everything from schoolwork to job performance.
Let’s talk solutions!
Understanding these root causes empowers you to tackle them head-on. Instead of relying solely on willpower, think about using your bullet journal as a supportive tool. What I love about this approach is that it turns your journal into a cognitive scaffold, helping to manage what your brain finds tricky.
Supply List for Bullet Journaling:
- Notebook: Leuchtturm1917 A5 Dotted ($20) or a budget-friendly alternative: Amazon Basics Dotted Notebook ($10).
- Pens: Tombow Dual Brush Pens ($10) or Crayola Supertips ($5).
- Ruler: Westcott 12-Inch Ruler ($3) or a simple plastic ruler ($1).
- Stickers/Decorations: Happy Planner Stickers ($20) or printable sticker sheets from Etsy ($5).
Skill Level: Beginner to Intermediate
Get Started with Planning
Step 1: Set up your monthly spread. Draw a rectangle 15cm wide by 10cm tall in the center of your page using a Micron 05 pen. Leave 2cm space at the top for the month’s name, and 1cm at the bottom for notes.
Step 2: Inside the rectangle, divide it into 7 equal columns (about 2cm wide each) for the days of the week.
Step 3: Color the headers with your Tombow pens—pick calming colors like soft blue or pastel pink to keep things light and inspirational.
Step 4: Add small icons or stickers that represent tasks or events for each day. This adds a touch of fun and makes your spread visually appealing!
Emotional Regulation Tips
Feeling overwhelmed? Here’s a quick tip: keep a “mood tracker” on the side of your monthly spread. Draw a simple chart with a 1cm wide column for each day. You can color it in based on how you feel, which helps you see patterns over time.
Engagement Break:
What’s your biggest challenge when planning? Is it the emotional ups and downs, or maybe the sheer volume of tasks? I used to struggle with tracking my mood until I realized it helped me understand my patterns. What would help you the most right now?
Common Mistakes
One mistake many beginners make is overcomplicating their spreads. Trust me, I’ve been there! Keep it simple—start with the basics and build from there. A cluttered page can lead to feeling overwhelmed, which is the opposite of what we want!
Try This Today
Pick one task you’ve been putting off and break it down into smaller steps in your bullet journal. Write down the first three steps you can take. Remember, start messy—progress is more important than perfection! You’ve got this.
Contributing Factors
Navigating Executive Dysfunction with Your Bullet Journal****
Ever sit down to tackle a big project and just… freeze? I totally get it. Executive dysfunction can be a real productivity thief. But here's the good news: you’re not alone, and there are ways to work through it that don’t involve endless to-do lists or feeling overwhelmed.
When your brain feels like it's juggling too much, that's when your bullet journal can truly shine! Instead of letting those interconnected challenges—like working memory limits and emotional dysregulation—get you down, you can lean on your creative spreads to help manage everything.
Supplies You’ll Need:
- Bullet Journal: Leuchtturm1917 A5 Dotted (around $20) or a budget-friendly option like a simple dotted notebook ($5).
- Pens: Tombow Dual Brush Pens (set of 10 for about $30) or Crayola Supertips ($10 for a pack of 50).
- Stickers or Washi Tape: Any fun decorative items that inspire you, from $5 up.
- Ruler: Just a basic one for clean lines—$2 at any store.
Skill Level: Beginner to Intermediate (If you can line things up, you’re good to go!)
Let’s Dive In:
First up, let’s tackle working memory. I know it can feel like a workout just to keep track of what you need to do! What I love about bullet journaling is how it allows you to offload those mental burdens.
Create a simple layout with a Task List spread. Draw a box measuring 10cm wide and 15cm tall on the left page, 2cm from the top. Inside, list your tasks for the week.
Now, let’s sprinkle in some emotional regulation strategies. Overwhelmed by tasks? Try using color coding! Assign a color for “urgent,” another for “medium,” and a third for “low priority.” This visual cue can help you see what really needs your attention without feeling like you’re drowning in responsibilities.
Engagement Break: Have you tried color coding before? It can really shift how you view your tasks. If you haven’t, give it a shot and see how it feels!
Now, onto initiation paralysis. You know that feeling when you just can’t start? My go-to approach is to set a timer for 10 minutes. Just 10! Grab your bullet journal and jot down one small task you can accomplish.
Once the timer goes off, you might find you’re ready to keep going. If not, that’s okay! You still made progress, and that counts.
The Mistake Most Beginners Make: They think their spreads have to be perfect. They don’t! You can start messy and still make meaningful progress. Remember, done is better than perfect!
After a few weeks of this layout, I found that I could easily track my tasks without feeling overwhelmed. I used this for three months, and it really stuck with me.
And if you find a layout isn't working, don't hesitate to adapt it!
Key Findings on Executive Dysfunction
Experts largely agree that executive dysfunction impacts about 75% of adults with ADHD, particularly in areas like planning, organization, and task initiation.
Given this understanding, how can we harness structured tools—such as bullet journals—to enhance task management and productivity?
While there's consensus on the benefits of these tools, the debate continues over whether executive dysfunction is primarily neurologically driven or shaped through learned behaviors.
This distinction is crucial, as it informs how interventions can be tailored to meet individual needs.
Key Findings
Key Findings
Hey there, fellow journaler! If you’ve ever felt the weight of procrastination or the frustration of incomplete tasks, you’re not alone. Executive dysfunction can really throw a wrench in the works when you’re trying to plan and organize. That’s where something like a Bullet Journal can become your best friend. Trust me, it’s all about creating a visual system tailored just for you.
Supply List:
- Journal: Leuchtturm1917 A5 Dotted (around $20) or a budget-friendly alternative like a simple composition notebook.
- Pens: Tombow Dual Brush Pens (set of 10 for about $30) or Crayola Super Tips (set of 50 for about $10).
- Ruler: A clear acrylic ruler (around $5) or any standard ruler you have on hand.
Skill Level: Beginner
Your working memory can be a little tricky, right? That’s why writing things down isn’t just a nice-to-have; it’s essential. What I love about Bullet Journaling is how flexible it is. You can change up your layouts every day to match how you’re feeling. Some days, you might want a full spread, and other days, a simple list will do. The key? Make it work *with* you.
Daily reflections in your journal can be a game changer. They help you recognize your achievements, which is super important when ADHD often has us feeling inadequate. Remember, it’s not just a task list; it’s a space for celebrating your progress.
Engagement Break
Have you ever tried reflecting at the end of the day? It can be such a simple yet powerful way to acknowledge what you’ve done. If you’re not into daily reflections yet, try writing down one thing you accomplished before bed. It counts, I promise!
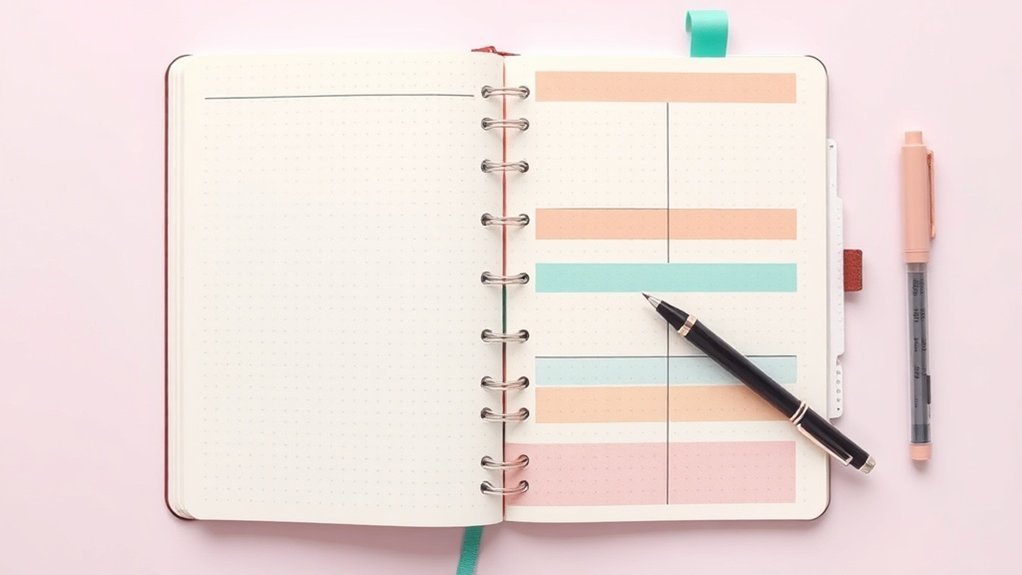
Now, let’s talk layouts. Here’s a simple one I used for three months: a monthly overview that includes tasks, events, and even a habit tracker. Start with a 6cm x 8cm rectangle at the top of your page for the month’s title. Underneath, divide the page into three sections, each about 4cm high. Label them “Tasks,” “Events,” and “Habits.”
Visual Elements:
- Use a black pen for the titles and a light gray for the lines. This keeps it clean and easy to scan.
- Color-code your tasks with the Tombow pens—maybe green for personal, blue for work, and pink for fun stuff.
Action Step
Ready to try this today? Grab your journal and set up your monthly layout. Don’t worry about making it perfect—start messy! That’s where creativity blooms.
The mistake most beginners make? They think it has to look flawless. It doesn’t! What matters is that it’s functional and serves you. Trust me, I’ve abandoned pretty spreads because they just didn’t help me stay organized.
Focus on what works for you. So, go ahead—give your Bullet Journal a shot. You’ve got this!
Where Experts Agree
Let's Talk Executive Function and Your Bullet Journal
You know that feeling when you sit down to tackle a task, and your mind just feels like a tangled ball of yarn? Yeah, that’s executive dysfunction in action, and it’s more common in ADHD than you might think. A good chunk of folks with ADHD—50-80%—deal with these struggles daily, especially when it comes to managing time and prioritizing tasks.
But here’s the good news: structured systems can really help! Bullet journals are more than just a pretty trend; they’re an evidence-based tool to support your unique brain. What I love about this? You get to customize it! Your layout should reflect your personal strengths and weaknesses, not a one-size-fits-all template that leaves you frustrated. Feel that?
Supply List:
- Notebook: Leuchtturm1917 A5 Dotted (around $20) or a budget-friendly alternative like a basic dot grid notebook from Amazon (about $10).
- Pens: Tombow Dual Brush Pens (set of 10 for $20) or Crayola Supertip Markers (set of 20 for around $10).
- Ruler: A standard clear plastic 30cm ruler (about $5) or a budget alternative from a school supply store for just a couple of dollars.
Skill Level: Beginner to Intermediate
So, let’s get into it! One of my go-to approaches is to create a monthly layout that not only looks great but serves a purpose. Start by drawing a rectangle measuring 14cm x 20cm, positioned 2cm from the top of the page. This will be your monthly overview.
Inside, divide it into a grid for days—5 rows and 7 columns will do. Each cell should be about 2.5cm x 3cm. You can use a 0.5mm black pen for crisp lines.
Here’s where the magic happens: color code your tasks! Grab those Tombow pens and assign colors for different types of tasks—work, personal, self-care. It makes scanning your month a breeze. Trust me, once you start using color, you’ll wonder how you ever did without it!
Quick Tip:
Start messy. Seriously! The mistake most beginners make is waiting for the “perfect” moment to start. Just dive in! Your first spread mightn't be Instagram-worthy, but that counts.
Now, let’s talk about reflection. I find that taking a few moments at the end of each week to assess what worked and what didn’t has been a game-changer. Try jotting down a few notes on what tasks you completed and what tripped you up.
This practice builds your awareness of your executive function patterns, so you can tweak your approach as needed.
Engagement Break
What’s your biggest challenge when it comes to staying organized? Is it starting tasks or keeping them on track? I’ve been there! Sometimes, I’ll even abandon a spread if it doesn’t serve me anymore. It’s okay to pivot!
Finishing Touches
Incorporate simple icons or doodles next to your tasks. A little star for completed tasks, and a question mark for things still in limbo. This small visual cue can keep you motivated and engaged, plus it adds a little flair to your layout without overwhelming the page.
Try This Today
Set aside 15 minutes to create a simple monthly layout using the steps above. It doesn’t have to be perfect—just functional and reflective of your style.
Where They Disagree
Where They Disagree
Ever found yourself staring at the pages of a beautifully crafted bullet journal, only to feel overwhelmed by all those blank spaces? Trust me, I’ve been there. While systems like bullet journals can be super promising for managing ADHD, not everyone sees eye to eye on how effective they really are.
Some researchers believe that just making your planner customizable isn't enough. If your working memory struggles to keep track of commitments, you might find yourself abandoning that gorgeous journal—no matter how beautiful it is—without some sort of external accountability. I get that! I've tried both ways, and I've learned the hard way that support systems can make or break your planning.
But here’s another perspective: creativity and flexibility can actually keep you engaged. When you infuse your journal with personal touches and make it fun, you’re more likely to stick with it. Feel that? It's like finding a rhythm that makes planning enjoyable instead of a chore.
Still, skeptics worry that you might just be trading one rigid planner for another. It can sometimes feel like you’re masking deeper issues instead of addressing them. That’s a valid concern!
So here’s the deal: you’ll need to experiment to find what works best for you. Your ideal bullet journal might need a mix of things—a blend of digital reminders, accountability partners, or little rewards to keep you motivated. My go-to approach? I like to keep it simple but colorful, integrating practical layouts with fun artistic elements.
Supply List for Your Bullet Journal Setup
- Bullet Journal:
- *Premium*: Leuchtturm1917 A5 Dotted
- *Budget-Friendly*: Scribbles That Matter Dotted Notebook
- Pens:
- *Premium*: Tombow Dual Brush Pens
- *Budget-Friendly*: Crayola Supertips
- Fine Liner:
- *Premium*: Micron 05
- *Budget-Friendly*: Staedtler Triplus Fineliner
Skill Level: Intermediate
Let’s dive into how you can make your bullet journal a space that truly helps you.
Step-by-Step Guide to an Engaging Bullet Journal Spread
- Set Up Your Layout:
- Start with a double-page spread. Leave a 2cm margin on the left and top for headers.
- Draw a 10cm x 15cm box on the right page for your main tasks or goals. Use your fine liner for clean edges.
- Add Color:
- Use your Tombow Dual Brush Pens to create a color gradient for your headings. Think of warm colors like orange and yellow for positivity!
- Incorporate Tracking Elements:
- Draw small dots or checkboxes in the task box. Make them large enough (about 1cm) to easily mark off when completed.
- Decorate:
- Add doodles or stickers around the edges that relate to your monthly theme. For example, if it’s October, you could draw little pumpkins or leaves.
- Make it Usable:
- Add a small section at the bottom for notes or reminders. A 5cm x 10cm box works well. This can be your space for daily reflections or things you need to remember.
Engagement Break
What would I do differently? If you find your spread is taking too long, don’t stress about perfection. Start messy! I’ve spent 45 minutes on a spread before only to realize I could’ve just jotted it down in five. Keep it functional, and remember that done is better than perfect!
The Mistake Most Beginners Make
Many folks think they need to have every element perfectly designed before they start using their journal. Here’s the truth: it’s okay if things don’t look Instagram-ready right away. What matters is that it works for you.
Bullet Journal Setup Prevents Overwhelm
With that foundation established, it’s clear that your setup choices can significantly influence your journaling experience.
What You Can Do
What You Can Do
Hey there, fellow journaler! If you’ve ever felt overwhelmed by to-do lists or chaotic thoughts, you’re not alone. I’ve been there too. One thing I've learned? ADHD brains thrive on structure that doesn’t scream perfection. That’s where a simple layout comes in. It’s a game-changer! Let’s dive into some strategies that’ll help you build momentum without the stress.
Recommended for You
🛒 Dotted Journal Notebook
As an Amazon Associate we earn from qualifying purchases.
Supply List:
- Notebook: Leuchtturm1917 A5 Dotted ($20) or *budget-friendly alternative*: Scribbles That Matter Dotted Notebook ($15)
- Pens: Tombow Dual Brush Pens ($10 for a set) or *budget-friendly alternative*: Crayola Supertip Markers ($7 for a set)
- Ruler: 12-inch clear acrylic ruler ($5) or *budget-friendly alternative*: any old school ruler ($1)
Skill Level: Beginner to Intermediate
- Create a Future Log: This is your space to jot down important dates without the pressure. I like to use a two-page spread for the next six months. Draw a 10cm x 14cm rectangle on each page, 2cm from the top, then divide it into three sections for each month. Use a different color for each month to make it pop!
- Break It Down: Take those big tasks and split them into Monthly and Daily segments. It’s all about making things feel manageable. When I did this for my last project, it was like lifting a weight off my shoulders!
- Establish Collections: This is where you can categorize everything. I love having a collection for books I want to read. Keep your main log clean while giving yourself focused reference points. Use a 0.5mm black pen to outline the categories, and add a small doodle or icon for flair.
- Employ Visual Systems: Symbols, colors, and icons can signal priority levels and match your energy state. For instance, I use a star for high-priority tasks and a circle for regular ones. You can even use color-coded pens to help you visually organize your tasks. Feel that?
Regularly migrating tasks between logs can transform that feeling of being overwhelmed into a sense of control. You’re not just tracking; you’re strategizing your workflow. This iterative approach means nothing slips through the cracks while keeping the flexibility your brain craves.
Engagement Break
Common Mistake: A lot of beginners get caught up in trying to make everything look perfect. Here’s the truth: it doesn’t have to be Instagram-ready! Start messy. That counts. I remember when I first started; I was so focused on aesthetics that I forgot about function. It took me a while to realize that if it’s not usable, what’s the point?
Dive Deeper
If you want your spreads to be even more functional, think about how each design choice improves scanability or daily usability. For example, when I layout my monthly calendar, I leave space between days to jot down quick notes or reminders. This little trick has saved me so much time!
What I love about this process is that it’s adaptable. If something isn’t working, tweak it! I’ve tried elaborate designs that looked great but took forever. Spoiler: I abandoned those quickly.
Try This Today
Ready to give it a go? Set aside a bit of time to create your future log today. Jot down important dates and break them into manageable tasks. Remember, perfect is the enemy of done. You got this!
What to Avoid
Embracing Flexibility in Your Journal
Ever felt the pressure of creating the perfect spread? I’ve been there, trust me! After trying countless systems over the years, I’ve learned that embracing adaptive frameworks is the way to go. Here’s the deal: keep your designs minimal. Use only the essential symbols that help you track what matters most.
What I love about this approach is that it transforms your journal into a flexible tool rather than a pressure cooker. You don’t need to stress over every detail. Start messy. That counts! Remember, done is better than perfect.
Here’s a quick tip: Ruthlessly prioritize your layouts. Focus on what you really need. I’ve tried both overly complicated spreads and the super simple ones. Guess which ones stuck? The simple ones! They’re easier to maintain and keep the burnout at bay.
Supply List
- Notebook: Leuchtturm1917 A5 Dotted ($20) or a budget-friendly alternative like the Scribbles That Matter Dotted Notebook ($15).
- Pens: Tombow Dual Brush Pens ($10 for a pack) or Crayola Super Tips ($6 for a pack).
- Fine Liners: Micron 05 ($2.50 each) or a budget-friendly alternative like the Arteza Fineliner Pens ($15 for a set).
Skill Level: Beginner – no experience, basic supplies.
Layout Concept
- Start with a Monthly Overview: Draw a rectangle measuring 14cm x 20cm, centered on the page, about 2cm from the top. This’ll be your main calendar.
- Divide the Rectangle: Use a 0.5mm black pen to create 7 columns, each 2.5cm wide, for the days of the week. Add a header for each day using your favorite brush pen color.
- Add Key Events: Below your calendar, create a space for key events. Draw a box measuring 14cm x 6cm, 1cm below your calendar. Use a fine liner to outline and label it.
- Decorate Sparingly: Feel that? That’s the freedom of minimalism! A few doodles or washi tape can make your journal pop without overwhelming it.
Engagement Break
Common Mistake: Many beginners try to fill every space with elaborate designs. Don’t! This can lead to burnout. Instead, focus on functionality. Your journal should enhance your productivity, not hinder it.
Final Thoughts
What’s your go-to approach? If you’re feeling stuck, why not try this layout today? You’ll find that the less you try to perfect it, the more you enjoy the process. Remember, the goal is to keep it enjoyable and sustainable.
What I’d do differently: If I'd to start over, I'd skip the complex spreads and stick to simple designs that serve a purpose. Trust me, it’ll save you time and keep your creativity flowing. Ready to give it a shot?
Comparison of Approaches
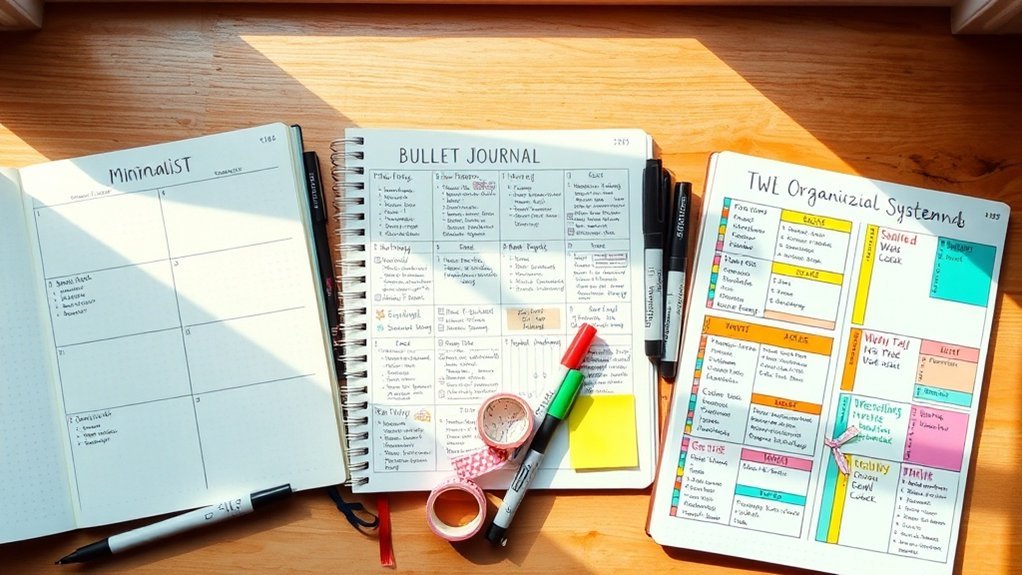
Finding Your Flow with Bullet Journals
You know that feeling when you sit down with a traditional planner, and it feels like a chore? Rigid structures can trigger all sorts of stress, especially if you’ve got an ADHD brain like mine. I’ve been there! That’s why I turned to bullet journaling—it’s a game-changer. You get to create a system that really works for you, not against you.
Here’s a quick comparison:
| Feature | Traditional Planners | Bullet Journals |
|---|---|---|
| Structure | Fixed, linear format | Customizable, adaptive |
| Engagement | Passive consumption | Creative, interactive |
| Organization | Segmented sections | Topic-based collections |
What I love about bullet journals is the signifier system. You can whip up symbols for tasks, events, and memories that let you scan everything quickly. No more cognitive overload! Monthly migrations keep you in tune with your energy levels, letting you shift priorities as needed. You’re not stuck pushing old goals; you’re in control.
Supply List:
- Notebook: Leuchtturm1917 A5 Dotted (or a budget-friendly alternative like the Scribbles That Matter Dotted Notebook)
- Pens: Tombow Dual Brush Pens (or Crayola Super Tips for a wallet-friendly option)
- Fine Liners: Micron 05 (or a set of Sharpie Pens)
Skill Level: Beginner to Intermediate
—
Getting Started: Your First Spread
1. Set the Scene: Grab your Leuchtturm1917 (or Scribbles That Matter) and a Tombow Dual Brush Pen.
2. Create Your Monthly Overview:
- Draw a rectangle measuring 10cm x 15cm, 2cm from the top and left edges.
- Divide it into 7 columns for the days of the week.
- Label them with your fine liner.
3. Add Your Signifiers: Use simple shapes or colors—like circles for tasks and stars for events.
*Feel that? It’s all about making it work for you!*
Engagement Break: If you’re feeling overwhelmed by the idea of creating a whole month, start with just one week. You can always expand later. Remember, done is better than perfect!
—
Personal Touches
Collections are a fantastic way to capture your interests. I’ve tried various layouts, but my go-to is a “Books to Read” collection. Here’s how to set it up:
- Draw a 15cm x 10cm box on a fresh page.
- Divide it into 3 columns (5cm each).
- Label the top with “Books to Read” using your fine liner.
- List books under each column, leaving room for notes or thoughts.
This setup not only looks pretty but also helps you keep track of your reading goals without feeling like you’re juggling too many things at once.
The Mistake Most Beginners Make
A common pitfall? Overcomplicating spreads. It’s tempting to aim for Pinterest-level perfection, but remember: simplicity often leads to sustainability. Start messy—trust me, it counts!
—
Ready to Dive In?
Why not try creating a simple monthly spread today? You might surprise yourself with how much you enjoy the process. And remember, every stroke is a step toward clarity. You’ve got this!
Key Takeaways
Key Takeaways for Your Bullet Journal
You know that feeling when you sit down to journal, but it all feels a bit overwhelming? Trust me, I’ve been there. After seven years of bullet journaling, I’ve found that the best systems are the ones that adapt to you, not the other way around.
Let's dive into what really makes a difference for those of us with ADHD brains.
Here’s the scoop:
– Simplicity drives consistency. Grab a basic notebook, like a Leuchtturm1917 A5 Dotted (or the budget-friendly Scribbles That Matter) and a pen, maybe a Micron 05.
I’ve tried all the fancy supplies, but honestly? A simple setup keeps me focused on tracking instead of decorating. Decision fatigue? Gone!
– Structured timeframes create clarity. Monthly, weekly, and daily logs help you externalize thoughts.
Picture this: a monthly spread where you jot down priorities and deadlines. It lightens the cognitive load and helps you see everything at a glance.
I love using a layout where I divide the page into sections—each section about 5cm tall—so it’s super easy to scan.
– Regular migration prevents stagnation. Every week, take a moment to review.
I’ve shifted tasks around so many times that it’s become second nature. It keeps your system responsive to what matters today. Nothing feels better than crossing off tasks that no longer serve you!
Remember, it’s not about perfection; it’s about building a system that works for you. Feel that relief? Let’s make it happen!
Supply List
- Notebook: Leuchtturm1917 A5 Dotted (or Scribbles That Matter for budget)
- Pens: Micron 05 (or any gel pen you love)
- Optional: Tombow Dual Brush Pens for a pop of color (or Crayola Markers)
Skill Level
- Beginner: If you’re just starting out, stick to a basic notebook and pen.
- Intermediate: Comfortable with rulers and hand lettering? Great! You can enhance your spreads.
- Advanced: Ready to dive into specialized tools? Go for those Tombows and fancy stencils!
Design Details
Let’s talk about layout. Start with a monthly log.
Draw a rectangle measuring 20cm x 15cm, about 2cm from the top of the page. Divide it into four sections for each week, each 3cm tall.
This way, you can easily jot down events or tasks without clutter.
Use a color coding system—maybe green for work, blue for personal, red for urgent. It makes scanning your month a breeze!
Engagement Break
Feel stuck with your designs? A common mistake is trying to make everything look perfect.
I used to spend hours on a spread that I abandoned after a month. It’s all about function! If it doesn’t serve your tracking, let it go.
Try This Today
Take a few minutes to set up your monthly log. Don’t worry about the aesthetics—just get those tasks down.
Start messy; that counts! Trust me, you’ll feel so much lighter once you see everything laid out. This time next week, you’ll be amazed at how much more organized you feel!
Let’s keep this journey creative and fun. You’ve got this!
Frequently Asked Questions
How to Make a Bullet Journal for ADHD?
Q: What kind of notebook should I use for my bullet journal?
Any notebook works — but a dotted A5 gives you the most flexibility. It helps you create clean layouts without the pressure of perfection.
Try the Leuchtturm1917 Dotted Notebook ($20) for a quality option, or go for a budget-friendly option like the Strathmore Mixed Media Sketchbook ($10).
—
Q: How long will it take to set up my bullet journal?
About 20 minutes once you have the layout figured out, 45 minutes the first time.
Focus on essential pages like your index and monthly log. You'll get quicker as you go! Set aside a relaxed afternoon to really enjoy the process.
—
Q: How do I keep my tasks and events organized?
You’ll use bullet symbols to organize everything efficiently.
Start with simple dots for tasks, circles for events, and dashes for notes. This spread takes about 15 minutes to set up, and you’ll only need 30 seconds daily to fill it in.
—
Q: What're backbone pages, and why do I need them?
Backbone pages like an index, future log, and monthly log help you navigate your journal easily.
They keep everything organized and reduce overwhelm. Setting these up takes about 30 minutes, but they’ll save you time in the long run!
—
Q: How do I handle tasks I didn’t complete?
You’ll conduct monthly reviews to reassess and migrate tasks, which keeps you focused.
This takes about 20 minutes at the end of each month. Use a simple checklist to ensure nothing gets lost; it makes the process smoother!
—
Q: Can I customize my bullet journal for specific interests?
Absolutely! You’ll build collections targeting your interests or goals.
This can take about 15 minutes for each collection you create. Use sticky notes to jot down ideas first before committing to pages, making it less intimidating!
Conclusion
Hey there, it’s time to dive in! Remember, it’s totally okay if things aren’t perfect—start messy. Grab your journal and a black pen. Draw a simple 2×3 grid on the next blank page; that’s your first weekly tracker. Fill in today’s column with one task you want to focus on. Done!
Once you’ve got that down, think about adding a color code for different tasks next week. You’ll see how this little structure can help you manage your days with ease. Keep it fun and flexible—your bullet journal is all about what works for you!