Staring at a blank page can feel like staring into the void, can’t it? But when you finally fill it with a layout that clicks, that satisfaction is unbeatable. Imagine organizing all your creative projects in one cohesive bullet journal spread, keeping deadlines in check and inspiration flowing. I’ve been there, juggling ideas and sticky notes, until I found this simple setup that worked wonders for me over three months. Start messy, and watch how it transforms your process. You’ve got this!
Key Takeaways
- Design a 20cm x 15cm monthly calendar with weekly sections and color-code projects to visually manage tasks — this keeps you organized and focused on priorities.
- Allocate dedicated pages for project overviews and task breakdowns using color coding — this helps clarify tasks and boosts your productivity by minimizing overwhelm.
- Divide projects into phases with specific milestones — this maintains motivation and allows you to track progress visually, ensuring you celebrate small wins.
- Set up weekly logs with three sections: goals, tasks, and reflections — this structure sharpens your focus and holds you accountable for your commitments.
- Conduct reviews every month to assess your system’s effectiveness — this adaptability keeps your project management fresh and aligned with your evolving needs.
Introduction
Ever felt overwhelmed juggling multiple creative projects? I’ve been there! After years of experimenting with different systems, I found that a bullet journal is a game changer. It’s not just about tracking tasks; it’s about crafting a space that truly reflects your creative flow.
Supply List:
- Notebook: Leuchtturm1917 A5 Dotted ($20) or a budget-friendly alternative like a Scribbles That Matter ($12).
- Pens: Tombow Dual Brush Pens ($10 for a set) or Crayola Super Tips ($8 for a set).
- Fine Liners: Micron 05 ($2.50 each) or Stabilo Point 88 ($10 for a set).
Skill Level: Intermediate (comfortable with rulers and hand lettering)
What I love about bullet journaling is its flexibility. You can mix brainstorming, task tracking, and deadlines all in one place. Imagine having a monthly log that not only organizes your tasks but also serves as a creative canvas. This method is particularly effective for monthly bullet journal setup that enhances your planning process.
You’re not bound by rigid templates; you can adapt your journal to whatever phase of life you’re in.
The Core Technique:
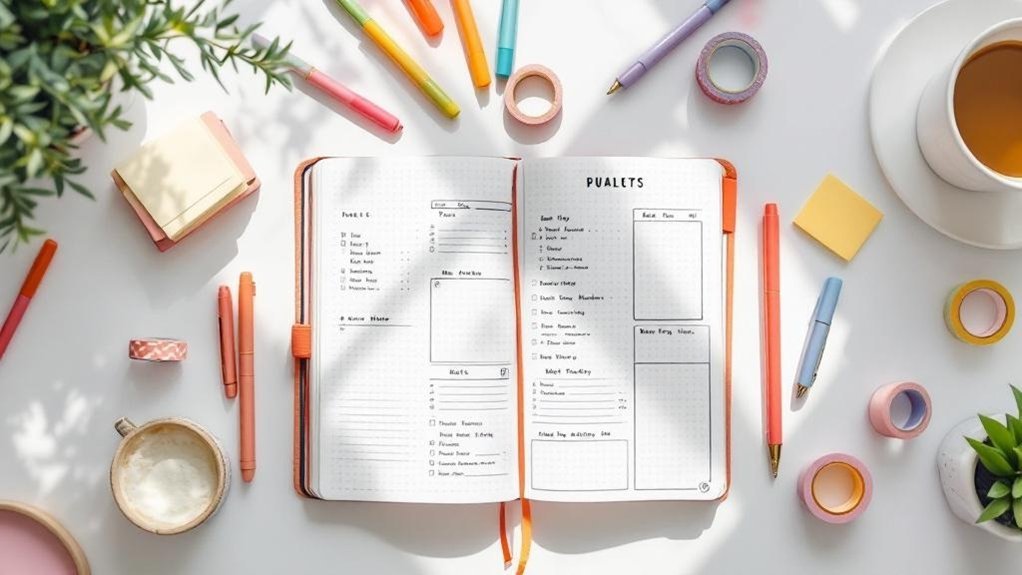
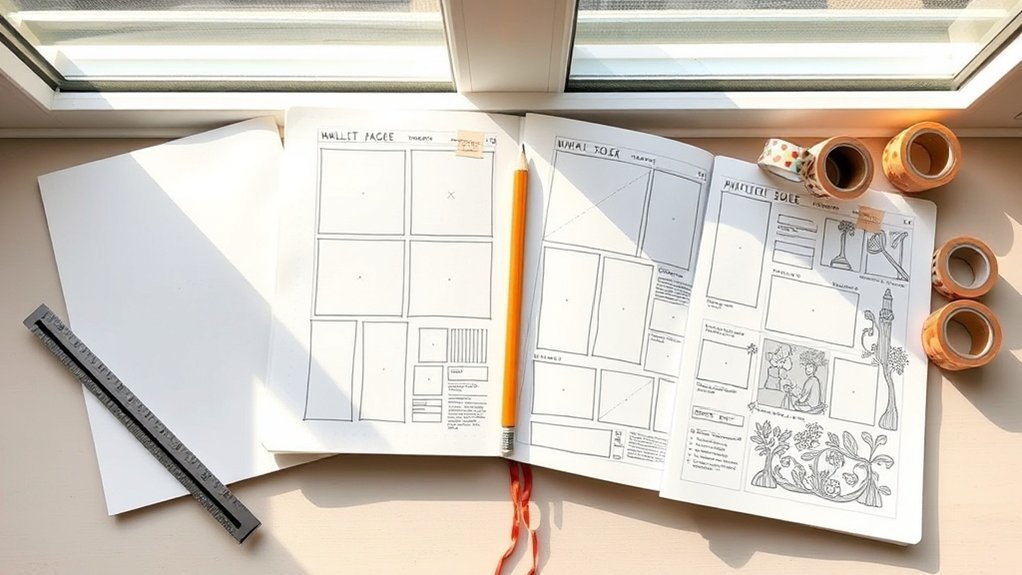
Start with a monthly spread that visually tracks your projects. Draw a 20cm x 15cm rectangle on the first page to create your calendar. Divide it into sections for each week, leaving 2cm between each section for notes or doodles.
Use a black pen for the outline, and fill in the days with colored markers that represent different projects.
Engagement Break:
Have you tried coloring your tasks? It can be such a fun way to visually separate projects. What colors resonate with your current vibe?
Visual Signifiers and Functionality
Here’s where it gets exciting! Incorporate visual signifiers like color coding and icons to make your journal more intuitive. For instance, use green for completed tasks, red for urgent ones, and blue for brainstorming ideas.
It’s all about making your journal work for you.
When I first started, I often got caught up in making things look perfect. The mistake most beginners make is spending too much time on aesthetics rather than functionality.
Remember, done is better than perfect!
Monthly and Weekly Logs
Let’s break down your monthly and weekly logs. For your monthly log, draw a 4cm x 6cm box in the top right corner of your spread for important deadlines. Use a fine liner to outline it, then fill it with sticky notes or bullet points.
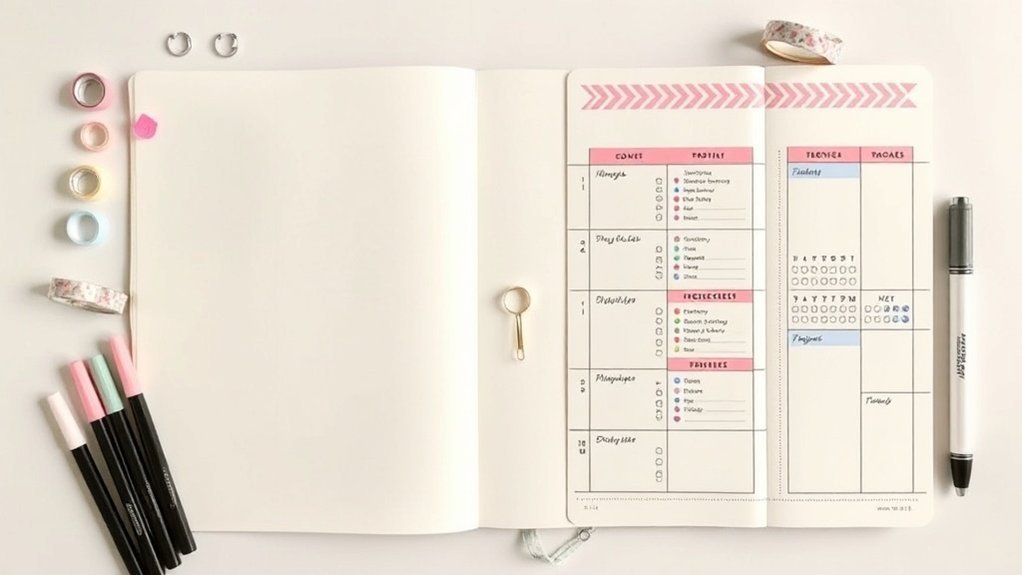
For weekly logs, create a simple layout: draw two horizontal lines across the page, creating three sections. The top section can be for goals, the middle for tasks, and the bottom for reflections.
This setup helps you stay focused while giving you space to evaluate your progress.
Printable-Friendly Tips:
If you love templates, consider designing your spread on A5 paper. You can print your layouts for consistency, then fill them in with your favorite pens.
Time to Get Creative!
This approach turns project management from a chore into a dynamic tool for your creative innovation. I’ve used this layout for three months straight, and it’s been a lifesaver.
You’ll be amazed at how much clearer your project’s trajectory becomes.
So, what're you waiting for? Grab your notebook and pens, and start crafting your bullet journal today. Feel that? That’s the excitement of organizing your creativity!
Action Step: Try setting up your monthly log tonight. Remember, start messy — that counts!
Understanding the Problem
You're juggling deadlines, resources, and creative ideas simultaneously, yet you're still missing project milestones or losing track of deliverables.
Most people assume a simple to-do list suffices for creative projects, but they don't account for the interconnected nature of tasks, dependencies, and the visual clarity needed to spot bottlenecks before they derail your timeline.
Recognizing these limitations in standard organization methods is crucial; it sets the stage for exploring how a tailored system—like the Bullet Journal—can truly keep your creative projects on track and enhance your workflow. Effective bullet journal migration techniques can further streamline this process, ensuring nothing slips through the cracks.
Why This Matters
Why This Matters
Ever had one of those days when managing your creative projects feels like juggling flaming torches? It can get overwhelming, right? Without a structured system, tasks and deadlines can spiral out of control.
Traditional project management tools often box you in with rigid frameworks that just don’t vibe with a creative workflow. What you really need is flexibility—something that lets you tailor your organization to fit your unique style.
That’s where a Bullet Journal comes in. I can't tell you how much I love the visual organization; it boosts my clarity and focus on what truly matters. By using signifiers and collections, you can streamline your task management.
It helps you prioritize effectively, keeping that chaotic feeling at bay. Plus, this method encourages continuous reflection and adaptation, which means you’re not just tracking progress—you’re building a system that evolves with your creative journey.
Ready to embrace a little chaos while still feeling organized?
Supply List
- Notebook: Leuchtturm1917 A5 Dotted ($20) / Budget-friendly alternative: Scribbles That Matter Dotted Notebook ($15)
- Pens: Tombow Dual Brush Pens ($12) / Budget-friendly alternative: Crayola Super Tips ($6)
- Fine Liner: Micron 05 ($2.50) / Budget-friendly alternative: Paper Mate Flair Pens ($7 for a pack)
Skill Level: Intermediate
Here's what worked for me: I’ve tried both rigid and flexible systems, but the Bullet Journal really stuck. I used a similar layout for three months, and it felt like I was finally in control.
The flexibility lets me adjust according to what I’m working on—be it a big project or just daily tasks.
Getting Started
Let’s dive into how to set up your Bullet Journal. Start by drawing a 4cm x 6cm box, 1cm from the left margin, using a 0.5mm black pen. This box will be your “Task List” area.
Leave about 1cm of space above it for a title—this helps with scanability later. Now, inside that box, write down your tasks.
I recommend using different colors for different types of tasks—maybe blue for creative work and green for admin tasks. This color-coding makes it super easy to see what needs your attention at a glance.
Engagement Break
Feel that? That mix of excitement and maybe a little overwhelm? It’s totally normal! A common mistake many beginners make is overcomplicating their layouts.
Keep it simple; remember, done is better than perfect. Start with a few easy tasks before diving into complex designs.
Adding Collections
Now, let’s talk about collections. These are special pages you can create for things like books to read, movies to watch, or even project ideas.
My go-to approach? I place these collections on dedicated pages, usually starting with a title page. For example, if you’re creating a “Books to Read” collection, draw a box measuring 5cm x 10cm, centered on the page.
Use bold lettering for the title at the top, then list your books underneath. This method not only looks great but also serves a purpose.
You can easily scan this page to see what you’re excited to dive into next!
Seasonal Themes
As the months change, so does your focus. For October, why not create a “Fall Projects” spread? Design a cozy autumnal theme with warm colors—think burnt orange, deep red, and browns.
Draw a large header at the top of the page, maybe using a brush pen for that artistic flair. Each project can go in its own section, laid out in a list format.
This way, you keep everything organized and visually appealing. Trust me, this makes tracking progress feel like a breeze.
Final Thoughts
The beauty of Bullet Journaling is that it’s a personal system. It's all about what works for you. If something feels off, don’t hesitate to change it up.
Start messy, and remember, that counts! So, why not try this today? Grab your supplies and set up a simple task list and a collection.
You’ll be amazed at how quickly you can gain control over your creative chaos. Happy journaling!
What Most People Get Wrong
What Most People Get Wrong in Bullet Journaling
You ever sit down with your bullet journal, excited to create, only to feel overwhelmed by the blank page? I've been there too. It’s easy to think every spread has to be a masterpiece, but here’s the truth: trying to make every page perfect can actually hold you back.
You end up cramming in way too many tasks and details, and trust me, clutter won't spark creativity. Instead, it can paralyze you.
What I love about bullet journaling is how it can be a flexible tool, but many of us forget to use visual signifiers to guide our eye. Have you tried using icons or color coding? They’re game-changers! Without them, you’re wasting precious brainpower just trying to figure out what’s what in your own system. Make it easier on yourself!
Here’s the kicker: if you’re not consistently migrating tasks or reflecting on what you've finished, your workflow can stagnate. I used to let my tasks pile up without checking in, and deadlines slipped right through the cracks.
Don't let your journal become a static archive of ideas; it should be a dynamic tool that inspires action.
Supply List
- Tombow Dual Brush Pens (Budget alternative: Crayola Supertips)
- Leuchtturm1917 A5 Dotted Notebook (Budget alternative: Scribbles That Matter Dotted Journal)
- Micron 05 Pens (Budget alternative: Staedtler Pigment Liner)
Skill Level: Intermediate
You’re comfortable with some basic layouts and want to add a little flair.
A Quick Layout Idea
Monthly Overview Spread:
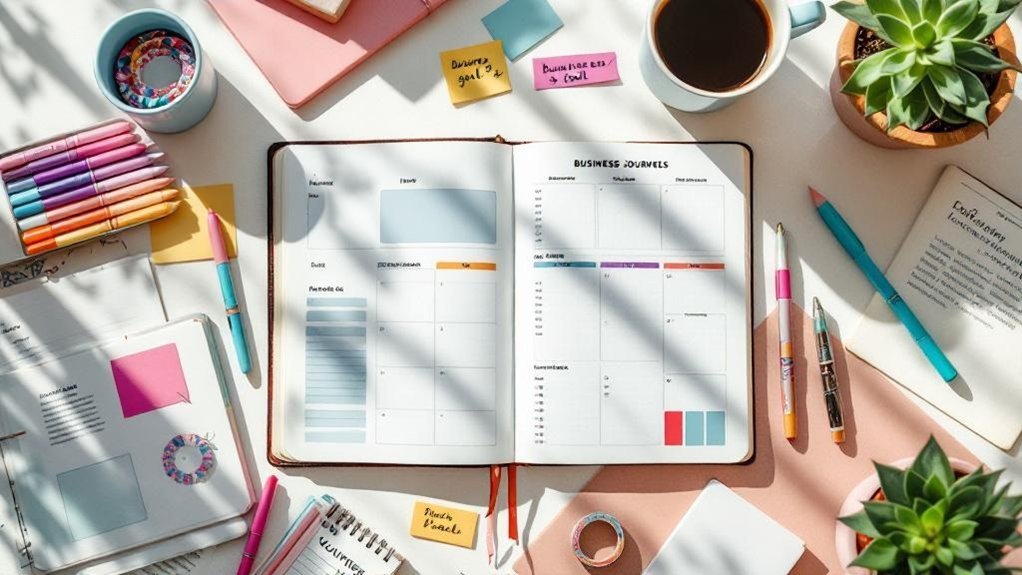
- Draw a 20cm x 15cm rectangle on the left side of your page, 2cm from the top and 2cm from the left. This will be your calendar space.
- Divide this rectangle into 7 equal vertical sections (about 2.8cm each). These will be for the days of the week.
- Label each section with the first letter of the day, using a bold pen. I like to use my black Micron for a clean look.
- On the right side, draw a 10cm x 15cm box for your goals. This helps keep your focus sharp.
- Add color with your Tombow markers — a gentle wash behind the days of the week can really make it pop!
Engage with Your Layout
Are you feeling that sense of organization? Here’s a common mistake: many beginners think they need to fill every space with something decorative.
Remember, function should come first! Your designs don’t have to be elaborate to be effective.
Reflecting on Your Progress
After using this layout for a month, you might find what works and what doesn’t. I tried a more intricate version once, but it ended up feeling like a chore to maintain.
Sometimes simple is best!
Ready to Try This Today?
Grab your supplies and set up your monthly overview. Keep it functional first, adding decorative elements only if they serve a purpose.
Remember, perfection is the enemy of done! Focus on what helps you stay organized and inspired.
You’ve got this! Happy journaling!
The Solution: Step by Step
The next phase involves breaking down tasks, visualizing timelines, and incorporating regular reviews to keep you on track. As you implement these strategies during your monthly setup, you'll gain insights into your progress, allowing you to refine your approach for future projects. Additionally, time blocking techniques can help you allocate specific time slots for each task, enhancing your productivity and focus.
Phase 1: Foundation
With that foundation established, you’re ready to take your bullet journal project spread to the next level.
As you continue, consider how you’ll visualize your progress and ensure clarity in tracking your tasks.
This sets the stage for refining your organization system, making it even more effective.
Key Setup Details
Key Setup Details for Your Bullet Journal Project Section
Supplies You'll Need:
- Notebook: Leuchtturm1917 A5 Dotted ($20) or a budget-friendly option like a simple dotted journal from Amazon ($8).
- Pens: Tombow Dual Brush Pens ($10 for a set) or Crayola Super Tips ($5 for a set).
- Fine Liner: Micron 05 ($2) or a pack of affordable gel pens ($5).
Skill Level: Intermediate (you’re comfortable with rulers and hand lettering).
—
Hey friend! Let's talk about setting up a project section in your Bullet Journal. You know those moments when your ideas feel scattered? Yeah, I’ve been there too. Starting with a clear, organized layout can make all the difference.
Here’s a simple way to create a project section that keeps everything tidy and visually appealing.
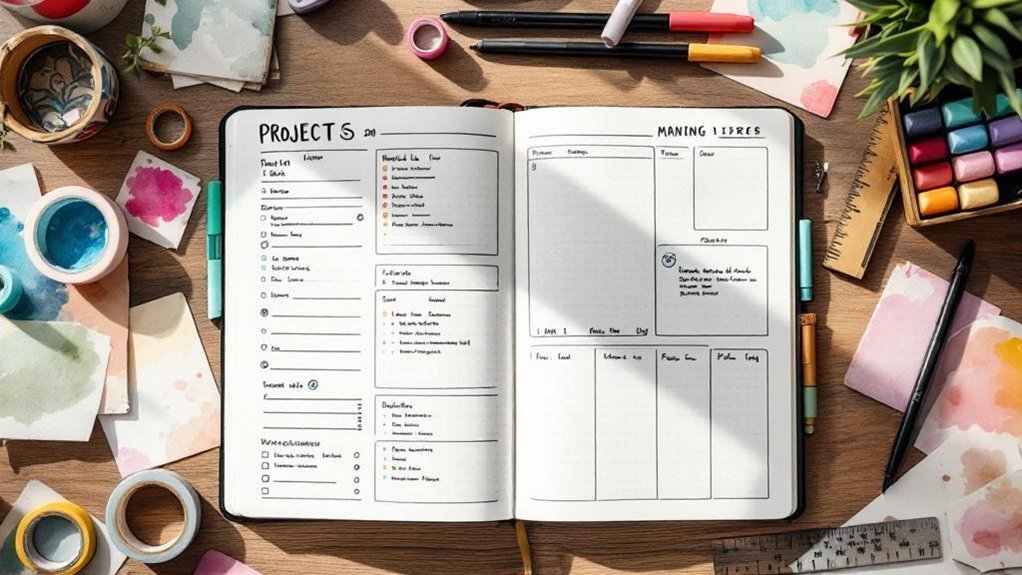
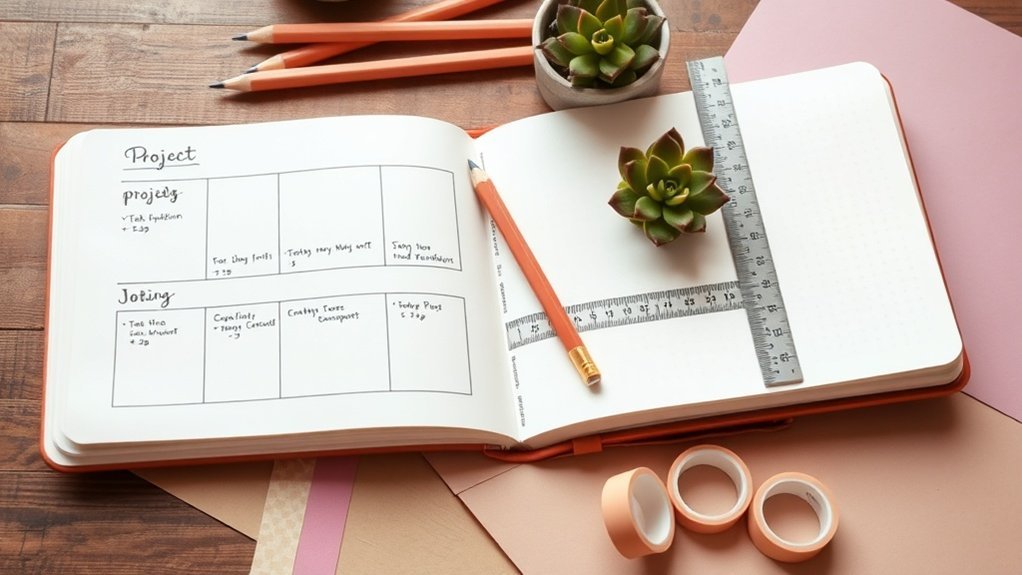
- Project Overview Page:
- Draw a rectangle measuring 20cm x 14cm at the top of a spread, 2cm down from the top.
- Inside, jot down your project goals, deadlines, and milestones. Use a Tombow brush pen for headers and a Micron pen for the details.
- What I love about this layout is how it gives you a bird’s-eye view of your project at a glance.
- Brain Dump Page:
- Next, dedicate a full page for a “Brain Dump.” Just draw a simple header and leave the rest blank for ideas.
- Use a mix of colors from your Tombow pens to make it feel fun!
- Remember, no idea is too silly here. Start messy. That counts!
- Task Breakdown Spread:
- Create a table for your tasks. Draw a 5cm x 10cm box in the upper left corner for your task name, then two boxes of 4cm x 10cm for due dates and priority.
- List your tasks vertically. I find it helps to use different colors for priorities – red for urgent, green for anything that can wait.
- This makes scanning for what’s urgent super easy!
Quick Tip to Remember:
The mistake most beginners make is trying to make everything perfect. Don’t let that stop you! Remember, perfect is the enemy of done.
—
Engagement Break:
Feeling a bit overwhelmed by all these spreads? You could simplify things! Instead of separate pages, consider merging the Brain Dump with the Task Breakdown. It saves space and keeps your ideas right where you need them.
—
Final Thoughts:
After working with these layouts for a while, I realized what stuck for me was the visual clarity. I abandoned the overly decorated spreads because I needed quick access to my tasks.
Phase 2: Implementation
With those foundational strategies in mind, it’s crucial to implement effective checkpoints during your implementation phase.
These checkpoints act as pivotal moments to evaluate your progress, enabling you to identify potential issues before they escalate.
Critical Checkpoints
Critical Checkpoints for Your Creative Projects
Hey there, fellow journaling friend! Have you ever felt like your project is spinning in circles? I’ve been there, too! One thing that really helps is setting up those critical checkpoints to keep everything moving forward. Trust me, it’s a game-changer.
Supplies You'll Love:
- Tombow Dual Brush Pens (great for color coding) — or try Crayola Super Tips for a budget-friendly option.
- Leuchtturm1917 A5 Dotted Notebook (perfect for those clean layouts) — or grab a Muji Notebook if you want to save some bucks.
- Micron 05 Pens (for fine details) — or use Papermate Flair Pens for a more affordable alternative.
Skill Level: Intermediate (you’re comfy with rulers and some hand lettering)
Once you’ve broken down your project into those easy-to-digest phases, it’s time to sprinkle in those checkpoints. Think of them as little markers along your journey. Break tasks into bite-sized pieces, and celebrate each milestone. Feel that? That’s the excitement of progress!
Here's what I love about this: using color coding or fun icons makes it easy to see where you're at a glance. For example, if you're working on a monthly spread for October, you might highlight planning tasks in orange, and execution tasks in black. Just draw a rectangle that’s 3cm tall and 6cm wide, then fill it in with your chosen color. Easy peasy!
Quick Tip: Regularly review those checkpoints. If they’re not working for you, adjust them. I once had a project where I set checkpoints too far apart, and I lost momentum. Don’t let that happen to you!
Engagement Break: What’s one project you’d love to tackle? Picture it mapped out with checkpoints. Got it? Great! Now let’s keep going.
Remember, this isn’t about perfection. Done is better than perfect! I’ve tried fancy layouts that took hours to set up, only to abandon them after a month. Keep your system flexible. This way, you can adjust on the fly as your project evolves.
When you create those visual signifiers, you’re not just decorating your journal; you’re improving scanability and usability. Each element should serve a purpose. Need to track deadlines? Make a big red dot for urgency. Want to celebrate small wins? Add a fun star sticker next to completed tasks.
The Mistake Most Beginners Make: They get too caught up in making their spreads look perfect. Remember, it’s about functionality and flow, not a magazine cover!
Phase 3: Verification
You'll know your project management system is effective when you consistently complete milestones on schedule and identify issues before they disrupt your timeline.
As you track improvements in task completion rates and reductions in bottlenecks, you might wonder: what happens when these elements align? This is where the verification phase becomes crucial, as you assess whether your efforts are translating into actionable insights and smoother execution.
If you find yourself spending less time searching for information and more time on tasks, it’s a clear sign that your system is functioning as intended.
How to Know It Worked
How to Know If Your Bullet Journal Spreads Are Working
Ever flip through your bullet journal and wonder if your spreads are really doing their job? It’s such a common feeling! I’ve been there too, trying out countless layouts and systems over the years. Here’s how I’ve figured out what really works for my creative projects.
Track Completion Rates
Start tracking how often you complete tasks. Use a simple checklist or a color-coded system. What I love about this is the visual boost it gives you when you see those tasks checked off! You can use Tombow Dual Brush Pens for vibrant highlights, or go for budget-friendly Crayola markers.
Mark Visually
Want quick recognition of your progress? Try marking finished tasks with fun stickers or doodles. It’s such a satisfying way to celebrate small wins. You could also use a Micron 05 pen to create a unique visual style that’s all your own.
Weekly Reviews
Set aside a few minutes each week to evaluate what's working. Are your spreads enhancing your creativity and productivity? I like to ask myself this honestly. Sometimes, I find that a spread I thought was amazing just isn’t delivering the goods anymore. It’s okay to switch it up!
Identify Obstacles
Feel that? We all hit roadblocks! Maybe your layout is too cluttered or you’re not using it consistently. That’s when I adjust my spreads. I’ve tried both minimalistic and artistic layouts, and I like to mix them depending on the season or my mood. You might discover a style that fits your current phase perfectly!
Keep It Evolving
Remember, your system doesn’t need to be perfect. It just needs to work for you. Refine your layout continuously. The mistake most beginners make is sticking with a spread that isn’t serving them. Don’t be afraid to pivot!
Try This Today
Grab your favorite supplies and set a timer for 15 minutes. Create a simple weekly review spread. Use a bold header, add your tasks, and leave space for notes. You’ll be amazed at how much clarity it brings!
Your bullet journal should feel like a creative ally, not a chore. So, let’s keep it fun and functional! Ready to dive in?
Pro Tips From Experience
Pro Tips From Experience: Bullet Journaling for Creatives
You know that moment when your ideas overflow, and your journal feels like a messy treasure trove? I've been there, too. After seven years of bullet journaling, I’ve tried every system under the sun and adapted methods to fit my life phases. Here’s what I’ve learned about effective strategies that really work.
Key Technique: Visual Organization****
Color-coding your spreads can be a game-changer. I like to divide my projects into phases—think brainstorming, drafting, editing—and assign a color to each. Grab some Tombow Dual Brush Pens or for a budget-friendly option, try Crayola Super Tips.
Color-coding project phases transforms your spreads into a navigable system that clarifies your creative workflow instantly.
It’s so freeing! You’ll navigate complex timelines without feeling overwhelmed. You feel that? It’s a rush when everything clicks into place.
Supply List:
- Tombow Dual Brush Pens ($20)
- Crayola Super Tips ($8)
- Leuchtturm1917 A5 Dotted Notebook ($20) or budget-friendly Moleskine Classic Notebook ($15)
- Micron 05 Pens ($2.50) or Paper Mate Flair Pens ($10 for a pack)
Skill Level: Intermediate
You should be comfortable using rulers and hand lettering for this layout.
The Brain Dump Section
This is where the magic happens. When you resist the urge to organize too soon, you capture raw inspiration that structured thinking might filter out.
I jot down everything, even the wildest ideas. It’s a sweet spot for creativity.
A Quick Tip: Use a blank page for your brain dump. I like to write in big, bold letters at the top: “Ideas!” This section has led me to some of my best solutions.
Reflection Pages
After each project, reflect on what worked and what didn’t. Here’s how I break it down:
- Document What Worked: List specific strategies that sped things up. Not just vague thoughts.
- Identify Bottlenecks: Break down tasks to spot where you stall. I learned I often lose steam during the editing phase.
- Iterate Systematically: Take these insights into your next project. You’ll be amazed at how small tweaks make a big difference.
Engagement Break:
Feeling stuck? The mistake most beginners make is overthinking their layouts. Trust me, your bullet journal is a living document. Start messy. That counts!
I once spent hours on a layout that I abandoned after a month. Here’s what I’d do differently: keep it simple and functional.
Consistency Over Perfection
What I love about bullet journaling is that it evolves as you do. Your creative process isn’t static, so why should your journal be?
Focus on consistency, not perfection.
Try This Today
Pick one project or theme for this month and color-code it. Use your favorite pens and let the colors guide you through your tasks.
You’ll find that it not only looks great but also improves your workflow.
Before and After: What to Expect
Recommended for You
🛒 Dotted Journal Notebook
As an Amazon Associate we earn from qualifying purchases.
Before and After: What to Expect in Your Bullet Journal
You know that feeling when your creative ideas are scattered across different notebooks? Deadlines seem to blur together, and your priorities shift like quicksand. I’ve been there, too—it’s so easy to miss deadlines and lose that precious momentum between projects.
But here’s the good news: once you set up project management spreads in your bullet journal, everything shifts. Seriously! When you add structured spreads with your favorite signifiers, tasks become visually mapped out, making it so much easier to prioritize. You’ll effortlessly track your progress and spot any bottlenecks instantaneously.
| Aspect | Before | After |
|---|---|---|
| Task Clarity | Fragmented | Streamlined |
| Timeline Visibility | Unclear | Precise |
| Progress Tracking | Inconsistent | Systematic |
| Accountability | Vague | Measurable |
| Decision-Making | Reactive | Strategic |
Supplies You'll Need:
- Notebook: Leuchtturm1917 A5 Dotted (or a budget-friendly alternative like a basic grid notebook)
- Pens: Tombow Dual Brush Pens (try Crayola Super Tips for a budget-friendly option)
- Ruler: Any standard ruler will do, but a clear one helps with precision
Skill Level: Intermediate (you’re comfortable with rulers and hand lettering)
What I love about this process is the clarity it brings. Regular migration and review sessions help cement accountability while showing you what's actually working. I’ve tried both chaotic and structured approaches, and I can tell you: you’ll iterate faster, innovate smarter, and complete projects with a renewed sense of confidence.
Getting Started:
- Draw a 5cm x 15cm box on the right page, 2cm from the top and 1.5cm from the right margin, using your black pen. This will be your project tracker.
- Divide the box into three sections: Name, Timeline, and Progress. Use a light gray or soft pastel color for the background of each section to visually differentiate them.
- Add columns for tasks under the Timeline section, leaving space to mark deadlines. Use a different color for each project to keep things vibrant.
- Track your progress by creating small circles next to each task. Fill them in as you complete them—this is super satisfying!
Feel that? That’s the shift from chaos to clarity.
Quick Tips:
- Start messy. Seriously, don’t stress about perfection. Just get those ideas down.
- What I’ve found is that the mistake most beginners make is overcomplicating their spreads. Keep it simple to start; you can always add flair later.
- Make sure to revisit your spreads weekly. This keeps you accountable and allows you to adjust your strategies as you go.
Engagement Break:
What if you tried a different approach? Instead of a linear timeline, consider a mind map for brainstorming. This can help visualize connections between projects and ideas.
Wrapping Up Your Spread:
After a few weeks, you’ll notice how your decision-making shifts from reactive to strategic. You’ll be able to clearly see where your focus needs to go, making those creative bursts much more effective. I used this layout for three months, and it really transformed my workflow.
Try This Today: Create a project tracker in your bullet journal and fill it in with your current projects. You’ll feel the difference right away! Remember, done is better than perfect—so just start!
Your Next Steps
Your Next Steps in Creative Project Management
Hey there, fellow journaler! Have you ever felt overwhelmed by all your creative ideas? I totally get it. It's so easy to have a million thoughts swirling around without a clear path. That’s where structured project management in your bullet journal can make a world of difference!
Supplies You'll Need:
- Notebook: Leuchtturm1917 A5 Dotted ($20) or a basic dotted notebook ($10)
- Pens: Tombow Dual Brush Pens ($10) or Crayola Super Tip Markers ($5)
- Fine Liners: Micron 05 ($3) or a pack of Staedtler Triplus Fineliner ($5)
- Ruler: Westcott 12” Ruler ($5) or any straight edge you have on hand
Skill Level: Intermediate
You’ll want to be comfortable with rulers and some basic hand lettering to really make these spreads pop.
—
Alright, let’s dive into your Creative Project! First up, create a dedicated Creative Project collection page. This is your vision board. Use a double-page spread—something like 20cm wide to give you room to breathe. Jot down your goals and deadlines here. Make it colorful!
What I love about this is that it sets a clear intention. Feeling a bit stuck? Just start messy! Your first draft doesn’t have to be perfect. That counts!
Next, launch a Brain Dump spread. Grab a blank page, and don’t hold back! Write down every single idea, no filtering. You can organize later; right now, it’s all about getting it out of your head. I’ve tried both ways—filtering first and just dumping—and the latter always feels freeing.
Project Timeline
Now, let’s get into the Project Timeline. Create a box measuring 18cm x 10cm on your right-hand page. Divide it into sections for each phase of your project—this visual mapping helps you see progress at a glance.
I usually use 3-4 sections, depending on the project length. For each section, write down key tasks and deadlines. Keep your color scheme cohesive; a simple palette of 2-3 colors can make this look stunning while keeping it functional.
Make sure to update your Daily Logs consistently with specific project tasks. Set aside realistic time blocks—maybe 30 minutes or an hour—to work on these. It maintains momentum and keeps you engaged.
I can’t stress this enough: perfect is the enemy of done. Just keep moving forward!
Reflection
Once you wrap up your first project, take a moment to add a Reflection page. This is where you can jot down what worked and what didn’t. I’ve found that this phase is invaluable for growth.
It might feel like a chore, but it’s a treasure trove of insights for your next project.
Common Mistake Alert: Many beginners skip the reflection part, thinking it’s not necessary. Trust me, it’s where the magic happens!
Frequently Asked Questions
What Type of Notebook Is Best for Bullet Journal Project Management Spreads?
What type of notebook is best for bullet journal project management spreads?
Any notebook works — but a dotted A5 gives you the most flexibility! Dotted grids let you create without feeling restricted, while A5 size is perfect for portability.
Try the Leuchtturm1917 Dotted Notebook ($20) for quality or the Scribbles That Matter Dotted Notebook ($15) as a budget-friendly option. You'll be glad you invested in a notebook that supports your ideas!
Why should I choose a specific paper type for my bullet journal?
You'll want thick paper to avoid bleed-through with markers or watercolors! Look for at least 160 gsm to keep your pages pristine.
The Rhodia Dot Pad ($10 for A5) is a great choice, and if you’re on a budget, the Strathmore Mixed Media Pad ($8 for a similar size) works well, too. Your notes will stay vibrant and neat!
How long does it take to set up a project management spread?
This spread takes about 15 minutes to set up, and once you’ve got your layout figured out, it takes just a few seconds daily to fill in.
Start simple — maybe a monthly overview, then add tasks as needed. You’ll see how quickly it becomes part of your routine!
What supplies do I need for filling out my bullet journal?
You’ll want some good pens or markers for filling out your spreads. Tombow Dual Brush Pens ($25 for 10) are fantastic for beginners, or grab Crayola Supertips ($6 for 20) if you’re on a budget.
Both give you vibrant color without breaking the bank, so you can have fun with your layouts!
Is it okay if my bullet journal isn’t perfect?
Absolutely! Imperfection is part of the process. Your bullet journal is all about what works for you, so don’t stress over mistakes.
How Do I Customize Bullet Journal Symbols and Key Codes for My Creative Projects?
Q: How can I create custom symbols for my bullet journal?
You can totally make your own symbols! Start by sketching icons that fit your workflow—like circles for brainstorms and stars for milestones.
It’ll take about 20 minutes once you’ve got the layout figured out. Use a dotted A5 notebook for flexibility, like the Leuchtturm1917 ($20) or a budget option like the Scribbles That Matter ($15).
—
Q: What’s a good way to keep my bullet journal organized with symbols?
Creating a personal key is a smart move! Document your symbols upfront, and it’ll take about 15 minutes to set up.
Use color-coding with Tombow Dual Brush Pens ($25 for 10) or Crayola Supertips ($6 for 20) to make it pop. Remember, it’s okay if it’s not perfect!
—
Q: How can I make my bullet journal more visually appealing?
You can definitely spice it up! Try using geometric shapes or emojis for different tasks.
Setting this up will take around 30 minutes, but once you have a system, it’s quick to fill in. The Zebra Mildliner ($15 for 15) is perfect for adding color without being overwhelming!
—
Q: How do I ensure consistency in my bullet journal symbols?
Just keep your key handy! After spending about 10 minutes creating it, you’ll have a reference to maintain consistency.
It helps to use a permanent marker, like the Sharpie S-gel ($15 for 10), to outline your symbols clearly. Don’t stress about making it flawless!
Can I Use Digital Tools Alongside Traditional Bullet Journaling for Project Tracking?
Q: Can I use digital tools with my bullet journal for project tracking?
Absolutely! Blending digital tools with your bullet journal can really boost your workflow.
Try using Trello or Notion for real-time updates while sketching ideas by hand in your journal.
It takes about 15 minutes to set up your digital boards and 5 minutes daily to update them.
For a great notebook, consider the Leuchtturm1917 Dotted A5 ($20) for flexibility.
How Often Should I Review and Update My Project Management Bullet Journal Spreads?
How often should I review my bullet journal spreads?
You should review your spreads weekly and update them daily! This routine helps you stay adaptable and on top of any project changes. Aim for about 20 minutes for the weekly review and just a couple of minutes for daily updates.
A simple A5 dotted notebook works best—try the Leuchtturm1917 ($20) or a budget-friendly option like the Scribbles That Matter ($15).
What’s the benefit of daily updates?
Daily updates keep your bullet journal relevant and action-oriented. You’ll only need around 30 seconds each day to jot down new tasks or adjustments.
Stick with those A5 dotted notebooks for flexibility, and grab some pens you love, like the Muji Gel Ink Pens ($12 for a set) or the Paper Mate Flair Pens ($10 for 12)—they make writing enjoyable and keep you motivated!
How do I set up a weekly review?
Setting up a weekly review spread takes about 15 minutes. Focus on assessing your progress and identifying any bottlenecks.
You can use a simple layout with sections for achievements, challenges, and next steps. A great option is the Rhodia Dot Pad ($10) for its smooth paper, or grab a budget-friendly option like the Pentalic Sketchbook ($8). Just remember, it doesn’t have to be perfect!
What if I fall behind on updates?
Don't stress if you fall behind; it happens to everyone! Just set aside about 10-15 minutes to catch up during your next review.
You can use a quick catch-up method, like bullet points for tasks missed. Grab some colorful markers like Crayola Supertips ($6 for 20) to make it fun! Remember, it’s okay to embrace the messiness.
What Should I Do if I Make Mistakes in My Bullet Journal Spreads?
Q: What do I do if I make mistakes in my bullet journal?
Don’t stress—mistakes are part of the process! You can cover them with washi tape or stickers for a fun twist.
Try using MT Washi Tape ($15 for a variety pack) or Paper House Productions Stickers ($10 for a set). This’ll take about 5 minutes, and it adds a creative flair to your spread!
Q: Can I just cross out my mistakes?
Absolutely! Just neatly cross out the error and keep going. It’s quick and easy—this’ll take about 1 minute.
For a smoother look, try using a Tombow Fudenosuke Brush Pen ($10 for 2). Remember, your journal’s all about progress, not perfection!
Q: Should I embrace my mistakes in my bullet journal?
Yes, embracing imperfections can make your journal feel more authentic! You can even highlight mistakes with doodles or notes.
This usually takes about 10 minutes. Consider using Crayola Supertips ($6 for 20) for colorful accents that brighten your pages.
Conclusion
Give it a go—embracing imperfection is all part of the fun! Grab your journal and a single black pen. Draw a 2×3 grid on the next blank page—that’s your first weekly tracker. Fill in today’s column. Done!
Now that you’ve taken that step, think about what project you want to tackle next. Jot down your main goal at the top of the next page and break it into smaller tasks. Remember, start messy. That counts! You’ve got this, and each small action leads to something bigger. Enjoy the process!