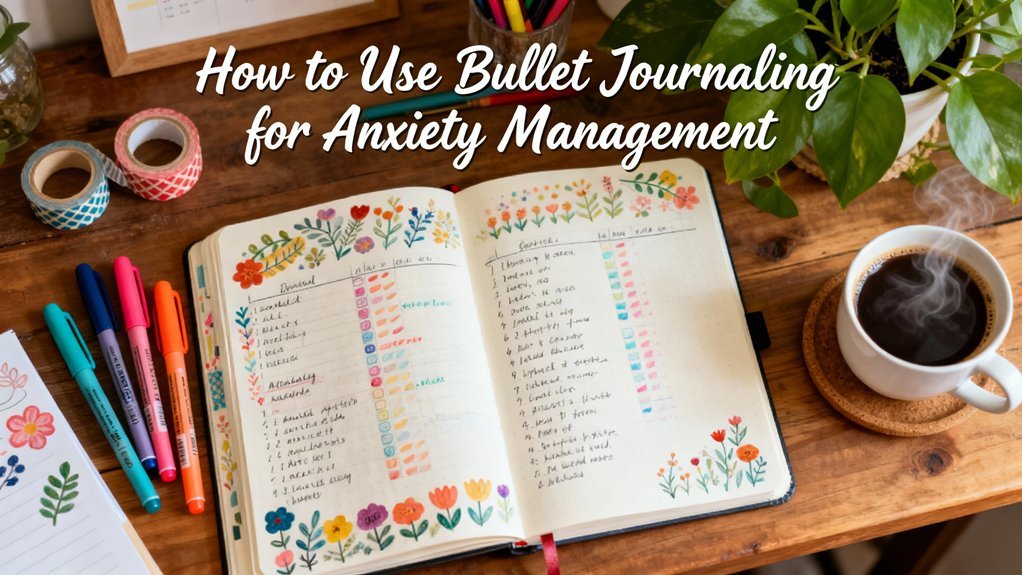
How to Start a Bullet Journal: Complete Guide for Beginners
Ready to transform the way you organize your life? Starting a bullet journal might seem overwhelming at first, but it's actually beautifully simple. This complete guide will walk you through everything you need to know to create your very first bullet journal—from choosing supplies to setting up your first week.
Whether you're looking to boost productivity, track habits, or simply bring more mindfulness to your daily routine, the bullet journal system can help you get there. Let's dive in.
What Is a Bullet Journal?


A bullet journal (often called a “BuJo”) is an analog organizational system created by Ryder Carroll. It's a customizable planner, to-do list, diary, and tracker all rolled into one notebook. Unlike traditional planners with pre-printed pages, a bullet journal is completely flexible—you create exactly what you need, when you need it.
The beauty of bullet journaling lies in its simplicity. At its core, it uses rapid logging (short, bulleted entries) to quickly capture tasks, events, and notes. From there, you can customize it to match your lifestyle, whether you prefer minimalist spreads or creative, artistic pages.
Why Start a Bullet Journal?
- Clarity: Get everything out of your head and onto paper
- Flexibility: Design pages that work for your unique needs
- Mindfulness: The act of writing by hand increases awareness and retention
- Creativity: Express yourself through layouts, doodles, and designs
- Productivity: Track what matters and accomplish your goals
What Supplies Do You Need?
One of the best things about bullet journaling? You need surprisingly little to get started. Here's what you actually need:
Essential Supplies
- A Notebook: Any notebook will work, but many journalers love the Leuchtturm1917 or Moleskine for their numbered pages and dot grid format. Aim for at least 100 pages.
- A Pen: Choose a pen that writes smoothly and doesn't bleed through your paper. Popular choices include Pilot G2, Micron pens, or simple ballpoint pens.
That's it! You can start bullet journaling with just these two items.
Optional Supplies (Nice to Have Later)
- Ruler for straight lines
- Colored pens or markers for color-coding
- Highlighters for emphasis
- Washi tape for decoration
- Stickers or stamps (if you enjoy embellishing)
Pro Tip: Don't let the lack of fancy supplies stop you from starting. The most important thing is to begin with what you have right now.
The Core Components of a Bullet Journal
Every bullet journal includes four foundational elements. These form the structure that makes the system work so well.
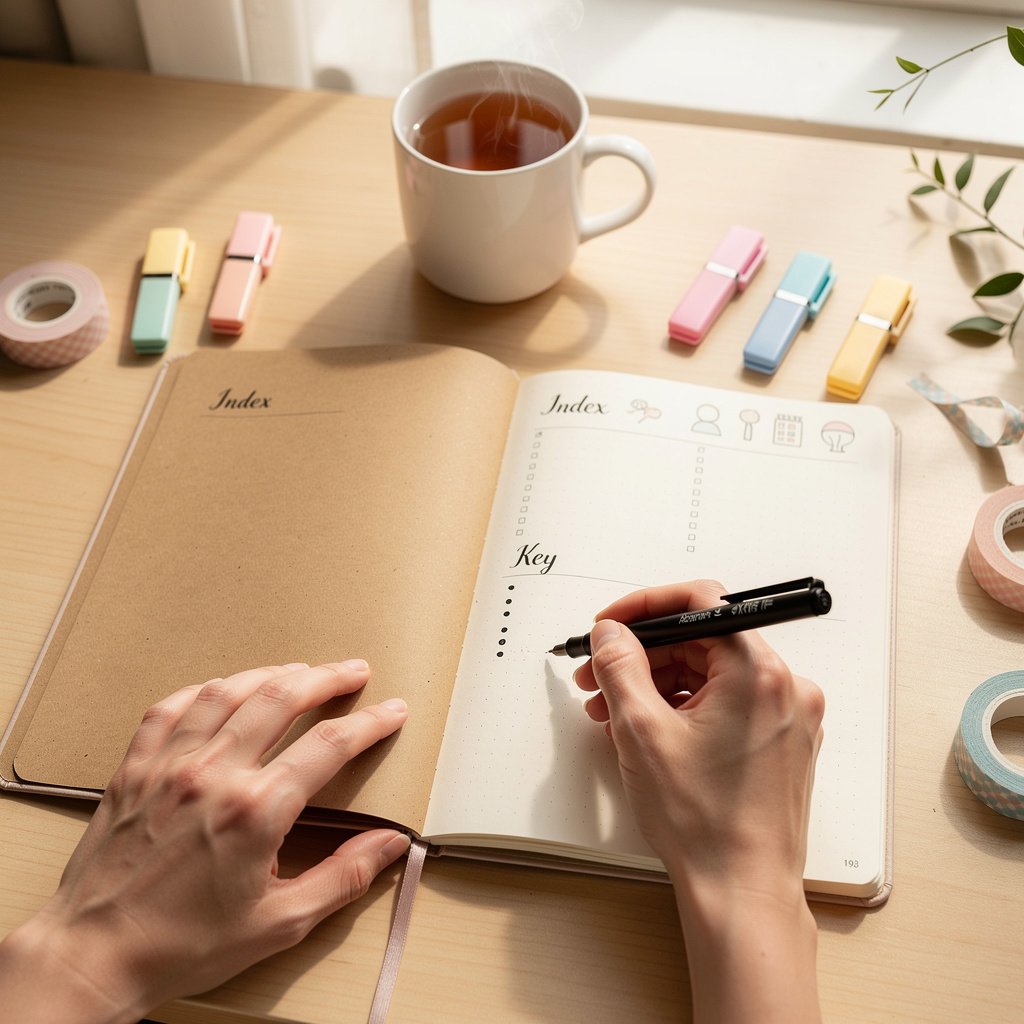
1. The Index
The Index goes at the front of your notebook (usually the first 2-4 pages). It's your table of contents—as you add pages to your journal, you'll list them here with their page numbers so you can easily find things later.
Example:
- Future Log: 1-2
- January Monthly Log: 3-4
- Habit Tracker: 5
- Daily Logs: 6-25
2. The Future Log
The Future Log provides a bird's-eye view of the entire year (or next 6 months). This is where you capture events, deadlines, and goals that are coming up beyond the current month.
Divide 2-4 pages into sections for each month. When something comes up in the future, jot it down in the appropriate month. You'll transfer these items to your monthly log when that month arrives.
3. The Monthly Log
At the start of each month, create a Monthly Log. This typically consists of two pages:
- Calendar Page: List the dates of the month down the left side with the day of the week. Add any events, appointments, or deadlines.
- Task Page: List all the tasks and goals you want to accomplish this month.
The Monthly Log helps you see the month at a glance and set intentions for the weeks ahead.
4. The Daily Log
This is where the magic happens. Each day (or as needed), create a Daily Log where you rapidly log tasks, events, and notes as they occur. This is your working space—the place where you capture everything.
Simply write the date, then start logging. When the page fills up or the day ends, move to the next page and continue. No wasted space, no pressure to fill a pre-printed page.
Rapid Logging: The Language of Bullet Journaling
Rapid logging is the heart of the bullet journal method. It's a system of short-form notation using bullets and symbols that lets you quickly capture information and see its status at a glance.
The Basic Bullets
- • Task: A simple dot represents a task (something you need to do)
- ○ Event: An open circle represents an event (date-specific occurrences)
- — Note: A dash represents a note (information, ideas, thoughts)
Signifiers (Extra Symbols)
- * Priority: An asterisk marks an important or urgent item
- ! Inspiration: An exclamation point marks ideas or inspiration
Task Status Updates
- X Completed: Mark tasks complete by turning the dot into an X
- > Migrated: A right arrow means you moved the task forward to another day/month
- < Scheduled: A left arrow means you moved the task to your Future Log
- Strike-through: Draw a line through irrelevant tasks
Example Daily Log:
Monday, January 15

• Call dentist to schedule appointment *
• Buy groceries
X Finish project report
○ Team meeting at 2pm
— Remember to bring laptop charger
! Great idea for blog post about productivity
Step-by-Step: Your First Week with a Bullet Journal
Ready to set up your journal? Follow these steps to get your first week started:
Day 1: Set Up the Foundation
- Number your pages: If your notebook doesn't have numbered pages, number the first 50 or so pages in the corners
- Create your Index: Title the first 2 pages “Index” and leave them blank for now
- Set up your Future Log: Use the next 2-4 pages to create sections for each month (you can divide pages into 3 sections each for a 6-month view)
- Add to your Index: Go back and write “Future Log: pages 3-4” (or whatever pages you used)
Day 2: Create Your First Monthly Log
- Turn to the next blank spread: You'll use two facing pages
- Left page – Calendar: Write the month at the top, then list each date down the left margin with its day of the week
- Right page – Tasks: Write “Tasks” or “Goals” at the top, then list everything you want to accomplish this month
- Update your Index: Add “January Monthly Log: pages 5-6”
Day 3: Start Your First Daily Log
- Turn to the next blank page: Write today's date at the top
- Start rapid logging: Add tasks, events, and notes as they come up throughout the day
- Use the symbols: Practice using bullets (•), circles (○), and dashes (—)
- Mark completed tasks: Turn dots into X's when you finish things
Day 4-7: Build the Habit
- Each morning: Review yesterday's Daily Log and migrate any incomplete tasks to today
- Each evening: Reflect on what you accomplished and mark tasks complete
- Throughout the day: Capture tasks, events, and notes in real-time
- Keep it simple: Focus on the basic system before adding fancy spreads
Pro Tip: Your first week won't be perfect, and that's completely okay. The bullet journal is meant to evolve with you. Give yourself permission to experiment and find what works.
Common Mistakes to Avoid
As you start your bullet journaling journey, watch out for these common pitfalls:
1. Waiting for Perfection
The biggest mistake beginners make is thinking they need perfect handwriting, artistic skills, or expensive supplies before starting. Your bullet journal is a tool for YOU—it doesn't need to be Instagram-worthy. Start messy and improve as you go.
2. Making It Too Complicated
When you see elaborate spreads online, it's easy to think you need complex trackers and decorative pages from day one. Start with just the core components (Index, Future Log, Monthly Log, Daily Log). Add complexity only when you feel ready.
3. Not Migrating Tasks
Migration is essential to the bullet journal method. It's the process of reviewing incomplete tasks and consciously deciding whether to move them forward or let them go. This prevents endless to-do list bloat and keeps you focused on what truly matters.
4. Comparing to Others
Your bullet journal should serve your life, not look like someone else's. What works for a student won't work for a parent, and what works for a creative won't work for an analyst. Customize your journal to fit YOUR needs.
5. Abandoning After a Missed Day
Missed a day? A week? A month? Just pick up where you are today. Write today's date and continue. There's no need to fill in missed days or start over. The bullet journal adapts to interruptions—that's part of its beauty.
6. Skipping the Monthly Review
At the end of each month, take time to review what worked and what didn't. This reflection helps you refine your system and set better intentions for the month ahead.
Next Steps: Growing Your Bullet Journal Practice
Now that you have the foundation, you can explore ways to customize and expand your bullet journal:
Explore Different Spreads
Once you're comfortable with the basics, browse our spreads collection to discover layouts for weekly planning, project management, meal planning, and more. Each spread serves a specific purpose and can be adapted to your style.
Add Trackers
Trackers help you monitor habits, mood, sleep, exercise, reading, and more. Visit our tracker library to find templates that help you build better habits and stay accountable to your goals.
Download Free Templates
Not sure how to draw a certain layout? Check out our free printable templates that you can trace or use as inspiration for your own pages.
Take the Full Course
Ready to master the bullet journal system? Our comprehensive Bullet Journal 101 course covers advanced techniques, productivity strategies, and creative methods to make your journal truly transformational.
Frequently Asked Questions
Do I have to be artistic to bullet journal?
Absolutely not! While many people enjoy adding artistic elements, the original bullet journal method is purely functional. Simple lines, dots, and text are all you need. Your bullet journal can be as minimalist or as decorative as you want.
How much time does bullet journaling take?
Most people spend 5-10 minutes in the morning reviewing and planning, and 2-3 minutes throughout the day logging tasks and notes. Monthly setup might take 15-30 minutes. The time investment pays off in increased clarity and productivity.
What if I make a mistake?
Mistakes are part of the process! Cross it out, white it out, or just leave it. Your journal doesn't need to be perfect. Some people even embrace mistakes as part of the authentic, handmade nature of bullet journaling.
Can I use a bullet journal for work and personal life?
Yes! Many people keep one journal for everything, using different symbols or colors to distinguish work and personal items. Others prefer separate journals. Try both and see what feels right.
What's the difference between a bullet journal and a regular planner?
Traditional planners have pre-printed pages with fixed layouts. A bullet journal is a blank notebook you customize to your exact needs. It's flexible, adaptable, and grows with you. You're never stuck with unused pages or layouts that don't serve you.
Do I need to use a dot grid notebook?
Not at all! Dot grid is popular because it provides subtle guidance without being restrictive, but you can use lined, blank, or grid paper. Use whatever feels comfortable and helps you write neatly.
How often should I migrate tasks?
Most people migrate tasks daily (from yesterday to today) and monthly (from the old month to the new month). This regular review ensures you stay focused on what matters and let go of what doesn't.
What if I don't use my bullet journal every day?
That's perfectly fine! The bullet journal adapts to your schedule. Some people use daily logs only on weekdays, others only when they have a lot to track. There are no rules—use it when it serves you.
Your Bullet Journaling Journey Starts Now
You now have everything you need to start your bullet journal. Remember, the most important step is simply beginning. Don't wait for the perfect notebook, the perfect pen, or the perfect Monday. Start today with what you have.
Your bullet journal will evolve as you do. What starts as a simple task list might grow into a creative outlet, a mindfulness practice, a goal-tracking system, or all of the above. Give yourself permission to experiment, make mistakes, and discover what works for you.
The journey of a thousand pages begins with a single bullet point.
Ready to dive deeper? Visit our Start Here page for curated resources, beginner-friendly tutorials, and everything you need to build a bullet journaling practice that transforms your life.
Happy journaling!
Related Posts


Essential Supplies to Get Started
Disclosure: This page contains affiliate links. As an Amazon Associate, we earn from qualifying purchases at no extra cost to you.
You only need two things to start: a notebook and a pen. Here are our top recommendations:
Recommended Starter Kit
- Leuchtturm1917 A5 Dotted – The most popular bullet journal notebook. Features numbered pages, index, and two bookmarks. (~$20)
- Pilot G2 Gel Pen (0.7mm) – Smooth, reliable, affordable. Perfect for daily writing. (~$6 for 4)
Total: Under $30 to get started!
Budget-Friendly Alternative
- Scribbles That Matter – Great quality at a lower price point with 160gsm paper (~$15)
- Pilot G2 – Same reliable pen (~$6)
Optional Upgrades (When You're Ready)
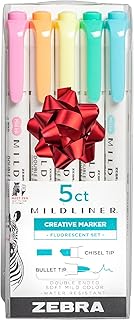
- Sakura Pigma Micron Set – For headers and detailed work (~$12)
- Zebra Mildliner Highlighters – For color coding (~$15)
- Ruler Set – For straight lines (~$6)
See our complete supplies guide for more detailed recommendations.