Table of Contents
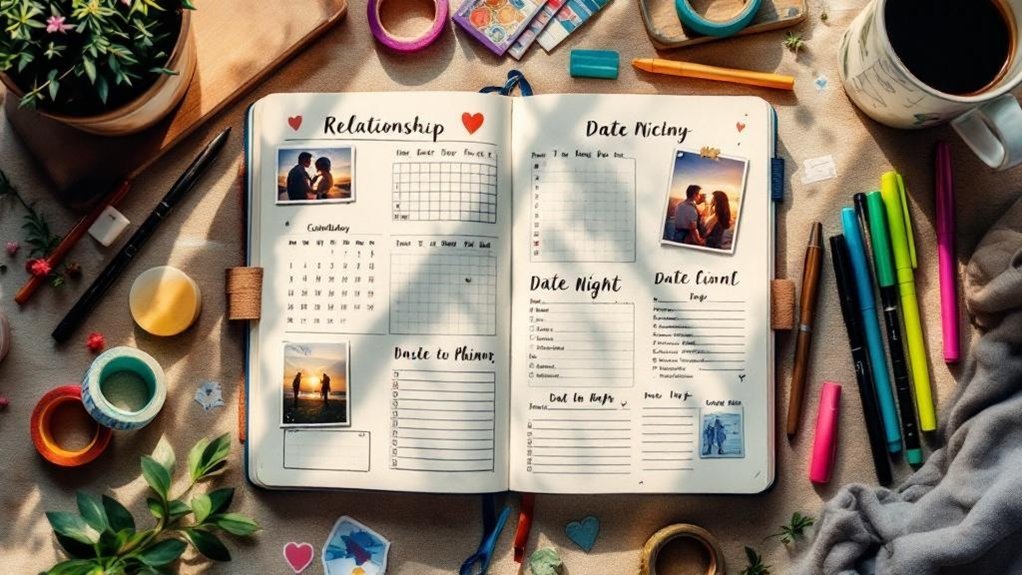
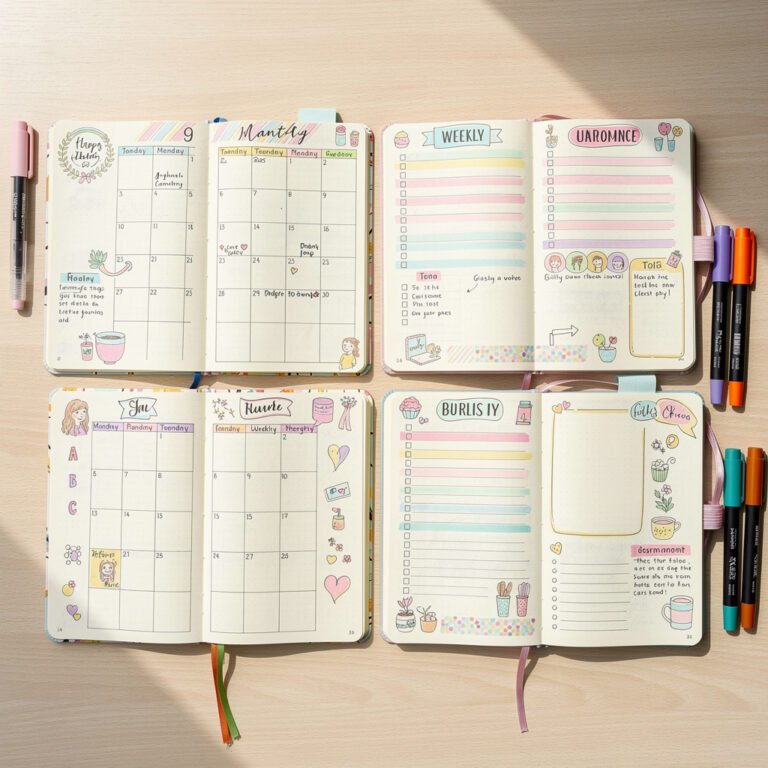
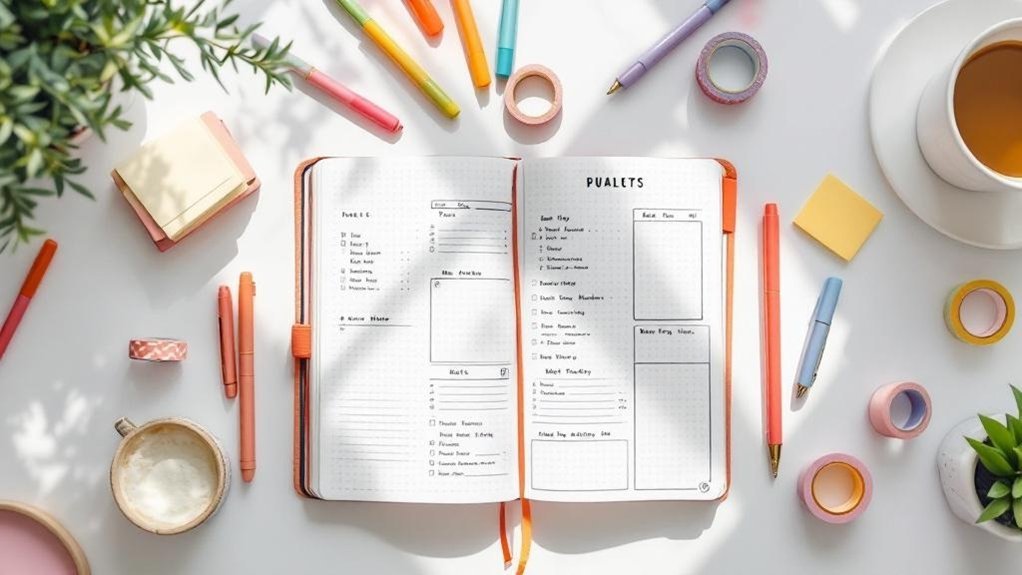
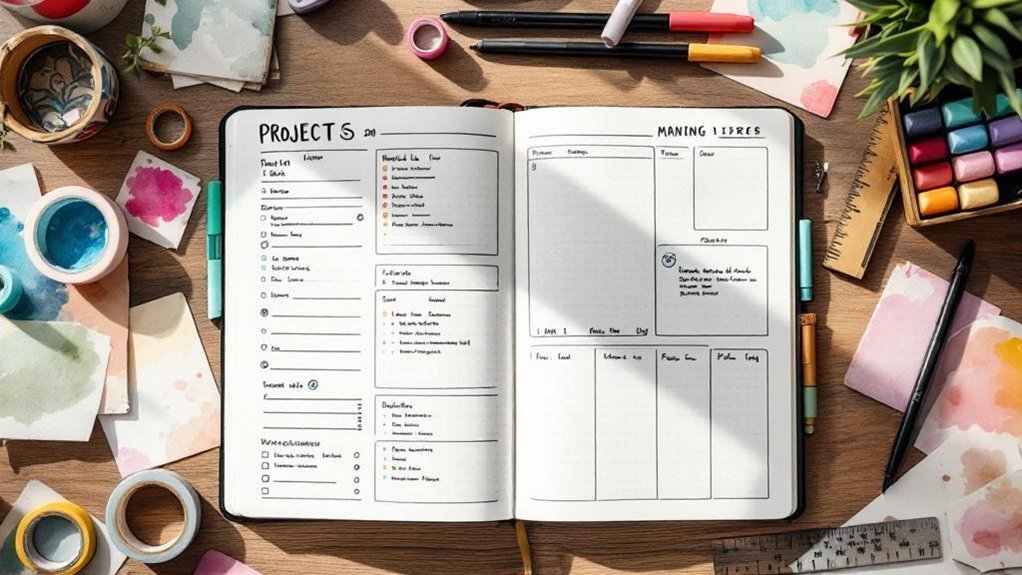
50 Bullet Journal Templates Pack
Ready-to-print spreads for habit tracking, weekly planning, mood logs, and creative layouts.
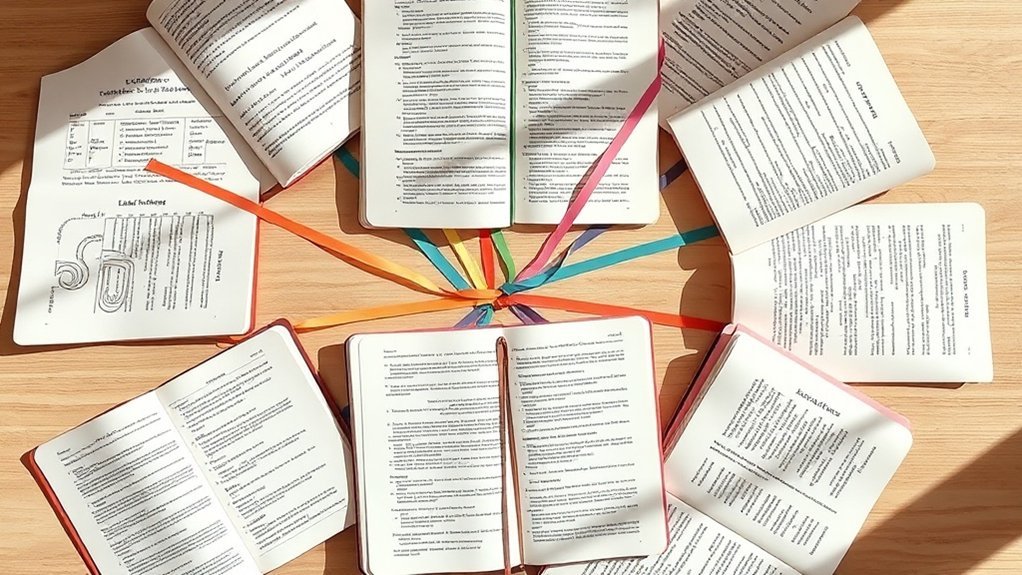
Staring at a blank page can feel both daunting and exciting, right? But what if you could turn that chaos into clarity with a simple system? Bullet journal threading lets you visually connect related tasks, so you can see what truly matters. After trying countless methods myself, I used this layout for three months and found my focus improved dramatically. Start messy—there’s no wrong way to begin! Let’s dive into how this technique can transform your organization and help you reclaim your day.
Key Takeaways
- Create visual links between related tasks using arrows or symbols — this clarifies connections and reduces chaos, making it easier to manage your workload.
- Implement a color-coded system for tasks — this prioritizes your to-do list and lowers mental load, ensuring you focus on what’s most important.
- Use a dedicated section for task migration — this establishes relationships across time periods, streamlining your planning process and enhancing continuity.
- Conduct weekly reviews in 15-30 minutes — this helps align your planning with personal goals, boosting motivation and ensuring you stay on track.
- Design personalized layouts that highlight 3-5 key metrics — this prevents overwhelm and tailors your organization to fit your workflow, enhancing productivity.
Introduction
Supply List
- Notebook: Leuchtturm1917 A5 Dotted (about $20) or a budget-friendly option like the Moleskine Classic Notebook ($15)
- Pens: Micron 05 for fine details (around $2 each) or a pack of gel pens from the craft store ($10 for multiple colors)
- Markers: Tombow Dual Brush Pens (set of 10 for about $30) or Crayola Super Tips for a budget-friendly choice ($10 for a pack of 50)
Skill Level: Intermediate
—
Ever felt overwhelmed by flipping through your bullet journal, trying to connect all those scattered tasks and deadlines?
Ever felt overwhelmed flipping through your bullet journal, trying to connect scattered tasks and deadlines? Threading systems can totally change the game.
Been there, friend! It can be a total mess. But here’s the good news: threading systems can totally change the game.
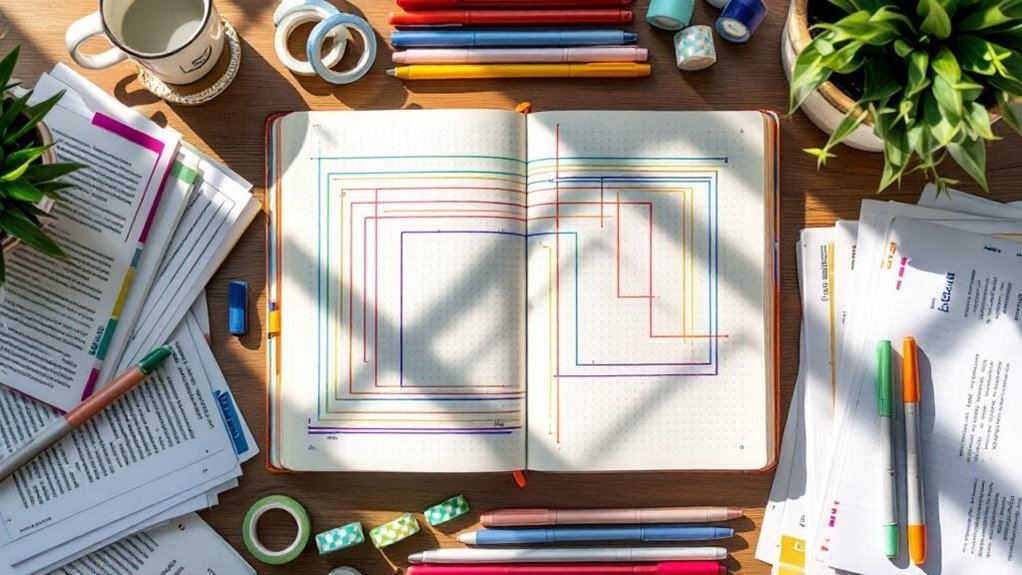
What I love about this technique is how it visually links related tasks, giving you a clear roadmap when things feel chaotic. You’ll use symbols and color coding to prioritize effectively and keep track of all those interconnected projects.
It’s like a visual web of your goals! This method enhances your bullet journal migration process by simplifying task organization.
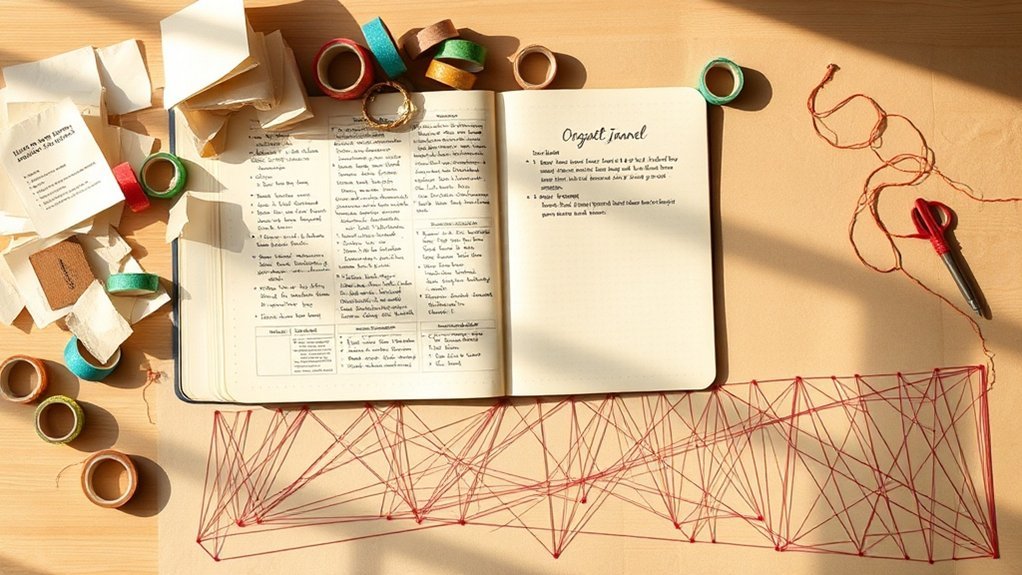
Start with a page for each project or theme. For example, if you’re working on a holiday event in December, dedicate a spread to it.
Draw a box measuring 4cm x 6cm, 1cm from the top margin and 2cm from the left, using your Micron pen. Inside, note down key tasks like “Book venue” or “Send invites.”
Use different colors for each task with your Tombow markers; it makes it pop and easy to read!
When I first tried this, I found it was so easy to migrate tasks from one week to the next without losing track.
You’ll draw lines to connect tasks that relate to each other—like linking “Pick up decorations” to “Set up venue.”
Feel that? You’re creating a visual flow!
Quick Tip:
Don’t overthink the aesthetics! A little messiness adds character. Remember, perfect is the enemy of done!
—
Engagement Break: Common Mistake
The mistake most beginners make? They try to make everything look perfect right away.
You don’t need to be a pro artist! Just get those ideas down, and the more you practice, the better it’ll flow.
Step-by-Step for Threading
- Choose Your Color Scheme: Pick 3-4 colors that represent your projects. For December, maybe green, red, and gold.
- Draw a Master Task List: Set aside a page to jot down all your tasks. For instance, write “Holiday Event” in the center, then branch out with related tasks.
- Connect with Arrows: Use your markers to draw arrows from the main task to sub-tasks. This visual connection makes everything clearer.
- Reflect Weekly: Take a moment at the end of each week to review your progress. What’s working? What isn’t? Adapt as needed!
Trust me, this approach not only keeps your journal looking fresh but also helps you focus on what truly matters.
I’ve used threading for three months straight, and it’s been a game-changer for my productivity.
Try This Today!
Grab your journal and pick a project. Create a simple threading layout right now.
Don’t wait for the perfect moment—just start messy! You’ll be amazed at how much more organized and energized you feel. Happy journaling!
Understanding the Problem
Imagine sifting through a sea of tasks, each one vying for your attention, making it hard to see what truly matters.
This chaos often leads to misusing bullet journaling as just another to-do list, rather than leveraging its potential to highlight the connections among your commitments.
Recognizing these relationships is crucial, but how do you elevate your approach to uncover the bigger picture of your responsibilities?
Incorporating bullet journal trackers can help transform your disorganized tasks into a structured visual representation of your goals.
Why This Matters
Why This Matters
Ever felt like you’re constantly juggling a million tasks, but nothing seems to get done? I’ve been there, too. Task overload and disorganization can really zap your mental energy. When you don’t have a clear system, it’s easy to get caught up in stress and frustration instead of making real progress.
Traditional planners often just don’t cut it. They’re too rigid and don’t adapt as your goals shift. What you need is a flexible system that matches your dynamic lifestyle. That’s where bullet journaling shines!
I’ve found that using threading systems in my bullet journal connects related tasks and events visually. It’s like creating a web of clarity that helps you focus on what matters most. Feel that? It turns organization from a chore into a fun strategy. You'll declutter your mind, sharpen your focus, and make smarter decisions about your commitments.
Here’s what I love about this approach: it helps you reclaim your time and energy while nurturing genuine personal growth. Plus, it feels so satisfying to check things off your list!
—
Supplies You’ll Need
- Notebook: Leuchtturm1917 A5 Dotted ($20) or a budget-friendly alternative like a Scribbles That Matter Dotted Notebook ($15).
- Pens: Tombow Dual Brush Pens ($8) or Crayola Super Tips ($5).
- Fineliner: Micron 05 ($2.50) or a budget option like the Paper Mate Flair ($4 for a pack).
Skill Level: Intermediate — you’ll be comfortable with hand lettering and rulers.
—
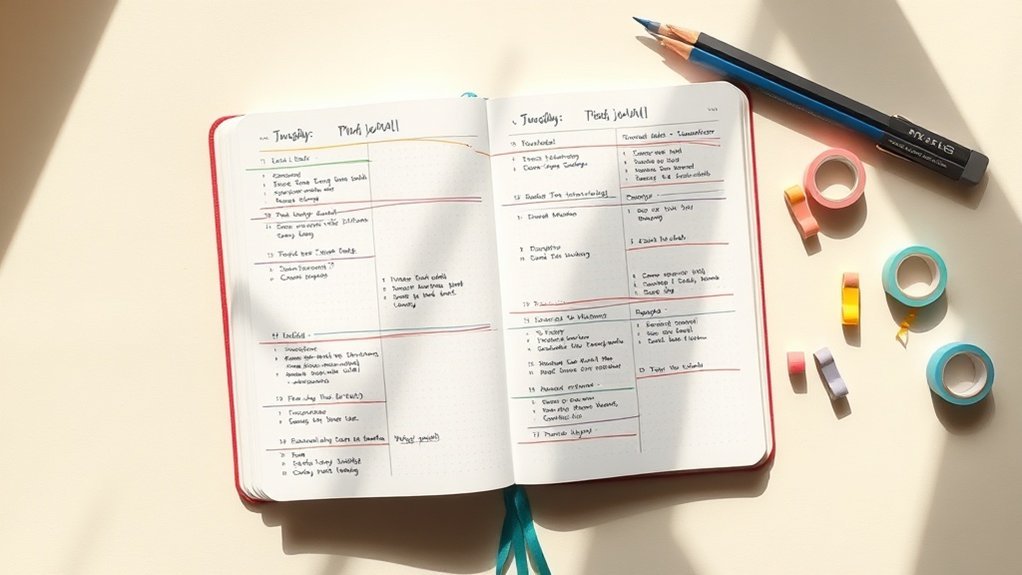
Getting Started with Bullet Journal Threading
- Choose Your Layout: Start with a monthly spread. Draw a 21cm x 15cm rectangle for your main area, 2cm from the top of the page. This will house your calendar and key tasks.
- Create Your Calendar: Inside that rectangle, sketch a grid for your month. Each square should be 4cm x 4cm, leaving a 1cm space between them. Use a ruler to keep it neat, but don’t stress if it’s not perfect!
- Add Your Tasks: Next to your calendar, draw a vertical line 1cm from the right edge of the rectangle. This will be your task section. Write down tasks related to your calendar events here.
- Use Threading: Here’s the magic: use different colored pens to draw lines between tasks and their related calendar dates. For example, if you have a meeting on the 10th that relates to a task on the 15th, draw a line connecting them. This visual cue keeps everything linked and clear.
- Decorate Wisely: Add a few doodles or washi tape, but remember — every decorative element should serve a purpose. This isn’t just about looking pretty; it’s about enhancing usability!
—
Engagement Break
Alternative Approach: If you’re looking for a simpler method, try a basic list format instead of a full grid. Just write your tasks and underline the dates they relate to. It’s not as visually engaging, but it’s effective!
Common Mistake
The mistake most beginners make? Overcomplicating their layouts. Remember, start messy! It’s better to have something down than to wait for perfection. I've abandoned spreads that looked great but took way too long to set up. Keep it functional!
—
Try This Today
Ready to give it a go? Set up your monthly layout, and don’t worry about making it perfect. Just get those tasks on paper and connect them with some colorful lines. Trust me, you’ll feel the difference!
What Most People Get Wrong
What Most People Get Wrong in Bullet Journaling****
You know that feeling when you sit down to journal, and the chaos of unfinished tasks stares back at you? You’re not alone. I’ve been there too. While threading systems can be a game-changer, many of us stumble over common pitfalls that keep us from truly thriving in our bullet journals.
Let’s start with task migration. It’s a powerful tool, yet so many of us leave incomplete tasks scattered across our pages. Instead of letting them linger, try rescheduling them strategically. It’s like giving your tasks a second chance! Feel that? When you take control, it’s liberating.
And symbols—oh, how they can simplify your status tracking! I used to skip them, thinking I could handle everything mentally. But let me tell you, adding a simple dot or arrow can clear up so much confusion. Sometimes, less really is more.
Now, maybe you’ve shied away from threading because it seems too artistic. It doesn’t have to be! My go-to approach is to keep it simple and functional. You don’t need to be an artist; you just need to find what works for you. Start messy. That counts!
One big mistake I see is sticking too rigidly to someone else’s system. Your bullet journal should reflect your unique style and needs. A layout that works for someone else mightn't fit you at all. Embrace your quirks! I’ve adapted my setup through different life phases, and it’s made all the difference.
Have you ever skipped the reflective practice that connects your planning to your personal goals? Trust me, it’s a game-changer. Taking a moment to think about what you truly want transforms your journaling from just task management into meaningful intention-setting.
So, here’s a little encouragement: don’t worry about perfection. What I love about bullet journaling is the freedom it gives you. You can adjust and pivot as you go. I once abandoned a complicated spread after a month because it didn’t serve me. Here’s the truth: practicality matters just as much as aesthetics.
Supplies You'll Love
- Notebook: Leuchtturm1917 A5 Dotted ($20) or Budget-Friendly: Scribbles That Matter Dotted Notebook ($12)
- Pens: Tombow Dual Brush Pens ($20 for a set) or Budget-Friendly: Crayola Super Tips ($8 for a set)
- Fine Liners: Micron 05 ($2.50 each) or Budget-Friendly: Staedtler Triplus Fineliner ($10 for a set)
Skill Level: Intermediate
You’ll want to be comfortable with basic layouts and maybe some hand lettering.
Seasonal Theme: November
Let’s create a cozy November gratitude spread that blends aesthetics with function!
- Draw a 5cm x 8cm box at the top center of your page, 1.5cm from the top edge, using a 0.5mm black pen.
- Inside the box, write “November Gratitude” in a fun, flowing script. Use a Tombow Dual Brush Pen in a warm orange.
- Create 30 smaller boxes (2cm x 2cm) in a grid below. Leave a 0.5cm gap between each. This will be your daily gratitude space.
- Use colors like earthy browns and deep reds to fill in the boxes as you go. It’ll make tracking your gratitude visually delightful!
Engage with Your Journal
If you find yourself overwhelmed, remember: it’s okay to skip a day or two. The mistake most beginners make is thinking they've to keep up every single day. Life happens! Just come back when you can.
Try this today: Set aside 10 minutes to outline your gratitude boxes. It doesn’t have to be perfect. Just start!
Embrace the messiness, and watch your bullet journal become a true reflection of your life. You’ve got this!
The Solution: Step by Step
Building on the foundational elements you've just established, the next step is to put these ideas into action.
As you start integrating your threading system into your daily logs, you’ll discover how these structural choices influence your organization.
But how can you ensure that this approach truly meets your needs? That’s where the assessment phase comes into play, allowing you to evaluate the effectiveness of your strategy.
Additionally, consider implementing a bullet journal index, which can help streamline your organization and make it easier to locate key entries.
Phase 1: Foundation
With your foundational symbols, color codes, and indexing method in place, you're ready to see the real magic happen.
This groundwork sets the stage for creating threads that will seamlessly connect related tasks throughout your journal.
Key Setup Details
Key Setup for Your Bullet Journal
Supply List:
- Notebook: Leuchtturm1917 A5 Dotted (around $20) or a budget-friendly alternative like a basic dotted journal from Amazon ($10).
- Pens: Micron 05 for fine details ($2) or Pigma Micron Pens set for a more budget-friendly option ($10 for multiple sizes).
- Markers: Tombow Dual Brush Pens for vibrant colors ($8) or Crayola Super Tips Markers for a more affordable choice ($5 for a pack).
Skill Level: Intermediate
—
We’ve all been there: staring at a blank page, feeling overwhelmed by ideas. That’s where a solid key comes in! It’s your guide, turning chaos into clarity. You’ll define symbols for tasks, events, and notes, which makes everything flow smoothly. Feel that? That’s the magic of organization!
What I love about creating a key is that it sets the tone for your entire journal. It’s like building the foundation of a cozy home—once it's there, everything else falls into place. You can use simple symbols, like a dot for tasks, a circle for events, and an asterisk for notes. It doesn't have to be fancy—just something that works for you!
Step-by-Step Key Creation:
- Start with a clean page—leave a bit of space at the top for a title. I usually write “Key” in big, fun letters.
- Draw a 5cm x 8cm box in the center of the page, using your Micron pen. This will hold your symbols.
- Inside the box, draw smaller boxes (2cm x 2cm) for each symbol you want to include, spacing them about 0.5cm apart.
- Choose your symbols and use your Tombow markers to color them in. I like to alternate colors for visual appeal—makes it pop!
- Label each symbol clearly with a small, neat print. Keep it simple so it’s easy to read at a glance.
Now, here’s a quick tip: Don’t stress about getting it perfect! Start messy. Remember, done is better than perfect. I’ve had keys that looked like a toddler’s art project, but they still worked wonders for my organization!
Common Mistake:
The mistake most beginners make is overcomplicating their key. You don’t need a million symbols! Start with three or four, then add more as you get comfortable. Trust me, this keeps things manageable.
Engagement Break:
What’s your go-to symbol for tasks? I’ve seen some really creative ones—like a little checkbox or even a tiny star! It’s fun to personalize it. If you're feeling stuck, try looking at some community examples for inspiration!
—
Final Touch:
Once your key is set, take a step back and admire your work. You’ve created something that speaks your journal's language! This key will help you track tasks and events effortlessly, making daily planning a breeze.
Phase 2: Implementation
With a solid foundation established, the next phase involves implementation, where the real test begins.
You'll set up critical checkpoints throughout this process to ensure your threading system remains functional and responsive to your changing needs.
These checkpoints serve as essential pauses for assessing what’s effective, what’s not, and where adjustments are necessary to prevent issues from escalating.
Critical Checkpoints
Transforming Your Threading System: Making Checkpoints Work for You
Ever feel like your projects are spiraling out of control? I’ve been there, too. That’s where checkpoints come in. They’re your friendly reminders to pause, breathe, and assess what you’re doing. By integrating these little reflection points, you shift from a static approach to a dynamic one, making your workflow feel alive and responsive.
What You’ll Need:
- Journal: Leuchtturm1917 A5 Dotted (around $20) or a basic notebook (like a $5 grid notebook)
- Pens: Tombow Dual Brush Pens ($10 for a set) or Crayola Supertips (around $5)
- Ruler: A standard 12-inch ruler ($2) or any straight edge you have at home
Skill Level: Beginner to Intermediate
Why Checkpoints Matter
What I love about checkpoints is how they break the overwhelm into manageable chunks. You don’t have to tackle everything at once. Instead, you’re creating a rhythm in your projects—almost like a dance!
Let’s say you’re working on a big goal. At each checkpoint, take a moment to assess your progress. What’s working? What needs adjusting? You’re not just checking boxes; you’re tuning your approach to fit your evolving goals. Feel that?
Personal Tip: I’ve tried going without checkpoints, and honestly, I felt lost. Now, I can’t imagine planning without them.
Visualizing Your Checkpoints
Here’s a simple layout to keep your checkpoints visible:
- Draw a Header: Start with a bold title like “Checkpoints” at the top of your spread. Use a brush pen for a fun touch.
- Create Boxes: Draw 4cm x 6cm boxes spaced 1cm apart on the page, using a 0.5mm black pen. Leave enough space to jot down notes at each checkpoint.
- Color Code: Assign a color for different project phases. For example, use green for “on track,” yellow for “needs attention,” and red for “reassess.”
- Add Icons: Use small doodles or stickers to represent different phases. It makes your spread pop and adds a personal touch!
What I’ve Noticed: This layout isn’t just pretty; it’s functional. It improves scanability, making it easy to see where you stand at a glance.
Keep It Real
Now, here’s the thing: Checkpoints can feel overwhelming if you try to do too much. The mistake most beginners make isn't keeping them simple. Start messy! Just jot down notes and thoughts. That counts!
Engagement Break: Have you ever felt like you were drowning in tasks? It’s so easy to lose sight of what matters. What would it feel like to embrace those checkpoints instead?
Keeping the Momentum
By anchoring these checkpoints in your system, you’re creating accountability loops. They help maintain momentum and drive meaningful results. It’s like having a buddy system for your goals!
I’ve used this method for three months, and I can tell you, it’s made a world of difference. You’ll find yourself recalibrating priorities with ease, making it less likely for projects to slip through the cracks.
Try This Today
Ready to give it a go? Set up your first checkpoint today! Draw those boxes, pick your colors, and let your creative side shine. Remember, perfect is the enemy of done, so just start. You’ve got this!
Phase 3: Verification
As you implement this verification system, consider what changes you’ll start to notice.
You'll find that tasks no longer slip through the cracks, and your mental clutter about pending items will diminish significantly.
With a focused review process, your completed tasks will truly feel finished, not just abandoned.
This clarity allows you to shift your energy from remembering what needs to be done to actually executing those tasks.
How to Know It Worked
How to Know Your Threading System‘s Working
Ever found yourself wondering if your bullet journaling system is actually doing its job? I get it! After trying so many different methods, I've learned that the best way to check in on your threading system is to review your logs monthly. It's like a little heart-to-heart with your journal.
Grab your favorite supplies — I love using Tombow Dual Brush Pens for color coding and a Leuchtturm1917 A5 Dotted for structure. If you're on a budget, Crayola Super Tips and a simple Moleskine Classic Notebook work just fine!
Skill Level: Intermediate
This approach is perfect if you’re comfortable with hand lettering and organizing your thoughts.
Assessing Your Progress
Start by diving into those monthly logs. Look for patterns in your productivity and completion rates.
What I love about this step is it helps you see which methods are truly serving you and which ones are just taking up space.
Feel that? That’s the joy of reflection! Document your insights in a dedicated section of your journal. I often create a “Reflection” spread where I jot down what worked and what didn’t.
Your system should evolve with your goals, so don’t hesitate to tweak things as you go. Remember, done is better than perfect!
Common Mistakes to Avoid
One mistake I see a lot of beginners make is trying to track everything at once. It can feel overwhelming!
Instead, focus on just a couple of key metrics each month. Which tasks consistently get done? What feels like a stretch?
This way, you can hone in on what really matters.
Give Yourself Grace
Don’t forget, this verification phase isn’t about being hard on yourself. It’s a chance to sharpen your approach.
Over time, you’ll find your unique balance between artistry and function.
So, are you ready to give this a try? Grab your pens, flip to your logs, and let’s see what insights you can uncover this month!
Whether you’re crafting a colorful spread or keeping it minimal, remember: every little step counts!
Pro Tips From Experience
Pro Tips From Experience
You know that moment when you sit down with your Bullet Journal, and it feels more like a chore than a creative outlet? I’ve been there! After years of experimenting with different threading systems, I learned that the real magic lies in personalizing your layout. It turns your planner into a productivity powerhouse that truly reflects your unique workflow.
Here’s my go-to approach: Once you’ve got the basics down, embrace experimentation. Try out new ideas and refine your layout.
Ready for some fun tips?
- Play with symbols! Test out unconventional combinations that make sense to you. I love using quirky icons, like a little coffee cup for energy-boosting tasks. It helps my brain recognize what needs attention faster. Feel that?
- Connect the dots! Link tasks across different sections. For instance, if you have a work project and a personal goal that overlap, create a visual link. This reveals patterns in your productivity that you might miss otherwise.
- Change it up monthly. I always iterate my layout based on what I’ve learned. It’s like a mini reset each month! This way, your system evolves alongside your ambitions.
What I love about this process is that it’s all about you. Don’t stress about making it perfect—start messy! That counts!
Supply List
- Pens: Tombow Dual Brush Pens (Budget-friendly alternative: Crayola Supertips)
- Notebook: Leuchtturm1917 A5 Dotted (Budget alternative: Scribbles That Matter Dotted Notebook)
- Fine-liner: Micron 05 (Budget alternative: Staedtler Triplus Fineliner)
Skill Level: Intermediate (comfortable with rulers and hand lettering)
Visual Elements
When you’re creating your layout, think about size and spacing. For example, if you’re drawing a box to contain your monthly goals, make it a 4cm x 6cm box, positioned 1cm from the left margin using a 0.5mm black pen. Fill it in with soft pastel colors from your Tombow pens to keep it visually appealing yet functional.
Quick Tip: Always make sure your symbols and sections are easily scannable. If you’re using a lot of colors, stick to a palette of three or four. This keeps things cohesive and helps with quick recognition.
Engagement Break
What’s your go-to symbol? If you haven’t settled on one yet, try something simple like a star for tasks that need extra attention. It’s a small change, but it can make a world of difference in how you track your tasks!
The Mistake Most Beginners Make
A common pitfall is overcomplicating layouts right off the bat. Trust me, I’ve been there! I once spent 45 minutes creating an intricate spread that I ended up abandoning after a week. It looked great, but it just wasn’t practical for daily use.
Keep it simple and functional.
Try this today: Pick one section of your Bullet Journal and experiment with a new layout. Remember, the goal is to make it work for you, not the other way around!
Before and After: What to Expect
Before and After: What to Expect with Threading
Hey there, journaling pal! If you’ve been diving into the world of threading, you’re probably wondering how this new system will shake things up in your planning routine. Let’s break it down together, shall we?
| Aspect | Before Threading | After Threading |
|---|---|---|
| Task Clarity | Scattered across multiple logs | Connected and visible |
| Mental Load | Overwhelm from fragmentation | Reduced clutter |
| Priority Identification | Difficult and time-consuming | Quick and intuitive |
| Project Dependencies | Hidden or unclear | Visually apparent |
| Planning Efficiency | Inefficient task migration | Streamlined workflow |
Feel that? The moment you start threading, things change. You’ll notice that priorities jump out at you, clear as day. Dependencies become transparent, letting you tackle projects with a strategy instead of just reacting. What I love about this is how it helps to clear the mental fog. It’s like a breath of fresh air for your brain!
Embracing the Shift
Once you've set up your threading system with those personal symbols and monthly iterations, you’ll see an immediate difference in how you juggle tasks. Gone are the days of feeling overwhelmed by fragmented lists. Instead, you’ll enjoy a reduced clutter vibe that makes everything more manageable.
I’ve tried both ways—scattered lists and threaded systems—and trust me, the clarity threading brings is game-changing. You’ll start regularly reflecting on task relationships, which boosts your mindfulness. Those visual connections you create? They turn complex projects into organized, interconnected systems. It’s like magic!
Your Go-To Approach
Ready to try? Here’s the beauty: you don’t have to be perfect! Start messy. Embrace the process. Your first few attempts might not be magazine-worthy, but that counts! What matters is that you’re taking steps toward a more organized life.
Quick Tips
- Celebrate Small Wins: Every task you check off is a victory!
- Keep It Visual: Use colors and symbols that resonate with you. I love using Tombow Dual Brush Pens for vibrant touches, but you can also use Crayola markers if you’re on a budget.
- Stay Flexible: If something isn’t working after a month, don’t be afraid to switch it up! I abandoned a spread once because it felt too rigid.
The Mistake Most Beginners Make
Recommended for You
🛒 Fine Tip Pens For Journaling
As an Amazon Associate we earn from qualifying purchases.
Many new journalers get caught up in the aesthetics and forget the function. Remember, every decorative element should serve an organizational purpose. If it looks pretty but doesn’t help you track tasks, let it go!
Try this today: Sketch out a simple threading layout for the week. Use a basic grid and color-code your tasks. You might just surprise yourself with how much clarity it brings. Happy journaling!
Your Next Steps
Your Next Steps
Supplies You'll Need:
- Pens: Tombow Dual Brush Pens (or Crayola SuperTips for a budget alternative)
- Notebook: Leuchtturm1917 A5 Dotted (or a simple lined notebook)
- Ruler: Any standard ruler (or use the edge of a book if you’re on a budget)
Skill Level: Intermediate
—
Hey there, creative friend! Let’s dive into how you can take your threading system to the next level. Trust me, I’ve been there, and I know how it feels to want a fresh start without the overwhelm.
Step 1: Audit Your Workflow
Start by checking in on what you’ve got going on. Grab your favorite pens and a notebook, and jot down tasks that naturally fit together.
What I love about this is that it’s visually engaging! Use colors, symbols, or even little doodles that resonate with how you think. It’s like creating a beautiful mind map! Feel that?
Step 2: Implement Incrementally
Now, let’s keep it simple. Instead of overhauling everything at once, pick one project to focus on first. This way, you’re not drowning in changes.
Start messy. That counts! I’ve tried both approaches, and starting with one thread lets you refine as you go. You’ll be surprised how much clarity this brings.
Step 3: Establish a Monthly Review Ritual
Mark your calendar for a monthly check-in. During this time, reflect on how your threads are evolving.
What’s working? What connections are most valuable? I find that this ritual helps me stay aligned with my priorities. Use what you learn to tweak your system.
Remember, perfect is the enemy of done — so don’t stress about getting it just right!
—
Engagement Break:
Ever felt stuck with your threads? A common mistake is trying to connect everything at once. Instead, focus on a few key threads that truly matter to you.
This will make your system more manageable and enjoyable!
—
This deliberate progression turns threading from just an idea into a personalized infrastructure that supports your goals. It’s all about finding what works for you.
Try This Today:
Grab that notebook, and start mapping out your tasks. You’ll be amazed at the insights you gather!
Frequently Asked Questions
What Supplies Do I Need to Start Implementing Bullet Journal Threading Systems?
What supplies do I need to start bullet journaling with a threading system?
Any notebook works — but a dotted A5 gives you the most flexibility.
For pens, try Tombow Dual Brush Pens ($25 for 10) or Crayola Supertips ($6 for 20); both are fantastic for beginners.
You’ll also want a ruler for clean lines and tabs for quick navigation.
This setup takes about 15 minutes to arrange, and you'll love how organized everything feels!
How Long Does It Take to Master the Threading System Technique Effectively?
Q: How long does it take to master basic threading techniques?
You can master basic threading techniques in about two to three weeks with consistent practice.
Try to use your journal daily for quicker progress. Set aside 15 minutes each day to refine your skills. If you're looking for a notebook, a dotted A5 like the Leuchtturm1917 ($20) is a great choice.
Q: When will I develop true proficiency in threading?
You’ll likely achieve true proficiency in about two months of regular use.
To speed things up, focus on your indexing speed and cross-referencing shortcuts. Spend 10 minutes each week reviewing your entries. For pens, the Tombow Dual Brush Pens ($25 for 10) work wonders, but Crayola Supertips ($6 for 20) are a fantastic budget option.
Q: How often should I use my journal for the best results?
Daily use is key to faster progress!
Even if you can only dedicate 10 minutes a day, you'll see improvement. Don’t stress if it’s not perfect; just keep at it. For a reliable journal, consider the Moleskine Classic Notebook ($20) for a solid experience.
Q: How can I improve my indexing speed?
You can enhance your indexing speed by practicing regularly—aim for 5 to 10 minutes a day on this.
Use symbols or colors to make it visually appealing and quicker to navigate. The Leuchtturm1917 has built-in index pages that help with organization and tracking.
Q: How do I create a personalized system that works for me?
Take your time; building a personalized system is a process!
Spend about 30 minutes setting it up initially, then 5 minutes daily to adjust as needed. Keep experimenting with layouts and techniques until you find what fits you best. A flexible notebook like the Rhodia Dot Pad ($10) can be helpful for this.
Can Threading Systems Work With Digital Bullet Journaling Platforms and Apps?
Q: Can I use threading systems in digital bullet journaling?
Absolutely, you can adapt threading systems to digital platforms! To get started, try using apps like Notion or Obsidian, which let you create linked connections with tags and colors.
Spend about 30 minutes setting up your tagging system to mirror your analog approach. For a solid choice, Notion offers a free plan, while Obsidian has a one-time payment option.
Q: How do I keep my digital threads organized?
You’ll want to establish consistent tagging and linking structures right from the start. Dedicate about 20 minutes to outline your tags and link formats—this’ll save you time later.
For easy management, check out Notion's built-in templates, or use tools like Trello to visualize connections.
Q: Is it hard to switch from paper to digital journaling?
Not at all! If you set up your system thoughtfully, it can feel seamless. Allocate about 15 minutes to familiarize yourself with your chosen app’s features.
If you’re looking for a user-friendly option, try GoodNotes for a more traditional feel or Notion for versatility.
Q: How can I make my digital journal visually appealing?
You can definitely enhance your digital journal’s look! Spend around 30 minutes customizing colors and layouts.
Use Canva to create beautiful headers and graphics, or explore Notion’s gallery view for a polished aesthetic. You’ll love the vibrant touch it adds!
Q: How long does it take to maintain a digital bullet journal?
Once your setup’s done, it takes about 5-10 minutes daily to fill in your entries. Just keep it simple, and don’t stress about perfection!
Apps like Notion let you quickly duplicate pages, making daily entries a breeze.
Are There Different Threading Styles Suitable for Various Personality Types or Preferences?
Q: What threading style should I choose if I’m detail-oriented?
You’ll love color-coded threading with intricate symbols! It takes about 15 minutes to set up the initial layout, and then just a minute or two daily to maintain it.
Try using Staedtler Triplus Fineliner Pens ($20 for 10) for vibrant colors or Sharpie S-Gel Pens ($10 for 12) for a smoother feel.
—
Q: I’m a creative person; what’s a good threading style for me?
Artistic flourishes and mixed-media approaches will work wonders for you! Setting up a spread takes around 20 minutes, with just a few minutes to fill in each day.
Consider using Tombow Dual Brush Pens ($25 for 10) for brush lettering or washi tape for fun accents.
—
Q: What if I prefer a minimalist style?
Simple line-based systems are perfect for you! You can set this up in about 10 minutes, taking only 30 seconds daily to fill in.
Look for a Leuchtturm1917 A5 Notebook ($20) for a clean layout, and use a basic Pilot G2 Gel Pen ($10 for 5) for smooth writing.
—
Q: I’m analytical; what’s the best threading style?
Numbered threading is ideal for precise tracking! You can set up your layout in about 15 minutes, and it’ll only take 1 minute daily to update.
A Moleskine Classic Notebook ($20) is a great choice, and you might find that using a Faber-Castell PITT Artist Pen ($20 for 6) helps keep it neat.
—
Q: I’m all about digital tools; what threading style should I use?
Tech-enhanced threading is perfect for you! Setting up an app like Notion or Trello takes about 20 minutes.
After that, it’s just a few seconds each day to update. If you prefer a more visual approach, consider using Canva to create beautiful digital spreads.
—
Q: I’m spontaneous; what threading style works best for me?
Flexible threading lets you adapt as you go! You can set up a basic layout in about 10 minutes, with just a couple of minutes daily to fill in.
Use a simple notebook like the Rhodia Webnotebook ($25), and keep some fun stickers or stencils on hand to mix things up!
How Do Threading Systems Compare in Effectiveness to Traditional Indexing Methods?
Q: Why should I use a threading system instead of traditional indexing?
You’ll find threading systems are more dynamic and interconnected! Instead of flipping through pages, set aside about 20 minutes to create a layout that connects your ideas.
Try using a dotted A5 notebook like the Leuchtturm1917 ($20) for flexibility. Remember, it’s okay if things aren't perfect—just focus on how the concepts relate.
Q: How does a threading system help with understanding concepts better?
Threading helps you build relationships between concepts, giving you richer context. Spend about 15 minutes setting up your initial threads.
Use colorful pens like Tombow Dual Brush Pens ($25 for 10) or Crayola Supertips ($6 for 20) to highlight connections. Don’t stress about making it look perfect—just enjoy the process of discovering connections!
Q: How much time will it take to maintain a threading system?
You’re looking at about 30 seconds daily to fill in your threads once you have the layout set up. It’ll feel natural as you go along!
A simple A5 notebook will work wonders, and you can try the Moleskine Classic ($20) for a sleek option. Keep it casual and remember, it’s all about making connections, not perfection!
Conclusion
Ready to give it a shot? Grab your bullet journal and a few colored pens. Flip to the next blank page and create a simple color-coded legend for your tasks—choose three colors that resonate with you. Start messy; that counts! Now, take today’s tasks and label them with your chosen colors.
Once you’ve done that, think about how you can visually link similar tasks or projects on the following page. You’ll be amazed at how this simple system can clarify your priorities and boost your productivity. So, dive in and see the difference—your organized self is waiting!
Related Posts


Related Posts
Related Posts
Related Posts
Related Posts
✨ Unlock creative energy with spiritual tools:
- AI Spell Generator – Create Personalized Intention Rituals
- Free Tarot Reading – Unlock Creative Inspiration
- Crystal Encyclopedia – Crystals for Creativity & Focus
Powered by Luna's Circle — Free Tarot, Spells & Spiritual Tools
Related Posts
Related Posts
Related Posts


Related: Organization: Creating a Family Command Center: Organization That Actually Works