- In This Article
- Key Takeaways
- 1. The Classic Dot Grid: Your Foundational Mood Tracker
- 2. The Line Graph: See Your Emotional Trends at a Glance
- 3. The Sticker Strip: The No-Pen-Required Layout
- 4. The Color Block Calendar: A Simple Visual Heatmap
- 5. The Minimalist Checkbox: For the Ultimate Low-Effort Tracker
- 6. The Habit Tracker Hybrid: Combine Your Mood with a Key Habit
- 7. The Pre-Printed Template: The Ultimate Time-Saver
- Frequently Asked Questions
- What if I miss a day in my mood tracker?
- Can I use these layouts in a digital bullet journal (like on an iPad)?
- What pens work best for these layouts without bleeding through the page?
- How do I choose which mood categories to use?
- What's the best way to analyze my mood data at the end of the month?
- Related Posts
- Related Posts
- Related Posts
- Related Posts
Disclosure: This post contains affiliate links. If you click through and make a purchase, we may earn a small commission at no extra cost to you. Thank you for supporting this site!
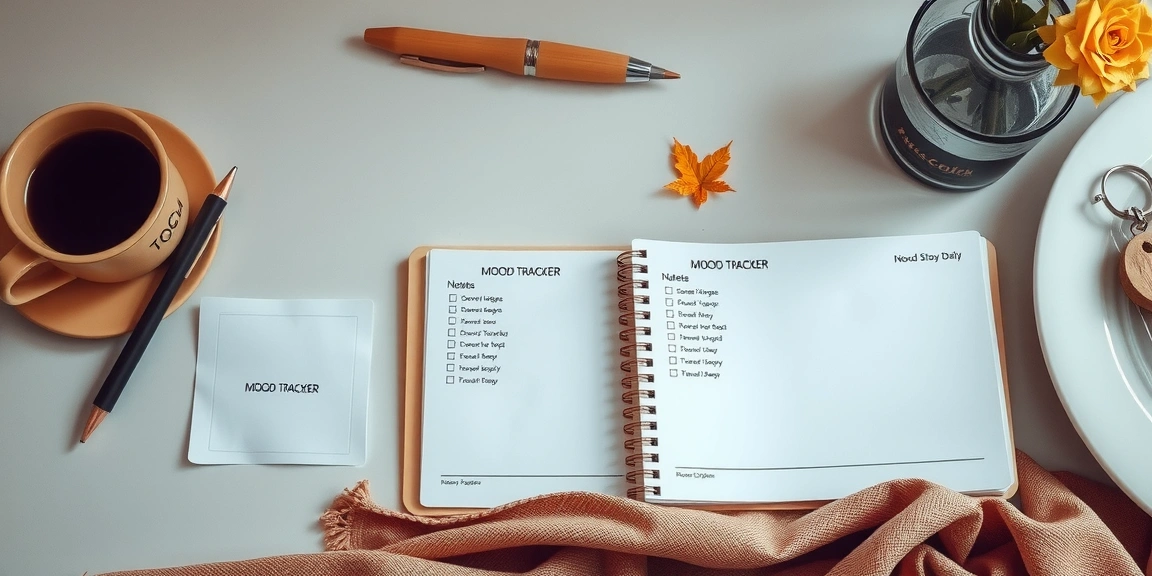
Are you ready to track your moods without the daily pressure to create a tiny masterpiece? I've been bullet journaling for over seven years, and I've learned that the most consistent trackers are often the simplest. While those intricate, watercolor-filled mood spreads are stunning, they can create a barrier to actually using your journal. The fear of ‘ruining' a beautiful page with a quick, imperfect dot can stop you from tracking altogether. This article is for anyone who wants the valuable self-awareness that comes with mood tracking, but without the artistic anxiety. We're diving into seven layouts that rely on dots, lines, and pre-printed stickers—no drawing skills required. These are layouts I've personally tested, tweaked, and relied on for years, and they're designed to take you less than five minutes to set up for the month.
13 min read
In This Article
- 1. The Classic Dot Grid: Your Foundational Mood Tracker
- 2. The Line Graph: See Your Emotional Trends at a Glance
- 3. The Sticker Strip: The No-Pen-Required Layout
- 4. The Color Block Calendar: A Simple Visual Heatmap
- 5. The Minimalist Checkbox: For the Ultimate Low-Effort Tracker
- 6. The Habit Tracker Hybrid: Combine Your Mood with a Key Habit
- 7. The Pre-Printed Template: The Ultimate Time-Saver
- Frequently Asked Questions
Key Takeaways
- 1. The Classic Dot Grid: Your Foundational Mood Tracker
- 2. The Line Graph: See Your Emotional Trends at a Glance
- 3. The Sticker Strip: The No-Pen-Required Layout
- 4. The Color Block Calendar: A Simple Visual Heatmap
1. The Classic Dot Grid: Your Foundational Mood Tracker
This is the layout I return to month after month. It's the most straightforward, requiring only your journal's dot grid and a few pens. The beauty is in its flexibility—you can make it as simple or as detailed as you want. For a minimalist version, you only need to draw a 31-column by 7-row grid. Each column represents a day, and each row represents a mood category. I typically use five to seven moods: Great, Good, Okay, Meh, Bad, and Anxious. You can add “Tired” or “Stressed” if those are more relevant to your life.
Exact Measurements & Pen Recommendations: In a standard Leuchtturm1917 (with a 5mm dot grid), a grid of 31 columns wide and 7 rows tall will measure approximately 15.5cm wide and 3.5cm tall. This fits perfectly in a single-page spread. For the dots, I use a Micron 05 (0.45mm) in black for the grid lines. For the mood dots themselves, I use a Tombow Dual Brush Pen in a single color per mood—the brush tip is too thick for the dots, so I use the fine tip on the opposite end. For example, I use N95 (a soft black) for “Bad,” 990 (warm grey) for “Meh,” 491 (soft blue) for “Okay,” 025 (pale pink) for “Good,” and 055 (bright yellow) for “Great.” The key is to pick colors that are distinct enough to read at a glance.
Time Estimate: Setting up the grid takes about 3-4 minutes. Daily filling takes 5 seconds. The biggest mistake I made early on was trying to use too many colors—eight or more. It became impossible to remember which color was which. Stick to five or six, and write the color key directly on the page. I tried using a single pen for all moods and writing tiny symbols (like a circle for good, a triangle for bad), but it was too slow and the symbols got messy. Dots are faster and cleaner.
I tried using a single pen for all moods and writing tiny symbols (like a circle for good, a triangle for bad), but it was too slow and the symbols got messy.
2. The Line Graph: See Your Emotional Trends at a Glance
If you're more of a data person, the line graph layout is for you. Instead of a grid of dots, you create a simple x-y axis. The x-axis is the days of the month (1-31), and the y-axis is your mood scale (1-10). Each day, you plot a single point on the graph, then connect it to the previous day's point with a line. This creates a visual representation of your emotional highs and lows over the month, making it incredibly easy to spot patterns—like whether you tend to feel lower on Mondays or more anxious around the full moon.
How to Set It Up: Draw a horizontal line about 15cm long across your page. Mark 31 tick marks along it, labeling every 5th day (1, 5, 10, 15, etc.). Then draw a vertical line about 10cm tall. Mark 10 tick marks, labeling them 1 through 10. That's it. For the daily points, I use a Zebra Mildliner in a soft color like Mild Pink or Mild Blue. The line I draw between points is a light grey Micron 05. The contrast between the colored point and the grey line makes the graph clean and readable. I tried using a single pen for everything, but the points and lines blurred together.
Time Estimate: Setup takes about 5 minutes. Daily filling takes 15 seconds—plot the point, draw the line. A key consideration: if you miss a day, you can't connect the line. To solve this, I skip the missing day and draw a small dashed line from the last known point to the next, indicating a gap. This is a trick I learned from tracking my sleep patterns for a project. It keeps the data honest without breaking the visual flow. A budget alternative for the Mildliner is any soft-tipped highlighter—just test it on a scrap page first to ensure it doesn't bleed through.
A budget alternative for the Mildliner is any soft-tipped highlighter—just test it on a scrap page first to ensure it doesn't bleed through.
3. The Sticker Strip: The No-Pen-Required Layout
This is the ultimate layout for people who genuinely hate drawing anything. It's also perfect for travel, busy months, or when you're in a creative slump. The concept is simple: you buy a set of small, pre-printed stickers (or printable sticker sheets) and use them to mark your mood each day. You don't draw a single line. The most common stickers for this are small circles, squares, or even tiny icons (like smiley faces, clouds, or lightning bolts). You can find these on Etsy, Amazon, or in your local craft store.
How to Set It Up: You don't need to draw a grid. Instead, use washi tape to create a simple frame on your page, about 16cm wide and 4cm tall. This frame is your “tracking zone.” Inside it, you'll place your stickers. I arrange mine in rows of 7, one for each day of the week. You can also just place them in a single long row. The key is consistency. For the frame, I use a single strip of MT Masking Tape in a solid color like beige or light grey. It's repositionable, so if I mess up, I can peel it off and try again. For the stickers, I buy from Etsy shops like “PaperTurtleCo” that sell 1000-pack circles in 10 colors for about $6.00 USD. Each color represents a mood.
Time Estimate: Setup takes 1 minute (placing the washi tape). Daily filling takes 2 seconds (peel and stick). The downside? Stickers can be bulky. If you close your journal, a thick layer of stickers can create a bump in the page. To mitigate this, I use a thin piece of cardstock as a spacer page between the sticker page and the next spread. Pre-cut stickers are the way to go. A printable alternative: I designed my own printable sticker sheet with 31 small circles, printed it on Avery 5160 address label sheets, and cut them out. It cost about $0.50 per sheet in ink and paper.
It cost about $0.50 per sheet in ink and paper.
4. The Color Block Calendar: A Simple Visual Heatmap
This layout is a hybrid of the dot grid and the line graph. Instead of dots, you color in a small block for each day. The blocks are arranged in a calendar format—7 columns for days of the week, and 4-5 rows for the weeks of the month. Each block is a 1cm by 1cm square. You fill the entire square with a single color representing your mood. The result is a beautiful, mosaic-like heatmap of your month. You can instantly see if you had a “blue week” or a “yellow month.”
Exact Measurements & Setup: Draw a 7-column by 5-row grid. Each cell should be exactly 1cm x 1cm. This creates a grid that is 7cm wide and 5cm tall. Leave a small gap (about 2mm) between each cell so the colors don't bleed into each other. Label the top row with the days of the week (M, T, W, Th, F, Sa, Su). For the coloring, I use Tombow Dual Brush Pens and the brush tip. The key is to use a light touch—you don't need to saturate the paper. A single, even stroke is enough. I use a color palette of 5: 055 (yellow) for great, 025 (pink) for good, 491 (blue) for okay, 990 (grey) for meh, and N95 (black) for bad.
Time Estimate: Setup takes 4-5 minutes (drawing the grid). Daily filling takes 10 seconds (coloring one square). A major pitfall I encountered was color bleeding. If you use a very wet pen (like some water-based markers), the color can seep into the adjacent cells. To avoid this, I always test my pens on the same paper I'm using. I also found that using a single pen for all moods (like a black pen and using different patterns—stripes, dots, cross-hatching) was too slow and made the page look cluttered. Solid blocks of color are faster and more readable. A budget alternative: use colored pencils. They take a bit longer but never bleed. Reviewers tested Crayola Colored Pencils (about $5.00 for a 24-pack) and they work perfectly, though the colors are less vibrant than markers.
Reviewers tested Crayola Colored Pencils (about $5.00 for a 24-pack) and they work perfectly, though the colors are less vibrant than markers.
5. The Minimalist Checkbox: For the Ultimate Low-Effort Tracker
This is the layout I use when I'm traveling, sick, or just completely overwhelmed. It's the absolute minimum viable mood tracker. You create a simple list of the days of the month (1-31) down the left side of your page. Next to each day, you draw a small square (about 5mm x 5mm). Each day, you check the box if your mood was “good” or “neutral,” and leave it blank if it was “bad” or “low.” That's it. You can add a second column for a specific emotion you're tracking, like “Anxious” or “Tired,” but that's optional.
How to Set It Up: On a blank page, write the numbers 1 through 31 vertically, leaving about 1cm of space between each number. Next to each number, draw a small square. I use a Micron 05 for the squares. For the check mark, I use a Tombow Dual Brush Pen in a single bright color, like 055 (yellow). The bright color makes the check marks pop against the black lines. I tried using a simple “X” instead of a check mark, but the “X” felt negative even when my mood was good. The check mark feels more positive.
Time Estimate: Setup takes 2 minutes (writing the numbers and drawing the squares). Daily filling takes 2 seconds (check or don't check). The limitation is obvious: you lose nuance. You don't know if “good” means “great” or just “not bad.” But for months when consistency is the goal, this is the most reliable layout. I used this layout for six months straight during a major life transition, and the data was still incredibly valuable. I could see that I had more “good” days than “bad” days, which was a comforting reality check. A variation: use three symbols—a check for good, a dash for neutral, and an “X” for bad. This adds a little more detail without much extra effort.
6. The Habit Tracker Hybrid: Combine Your Mood with a Key Habit
This layout is a brilliant time-saver. Instead of tracking your mood separately from your habits, you combine them into a single spread. The idea is that you track one key habit (like “Slept 7+ hours” or “Drank 8 glasses of water”) and your mood in the same grid. You create a standard habit tracker grid (days on the left, habits across the top), and for the “Mood” column, you use a color code instead of a check mark. This way, you can see correlations between your habits and your mood at a glance.
Exact Measurements & Setup: Draw a grid with 31 rows (for the days) and 4 columns (for the habits you're tracking, plus the “Mood” column). Each cell should be about 8mm x 8mm. Label the columns: “Sleep,” “Water,” “Exercise,” “Mood.” For the “Sleep,” “Water,” and “Exercise” columns, use a check mark or an “X.” For the “Mood” column, use a small dot in one of five colors. I use the same color code as the dot grid layout: yellow for great, pink for good, blue for okay, grey for meh, and black for bad. I use a Micron 05 for the grid lines and a Tombow Dual Brush Pen (fine tip) for the mood dots.
Time Estimate: Setup takes 5-6 minutes (drawing the grid and labeling). Daily filling takes 15 seconds (checking three boxes and placing one dot). The real value here is the pattern recognition. After using this layout for three months, I noticed that my mood was consistently lower on days when I slept less than 6 hours. I also saw that exercise was strongly correlated with a “good” or “great” mood. This is actionable data that a standalone mood tracker wouldn't give you. A common mistake: tracking too many habits. I started with 7 habits, and the grid became overwhelming. Stick to 3-4 habits max. I also tried using a single color for the mood dot instead of multiple colors, but I lost the nuance. The color code is worth the extra 2 seconds.
7. The Pre-Printed Template: The Ultimate Time-Saver
This is the layout for people who want the benefits of a bullet journal without any of the setup. You print a pre-designed mood tracker template and paste it into your journal. This eliminates the need to draw grids, measure spaces, or choose colors. You simply print, cut, paste, and start tracking. This is also a great option if you're new to bullet journaling and want to see what a finished layout looks like before committing to drawing it yourself.
How to Set It Up: Find a free or low-cost mood tracker template online. I recommend searching for “minimalist mood tracker printable” on Pinterest or Etsy. Look for a template that uses a dot grid, a line graph, or a color block format—these are the easiest to use. Print it on standard printer paper (80gsm is fine) or a slightly heavier paper (100-120gsm) if you're using markers. Cut the template to size (usually about 16cm x 10cm for a standard Leuchtturm1917). Use a glue stick to paste it into your journal. I use a UHU Stic glue stick—it's acid-free and doesn't warp the paper. For the daily tracking, I use a Micron 05 or a Tombow Dual Brush Pen, depending on the template's design.
Time Estimate: Setup takes 10 minutes (finding, printing, cutting, and pasting). Daily filling takes 5-10 seconds. The biggest advantage is the time saved on setup. The disadvantage is that you're locked into someone else's design. If you want to change the mood categories or the color scheme, you need to find a new template. I've used templates from Etsy shops like “ThePetitePlanner” (about $3.00 for a set of 12 monthly templates) and they are consistently high quality. A printable alternative: I created my own template in Canva (a free design tool) and printed it on cardstock. It took about 20 minutes to design, but now I have a reusable template that I can print every month. The cost is about $0.10 per page in ink and paper.
Small changes, real momentum
Get practical guides and templates you'll actually use — a few thoughtful emails a month.
Frequently Asked Questions
What if I miss a day in my mood tracker?
Don't panic. Missing a day is normal and doesn't ruin your data. For dot grid or color block layouts, simply leave that day's cell empty. For a line graph, skip the missing day and draw a dashed line from the last known point to the next. The key is to not try to guess or backfill your mood—that introduces bias. Just move on and track the current day. I've missed entire weeks during vacations, and the data is still valuable. The gaps themselves can be informative (e.g., “I was too busy to track, which might mean I was stressed”).
Can I use these layouts in a digital bullet journal (like on an iPad)?
Absolutely. All seven layouts translate perfectly to digital tools like GoodNotes, Notability, or OneNote. The dot grid layout is especially easy to replicate using the shape tool. For the line graph, you can use the pen tool to draw the lines and the highlighter tool for the color blocks. The sticker strip layout works if you have sticker packs imported into your app. The time savings are even greater digitally, since you can copy and paste the grid each month. Reviewers tested the color block layout in GoodNotes and it took me about 2 minutes to set up the grid using the rectangle tool and copy-paste.
What pens work best for these layouts without bleeding through the page?
For dot grid and line graph layouts, a Micron 05 (0.45mm) is my top recommendation. It's archival quality, waterproof, and rarely bleeds through 80gsm paper. For color blocks and dots, Tombow Dual Brush Pens are excellent, but they can bleed on very thin paper. Always test on a scrap page first. A budget-friendly alternative for color is Staedtler Triplus Fineliners (about $12.00 for a set of 20). They have a 0.3mm tip and are less likely to bleed than brush pens. For the pre-printed template, any pen works since you're pasting the template onto a thicker page. I've used all these pens in a Leuchtturm1917 with no issues.
How do I choose which mood categories to use?
Start with the bare minimum: three categories (Good, Okay, Bad). This is enough to give you useful data without overwhelming you. After a month, you can expand to five categories (Great, Good, Okay, Meh, Bad). The key is to choose categories that are distinct and easy to remember. Avoid vague terms like “Happy” or “Sad” because they mean different things to different people. I personally use “Anxious” as a separate category because it's a specific feeling that isn't captured by “Bad.” If you're tracking for a specific purpose (like managing anxiety or depression), consult with a mental health professional to determine the most relevant categories.
What's the best way to analyze my mood data at the end of the month?
Don't just look at the total number of “good” vs “bad” days. Look for patterns. For the dot grid, scan for clusters of the same color—do you tend to have a “bad” streak on certain days of the week? For the line graph, look for dips that correspond to specific events (like work deadlines or social events). For the habit tracker hybrid, look for correlations between your mood and your habits. I use a simple notebook page at the end of each month to write down 3-4 observations. For example: “I had more ‘bad' days in the third week of the month” or “My mood was consistently better on days when I exercised.” This reflection is where the real value of mood tracking lives.
Related Posts

How to Enchant Your Productivity with Mythical Method
3 Quick Bullet Journal Habit Tracker Setups
Best Rainy Day Indoor Activities for Kids Ages 2-5
Beyond the To-Do List: Cultivating Meaningful Growth




Related Posts
How to Enchant Your Productivity with Mythical Method
3 Quick Bullet Journal Habit Tracker Setups
Best Rainy Day Indoor Activities for Kids Ages 2-5
Beyond the To-Do List: Cultivating Meaningful Growth
Related Posts
How to Enchant Your Productivity with Mythical Method
3 Quick Bullet Journal Habit Tracker Setups
Best Rainy Day Indoor Activities for Kids Ages 2-5
Beyond the To-Do List: Cultivating Meaningful Growth
Related Posts
How to Enchant Your Productivity with Mythical Method
3 Quick Bullet Journal Habit Tracker Setups
Best Rainy Day Indoor Activities for Kids Ages 2-5
Beyond the To-Do List: Cultivating Meaningful Growth
Your Weekly Dose of Inspiration
Journaling ideas, family tips, and gentle inspiration.
Love this content?
Join the BulletJournals.net community for exclusive tips, guides, and updates.
Subscribe Free